Gratefully, our family has been spared severe sickness this winter. When I hear of the flus and fevers ravaging other communities while we were hardly touched with illness, I feel blessed indeed!
We are, however, coming down with fever. Spring fever that is. Dappling sunshine and 70ish temperatures beg us to be outdoors. This weather has teased us with pleasantries of summer. With this sort of malady comesthe mood for outdoor parties…. fire up the grill and bring on the sweet tea! But common sense tells us to “hold our horses“; I dare say we will have a cold snap or two yet.
And so it is, I’ve been dreaming of a tea party. This one would be served in our grainbin gazebo. In that respect, it will be some time before I accomplish it, since the weather and wind must comply, along with my schedule. I certainly don’t get half the dreams accomplished that enter my head, but if I can put into action one-fourth of them, I’ll call it good.
It’s always a great idea to connect with friends. But it takes intentionality on both parties to connect on heart levels. Hosting a tea party is one way to interact and learn to know people better outside of the “after church small talk.”
Tea parties are not something I do often, but always find it to be a blessing! It is work, for sure, but the benefits of giving and good conversations are worth it. I also love seeing friends enjoy the benefits of my labors. It is like therapy for me to decorate. And yet another big percentage of the enjoyment is searching for recipes and decor. Musing on what delicacies to put on the menu and how to improve the aesthetics of my table without breaking the grocery or time budget. Now don’t get me wrong here- I’m not advocating wild, exotic menus! It’s fun to dream, of course, but I’m well aquainted with reality, which tends to keep me on ground level. Making doable foods look delectable is more like it. Something like crepes with fruit glaze, avocado toast, or yogurt parfaits. Even serving soup is fine! It is better to keep the food simple and enjoy your friends than to have such high ideals you never get around to hosting.
Here’s a few tea party pictures to get you inspired.
I hosted this for my prayer partners group a little over a year ago. This was extremely simple, yet fresh and spring-like. The flowers weren’t exactly what I wanted, but it was what I found and made do. The candles and runner were things I had on hand.
It was a chilly evening, so I served Zuppa Toscana soup, artisan sourdough, individual toss salads, and punch. It was nothing fancy and time-consuming like cheesecake or scones, but that is always fun if you’re up to the challenge!
Zuppa Toscana
I used the recipe in Hope’sTable. It’s a simple chicken broth/ground sausage base with diced potatoes, seasonings, cream and kale. Hearty and filling and definitely one of our favorites!
The punch was simply one cup Countrytime pink lemonade mix, one 48 ounce pineapple juice and one 2 liter Sprite or 7-Up. Stir together for a beautiful and refreshing drink!
The following tea party I hosted one year in September or October. I served fresh grapes, avocodo toast with bacon & cheese, crepes with a raspberry sauce and pumpkin scones. I’ve not made scones much at all, so did a practice run the night before. They were drool worthy! So I made another batch, formed and cut them, then refrigerated overnight. The next morning, I could pop them in the oven for quick, yummy goodness!
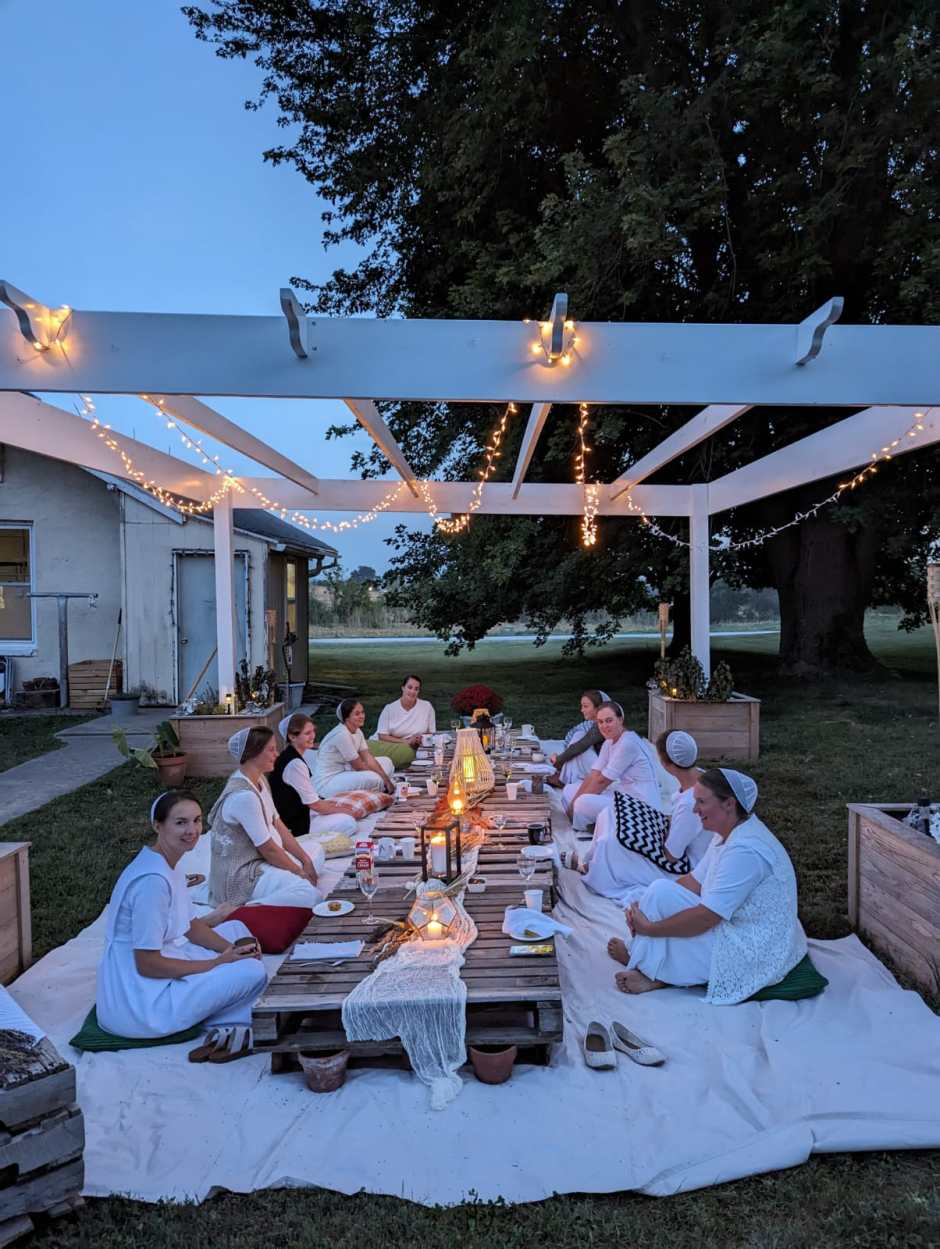
This next party was not one I hosted or helped with. Last October, I was invited to this backyard party, ate delicious food and completely enjoyed the evening!
Renita Plank hosted this in her backyard underneath their lovely pergola. Credits to her and Jolene Miller for this rustic and gorgeous party. And yes, they told us to wear white or ivory dresses!
Photo credits Jolene Miller
They had put down a tarp of sorts and then set up the pallet table on that, with pillows for seating. Dried flowers/weeds and random lanterns scattered down the center, turned this into a delightful scene!
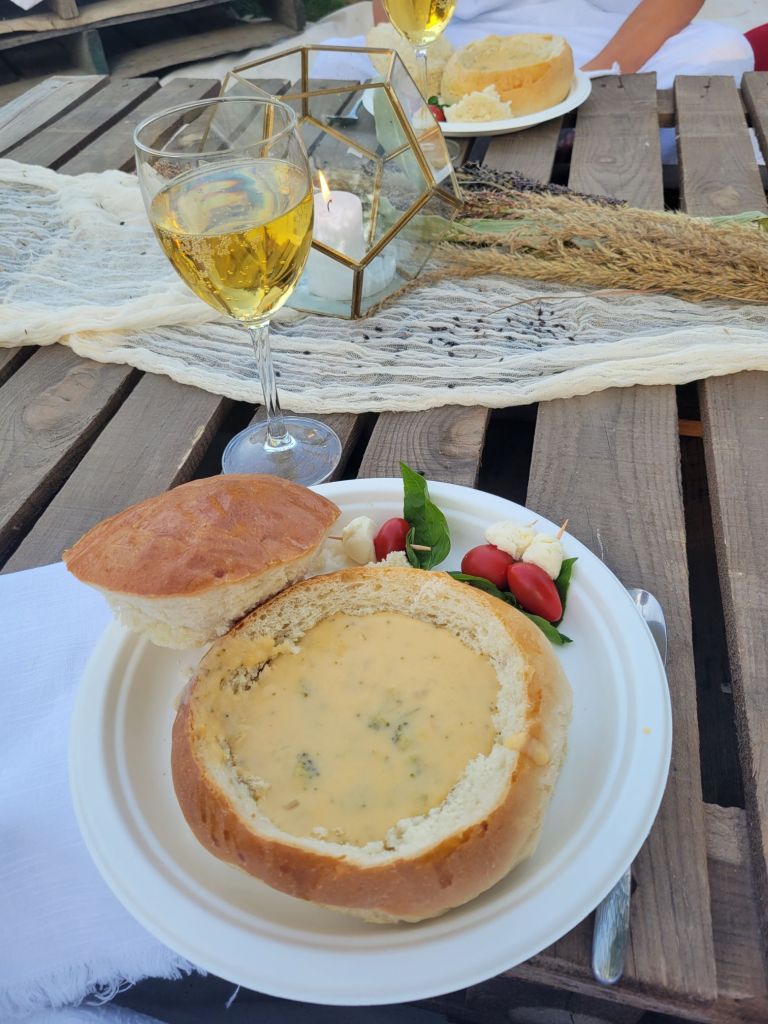
They made these huge bread bowls for serving the broccoli cheese soup in. We also ate veggies and dip and skewers with basil, tomato and fresh mozzarella cheese. Then scones and coffee for dessert. The drink was a mixture of apple juice and Sprite/7-Up. I’ve also made this drink a few times. If I recall correctly, I mixed 1 can apple juice concentrate to one 2 liter Ginger Ale. Sprite or 7-Up works too. This is such a simple, but over the top delicious drink! Not that I’m a soda drinker, but you can always get the sugar free soda versions to cut back on sugar! 🤫
How are you feeling by now? Are you too plagued with spring fever? Get yourself a big bouquet of daffodils or tulips. While you’re savoring their beauty on your table, share them with friends! Throw on a cheerful tablecloth, get out your pretty dishes, bake some muffins, brew the coffee and have somebody over. It doesn’t require perfection at all! A willing spirit will do. And you just might find it therapeutic to arrange those flowers and candles. To garnish the muffins and serve tea in China cups. I definitely hope you find the therapeutic benefits of heart to heart chatting with friends! 🤍
It feels like the playful temperatures of Indian summer have indeed left us for the fierceness of winter. Still, the dreary, chilled days make it feel cozy inside with warmth of heat and the ambiance of candles. I’ve started burning my favorite Welsh Mountain Candles. I love their clean wax and essential oil scents.
My stomach ulcer has been flared up considerably the last 2 months. Anytime I have too much going on, it gets worse. My brain tells my body I can’t handle much stress. We have intentionally needed to cancel some events and plans to lighten things up for me. It feels rather intimidating when others can be busy and going full throttle, yet they don’t seem worse for the wear. But then I have to watch my thoughts, or I’ll be slipping down the well-worn tracks of despondency at an alarming speed, for this treads closely to comparison. And, comparison is the thief of joy. But more than that, the Bible admonishes us that we are not to compare ourselves among ourselves. (1 Corinthians 10:12) Nobody is superwoman anyone, right?! Even when it may look like it from a distance.
And so it is, I’ve been puttering around home trying to rest both mind and body. There’s still the daily care of my family and house work, but prioritizing naps and saying “no” to big projects has felt amazing. I’ve definitely not been doing major things like fall house cleaning or sewing or decluttering or the like. I did very little canning this fall too. And this restful mode has felt so so good! I get a sort of panicky feeling when my week fills up with lots of outside obligations. Anyone else know what I mean, or am I the only weirdo?
So here’s a glimpse into what I have been doing. If you get bored, you’ve got full permission to read other people’s posts with more flare.
With the fall season, there seemed to be a need for pumpkin pies. Two weeks ago, I made two pies and took one to carry in dinner at church. It felt like minimal work since I had crusts in the freezer. Plus, I also baked 2 dishes with only filling because we don’t eat much gluten around here. I don’t know how to adequately describe the lusciousness of my mom’s pumpkin pie recipe, but I’ll have to say it’s the best there is! Rich, creamy, and comforting goodness! Mom always made large batches of this pie when I was growing up. Large as in a dozen pies! It’s like, if you’re going to the bother of making pie, make it worth your time and make a bunch! (I still like big batch cooking for efficiency.) She frequently made pumpkin pie for company, plus, I had 5 big brothers who ate a lot of food! The boys loved when the basement refrigerator was stocked with extra pies because this is one kind of pie you can sneak and eat on your way out to do chores! To this day, it is a favorite for me and all my siblings.
We don’t have the brilliant display of leaves in this area like the trees up north. Ours are more dull colors of rust, gold and pale yellow. This has its own kind of beauty, but I miss the mountains with their dazzling splendor of maples in autumn garb.
I was hankering for fall colors inside my house the other week, So one afternoon, I decided to bring fall foliage inside to spruce things up. I parked the Yukon and climbed up the bank beside our road and feverishly cut weeds with a scissors that was much too small. It was windy and cloudy with a chill and beginning to rain. I fervently hoped no one would come along and ask if I needed help because I didn’t. It just looked like I did. Of course, someone had to stop just as I was getting back into my vehicle. I quickly informed them of my mission but figured they probably questioned my words. I mean, who would be out picking crusty bouquets in this weather?!
Here’s what the bouquets looked like a day or so later. Even though they dried up a lot more, I still enjoy their rustic, natural beauty.This maple is in our front yard and one of the precious, colorful trees around! I have so enjoyed it’s magnificent display! But it didn’t last. Within a week or less of this picture, it was swept bare and bleak.
One day the other week, I met a friend at a cute coffee shop to chat about life. It was such a refreshing time. I came away grateful and thanking God for the privilege of friendship!
I felt very accomplished to be able to defrost both my freezers in the last weeks. That and the pumpkin canning I’ll tell you about later, are the biggest jobs I’ve done the last month. Defrosting freezers is a job I hate. But find it’s best to do it twice a year to simplify the process. What really irritated me was that the very week I cleaned my chest freezer, was the week we put in our jugs of apple cider. About half of the jugs spilled out their stickiness and made a brown river down the center of the freezer! It was like the rest of the freezer items whispered cold secrets to the cider that they were in a freshly cleaned space. And the cider decides it should do its share of “mess- making” in an effort to give the housewife job security. I’ll admit I re-cleaned the freezer with plenty of groaning and moaning as I saw the entirety of the mess and all the food that was required to move to clean underneath! At last, my freezer and I can both rest in peace!
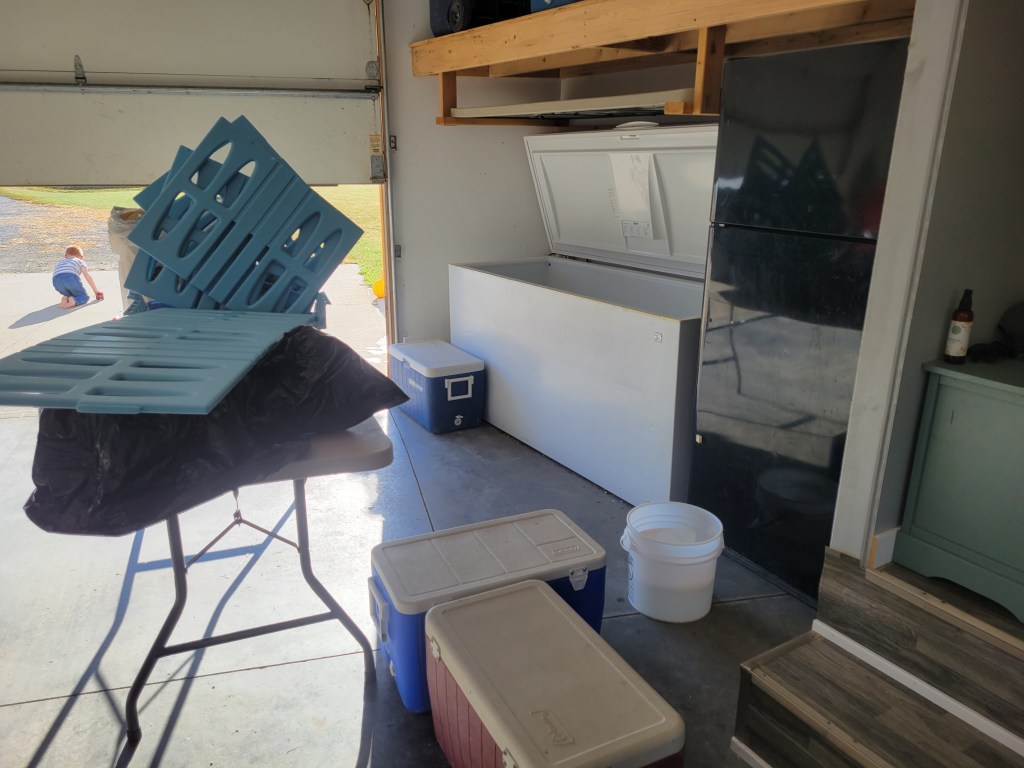
Here’s a few tips for freezer cleaning:
* Unplug the freezer. (In case your blonde and might forget this step)
* Use ice chests or coolers to stack in the majority of the food.
* Set up a table to pile other things on that don’t matter to set out for a few hours.
* When it’s totally empty, get a rag and a bucket of hot water and a scraper of some sort. Soak the frosty spots with hot water and scrape off chunks the best you can.
* When all the sides are cleaned of frost, get a dust pan and scoop up the water and pour into your bucket. This is a quick way to rid all that water and ice chunks.
* When it’s mostly emptied of liquid, get rags to wipe out remaining moisture. Lastly, get dry rags to wipe down the whole freezer.
* Now you get to organize and stack your foods back in. I love the dividers and baskets that came with this freezer. But in our upright freezer, I find it very beneficial to use baskets to keep the variety of meats and things separated. Adding labels is always a good idea.
* Plug in the freezer and enjoy your chill food space!
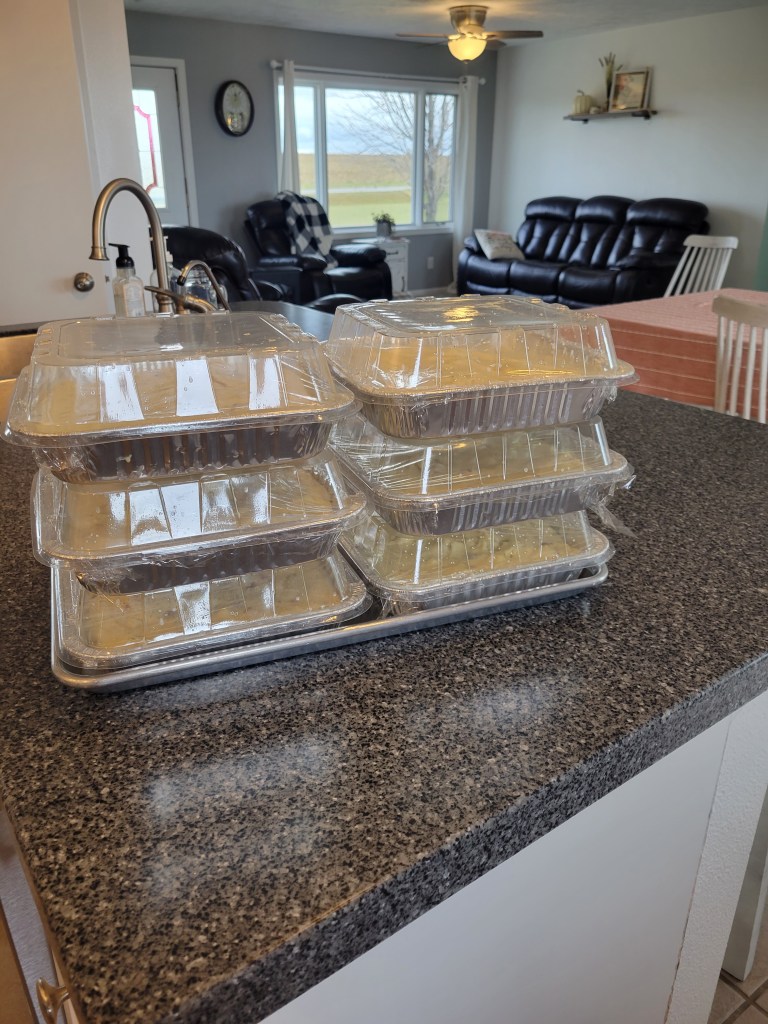
I was also pleased to restock my freezer with Sunday dinner mashed potatoes last week. I made a tremendous batch that should last until the end of the year. This includes a Sunday or two of being gone plus carry in at church 2 Sundays. And oh, yes! I must tell you I changed up my recipe again🤭 We had red garden potatoes that needed to be used up, so I cooked up a batch of mashed potatoes without peeling! Still added the cream cheese and sourcream, etc. They freeze fine, and we don’t mind the peelings and little chunks of potatoes in it. We all love these potatoes just as much or better than the instant ones. After eating these a couple of Sundays, I got kinda convicted about eating instant potatoes on a regular basis. Not peeling them is key to speed, which is why I decided I could go this route. You won’t catch me peeling 10 lbs of potatoes on a regular basis.
I cooked the potatoes in this big kettle, then used my hand mixer and made it in here too. Ready for the freezer. I tell you folks. This is an amazing feeling!
One evening when Jerald was gone, I mixed up a batch of Caramel popcorn. The children enjoy making popcorn, but the Caramel makes it extra yummy. It’s a special treat now and then, and the reason it’s special to me is that it does not have corn syrup in it! The children sat coloring at the bar while the popcorn toasted in the oven. Along with stories, the evening passed rapidly. With the ages of my children, I enjoy doing these sort of things with them. They both get so excited about being all coo-zzy inside on a cold or rainy day/evening. Playing games, reading stories and drinking hot chocolate rate high on their list of all things cozy! It’s these kind of moments we all want our children to remember in years to come, isn’t it? And so much of it is up to us moms to make those moments happen.
With the recent freezing temperatures, I brought in our butternut squash and pumpkins that we had for fall displays. I bit off more work than I expected when I started this project. The squash was minimal effort- the pumpkins a different story. I baked the squash and scooped out the meat. Reece and I have been eating it for lunch topped with butter, salt, and nutritional yeast. We deem it tasty and nutritious!
Butternut squash Our fall display
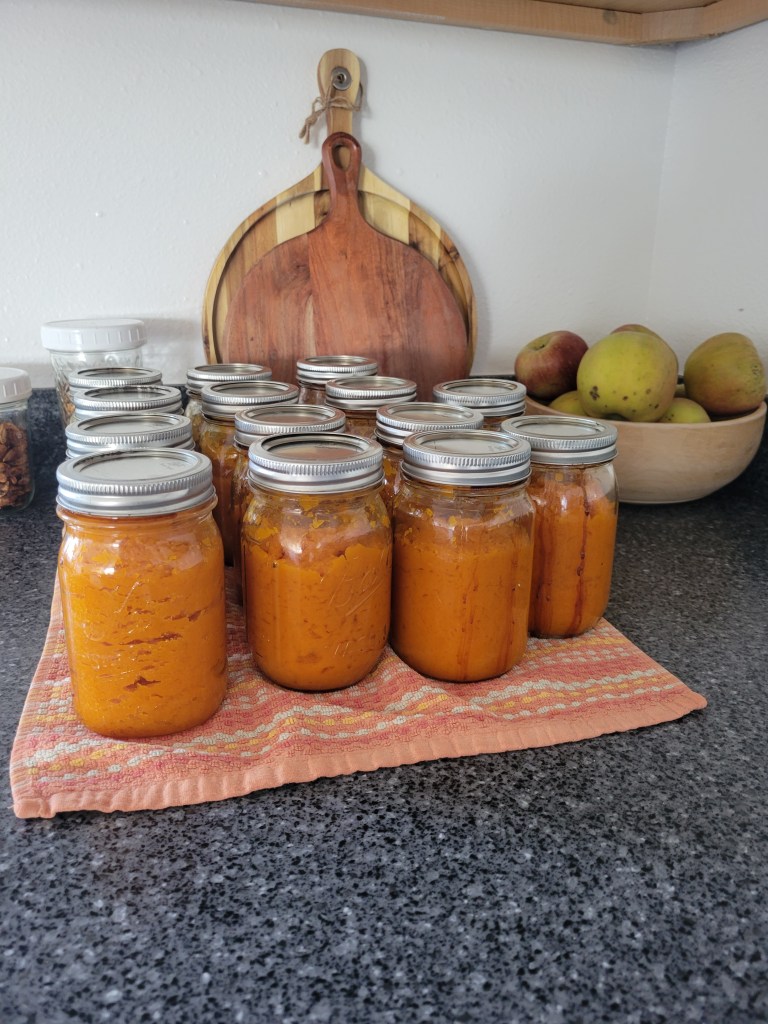
I wanted to be this frugal, virtuous, homesteading sort of wife. So I thought I ought to save those pumpkins to can. After all, we had paid good money for them at the Pumpkin stand. (Honestly, if I was truly homesteadish and frugal, the pumpkins would have been homegrown.) But if I could can them, it would help combat the cost. I had two hefty ones that I cut in halves and baked. Three of the pumpkins were the kind without much flesh; I was awfully grateful I didn’t need to process all 5!
I rose up early, while it was yet night (dark) and prepared meat for my household.
I placed pumpkin halves on cookie sheets and added water, not realizing how much liquid they make as they bake. And did I have a mess! Two of the cookie sheets were just at the brim of overflowing when I caught it. So imagine trying to dip out or dump water off a cookie sheet with hot temperatures all around, without creating a flood in the bottom of the oven or scalding my hands in the process! I had both ovens going and had the privilege of cleaning them both too! Scooping out the flesh was easy. But then I had to put it all through the blender and fill jars. Out of those two pumpkins, I got only 14 pints.
But the labor was not over. The dishes kept cropping up as if thrilled to be adding to the workload. The pumpkin skins had to be taken out to the pigs and chickens to keep up with this homesteading life. My son and I traipsed down together laden with slop. Ah, but the animals were so grateful! And I was glad to contribute to their joy, for it could not be anything but dismal to be an animal out in an old cold barn. At least we got fresh air and a bit of exercise to benefit us. But now on to the next step.
Homesteading?! Those seeds ought to be drying out in the sun and fresh air!
I rinsed the seeds to save for roasting. I read how they must be thoroughly dry or they won’t crisp up well. So I spread them on a towel and ran a fan over them for an hour or two. Finally, I divided them in bowls and made 3 different flavors. They crisped up pretty well and they look great stored in glass jars on the counter. But. I’m sorry to say, they have more to their looks than their taste. Actually, two of the flavors are pretty good. Perhaps it’s more the way they gum up in your mouth. We find ourselves chewing them, and depending who the chewer is, we have the need to spit them back out, which is not frugal at all!
I really ought to sell these seeds to help pay for my efforts. Anybody interested?
And would you like to know how beat out I was, when my husband comes along and asks me what the price is of a can of store bought pumpkin?!! He quickly did the math and obviously, my ambitions completely missed it when it came to being frugal! A dollar and twenty-two cents for a 15 oz. generic brand of pumpkin is not unreasonable. My precious, home canned pints of pumpkin came to about 3 or 4 dollars a jar! And to think of all the time and energy I put into my attempts at being frugal! There may be more reasons I don’t can all kinds of food. But I’m hoping my hard, honest toil would allow me to be ranked among the virtuous.
As I took the jars out of the oven, I said to myself, “this would be the last straw if they wouldn’t seal!” But thank God, they innocently sealed, knowing nothing about the hard work they cost me.
If you’re interested in the canning process, here it is: Simply fill your pints, wipe the rim, and add lids and rings. Place jars on bread/cookie racks on top of your oven rack. (This adds stability to the jars) Turn oven to 250*. Bake for 4 hours. Turn oven off and let set until cooled- at least 10-11 hours. I got mine started around 4:30 pm and turned it off at 8:30. The next morning, I got them out around 7.
My pressure canner sits neglected on the shelf since I’ve learned the ease of oven canning.
Here we are, already well into the month of September! With it comes the arrival of school and lunch boxes. What you pack, impacts your child’s brain and health. And what a job it is to pack nutrition instead of prepackaged foods! It definitely takes intentionality and a good deal of preparation.
I want to share some ideas and recipes to inspire those lunch boxes. Some of these ideas will not likely be new, but maybe it can be a twist of inspiration one way or another.
Be Organized
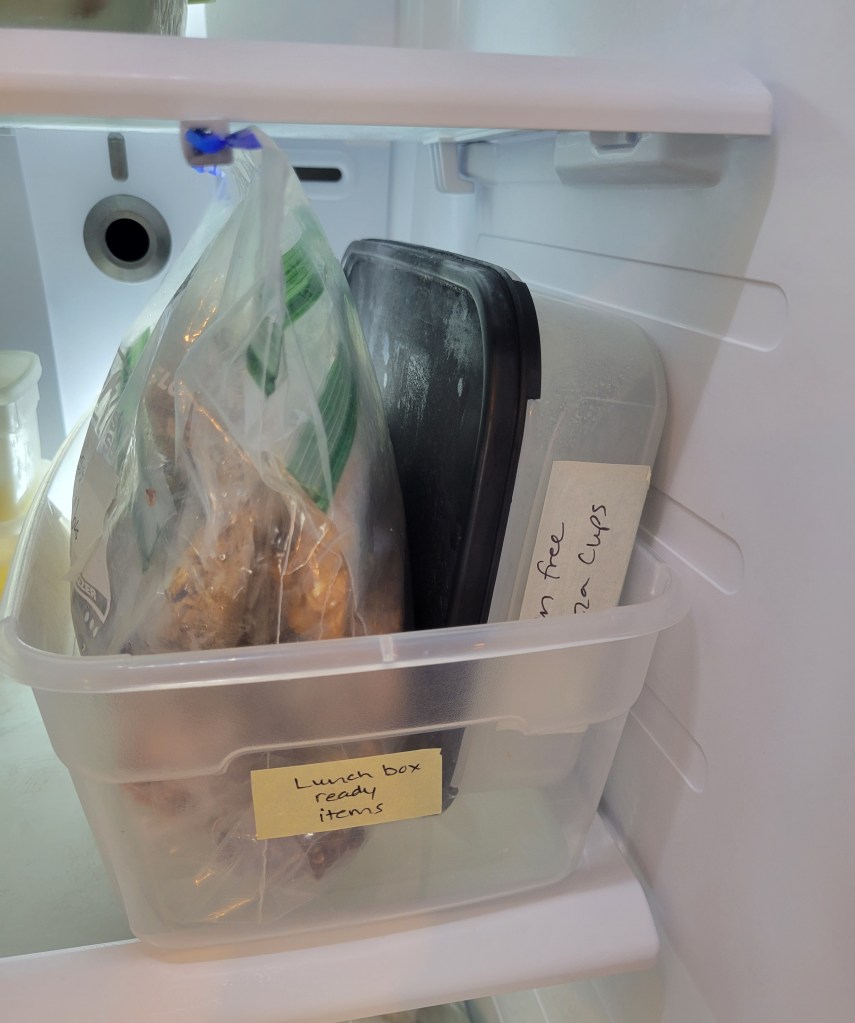
Here is how I feel most prepared for the daily packing: I keep my freezer compartment of the fridge well stocked with healthy baked goods/protein bars/leftovers/homemade pizza or pizza cups etc. I like keeping a variety of cookies and bars pre-bagged and ready to grab. I then slide all these into a gallon ziploc bag. Some days I’m also packing for Jerald and am always grateful for my supply stash.
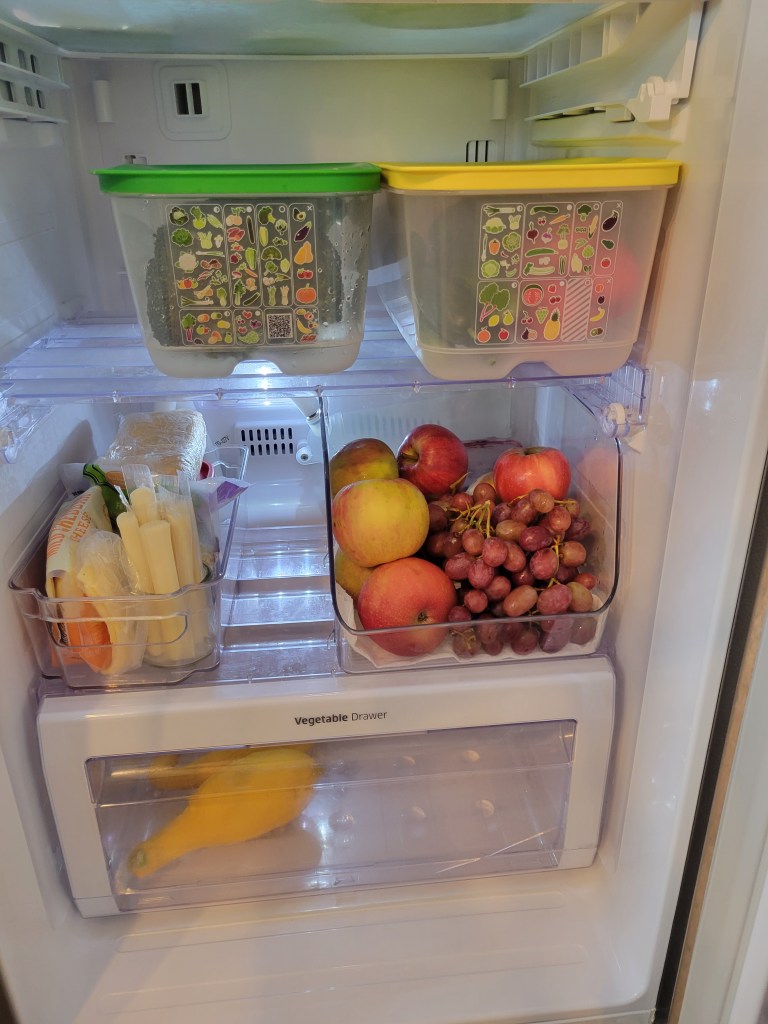
I keep a clear organizer on a low shelf in my fridge, stocked with fresh fruit. Often things like apples, grapes, small oranges and the like. Another clear organizer holds cheese and cheese sticks. This makes for easy access for snacks or lunch packing, plus, the children can help themselves. I’d much rather they see fruit, cheese sticks or yogurt cups when they need snacks than going to the pantry looking for snacky things! Not that I keep many snacky things around, but even healthy cookies don’t need to be the first option when they’re hungry!
A couple years ago, I took out 2 of my fridge drawers and use the lower shelves for my Tupperware Fridge Smart containers and the fruit/cheese organizer bins. I like this so much better than drawers! I like the easy access for already washed veggies options. Pepper or cucumber slices, cherry tomatoes or carrot sticks are the most frequent vegetables I pack. Sometimes I’ll do celery with peanut butter. Or for a different twist, fill celery with cream cheese and sprinkle with Nutritional yeast. I happen to like the last option better than my daughter. 😉
Most times I pack leftovers for Josie’s main dish, which they heat in the oven at school. (I don’t advocate microwave use) I also do this for the days I pack Jerald’s lunch. I find this much more simple and healthy than constantly packing sandwiches. I rarely have boughten deli meats on hand, simply because they are not good for you! They are filled with nitrates, flavorings, or other carcinogens.
6 Lunchbox Recipes
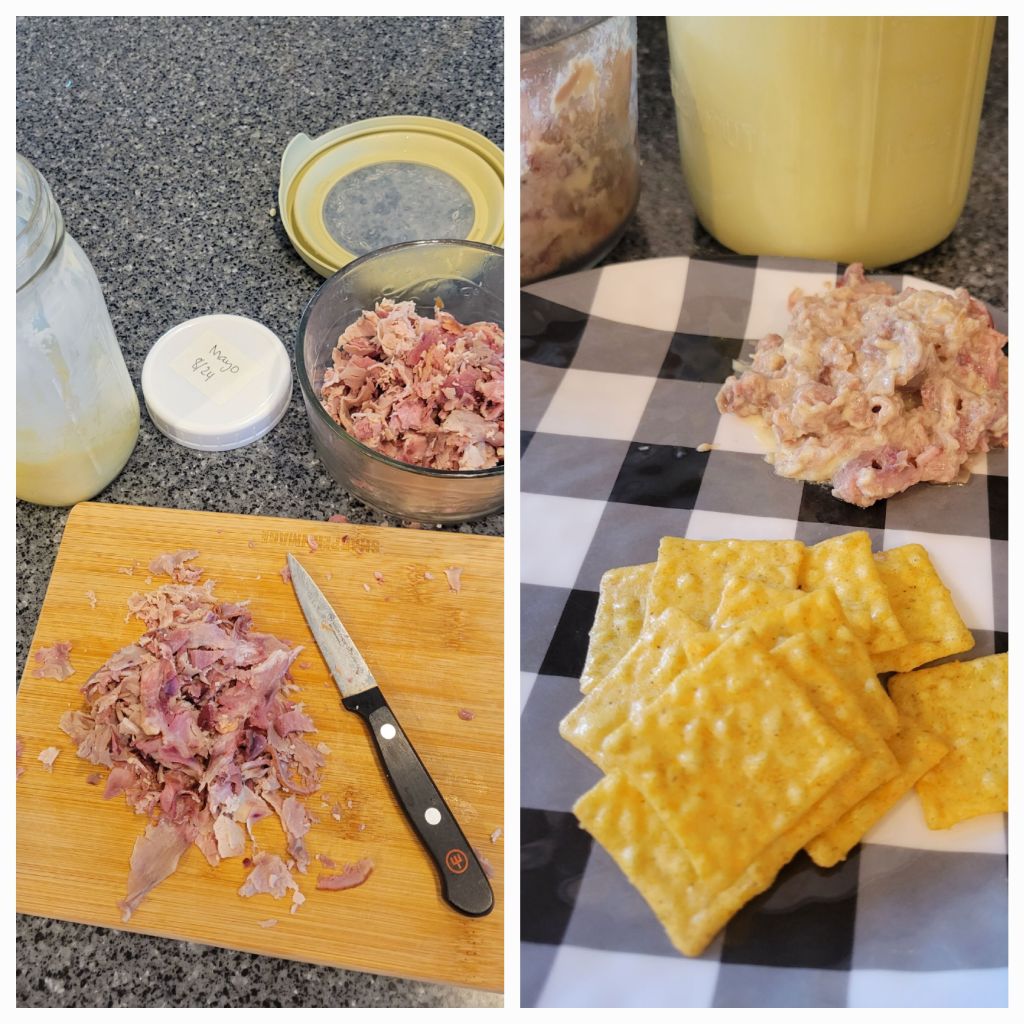
Ham or Egg Salad
We are blessed to raise our own organic hogs. A local friend from church butchers them for us and we get lunch meat ham from that. Totally cured but without those harmful additives! What I most often make with that ham instead of a plain sandwich, is ham salad. I dice the ham very small, add homemade mayonnaise and presto- delicious ham salad! Josie loves this with crackers. Sometimes I also make egg or chicken salad. Same idea- shred the cooked chicken or boiled eggs, add mayonnaise and salt. Super simple! Occasionally she eats these ‘salads’ on sourdough bread instead of crackers. When I have no leftovers or nothing else around, I resort to a peanut butter and jelly sandwich which she enjoys, but I don’t like to do it often.
Ham salad
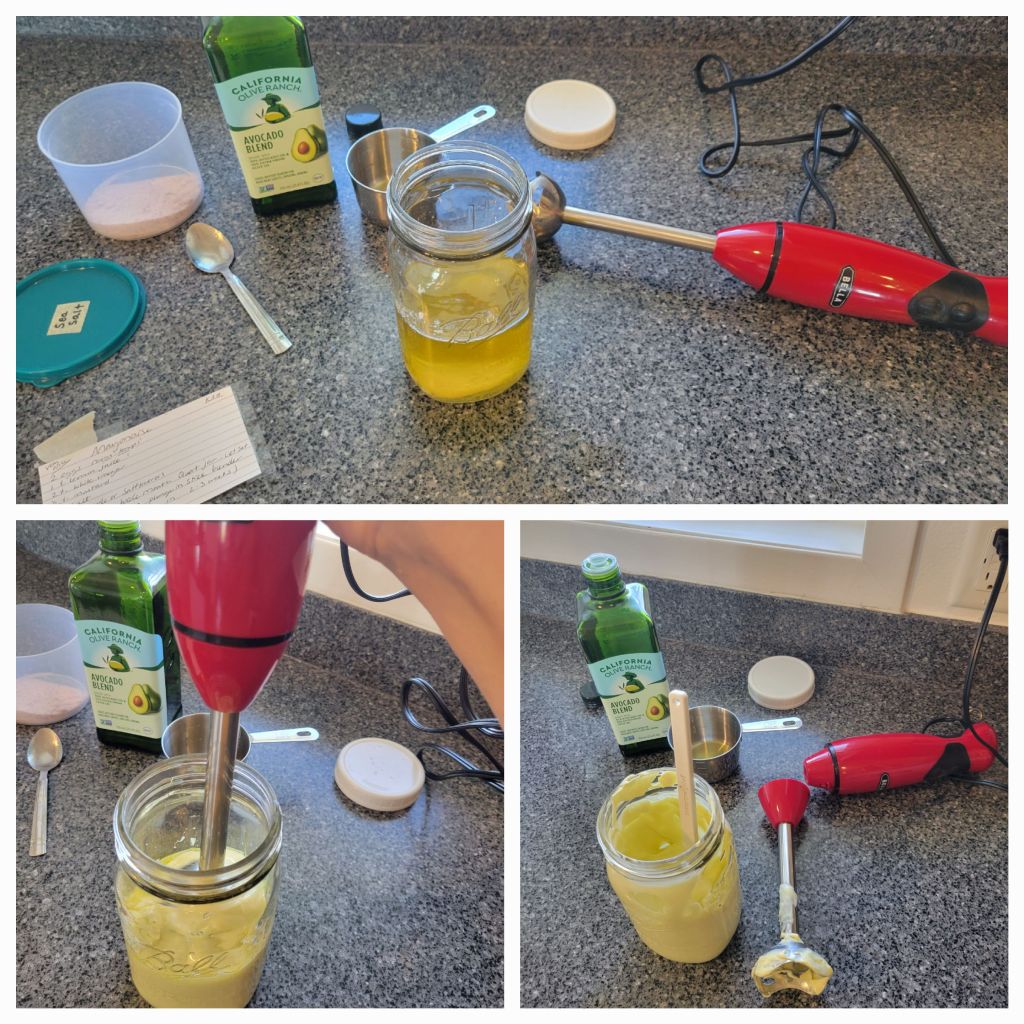
Homemade Mayonnaise
This takes so little time and is so much better for you than the store bought stuff!
In a wide mouth quart jar, break 2 room temperature eggs (I often set the eggs in a bowl of hot water for a few minutes. This helps them dissolve into the oil better)
Add: 2 teaspoons white vinegar, 1 teaspoon lemon juice, 1 teaspoon salt, ¹/² teaspoon mustard and 2 cups oil. Avocado oil makes the best but since it’s s so pricey, I sometimes use a mix of avocado and olive oil. Using only olive oil makes for a really strong tasting flavor, which I don’t care for. I use an immersion blender until it’s well combined and emulsified. Throw on a lid, add the date and refrigerate. Remember, this has no preservatives. But that’s OK! This is real, unprocessed food! Using fresh eggs will help it to last longer.
You can also make this in a regular blender. Just blend everything else while drizzling in the oil. I hate the greasy mess to clean up though. Absolutely recommend the immersion blender!
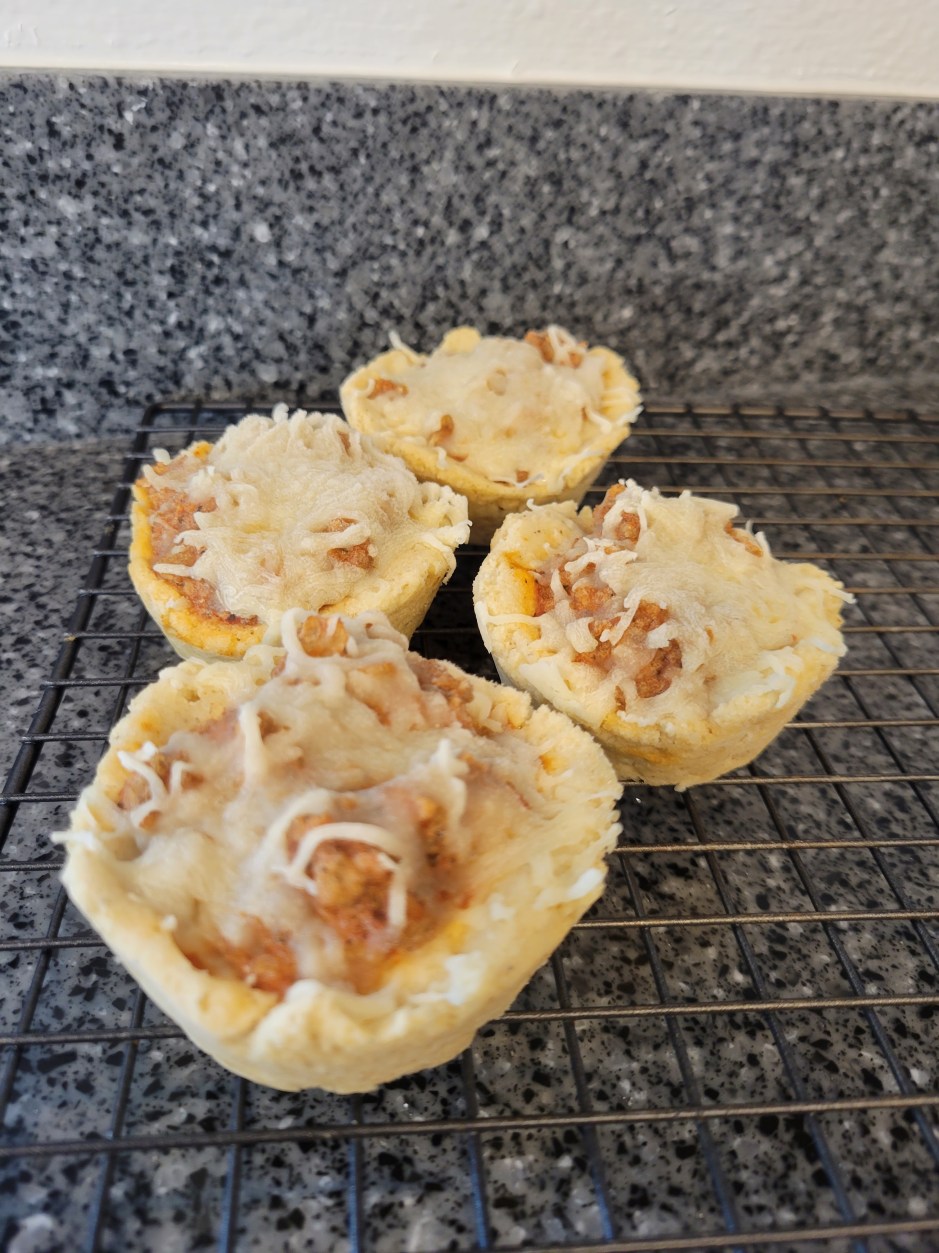
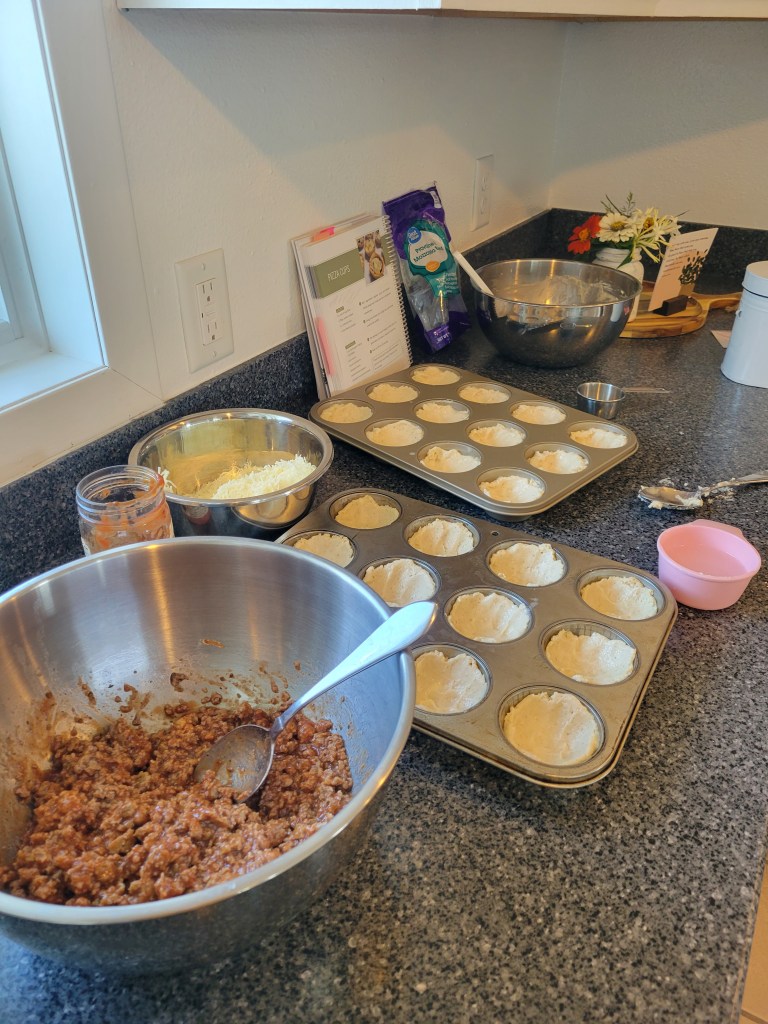
Pizza Cups
Use your choice of biscuits, bisquick mix or homemade dough. Press into well greased muffin tins. (I make a gluten free version for my crust.)
Fry 1 lb. Sausage. Drain and cool, then stir in 1 pint pizza sauce and 1 cup shredded cheese. Fill dough lined muffins. Bake at 350* for about 20 minutes or until crust is baked. This amount of meat mixture makes 2 dozen pizza cups. These are delicious and freeze well! My family loves them.
In this picture I had forgotten to stir in the cheese. But I hate how the cheese sticks to the pan when I sprinkle it on top! So I’ve discovered it works much better to stir it into the meat mixture.
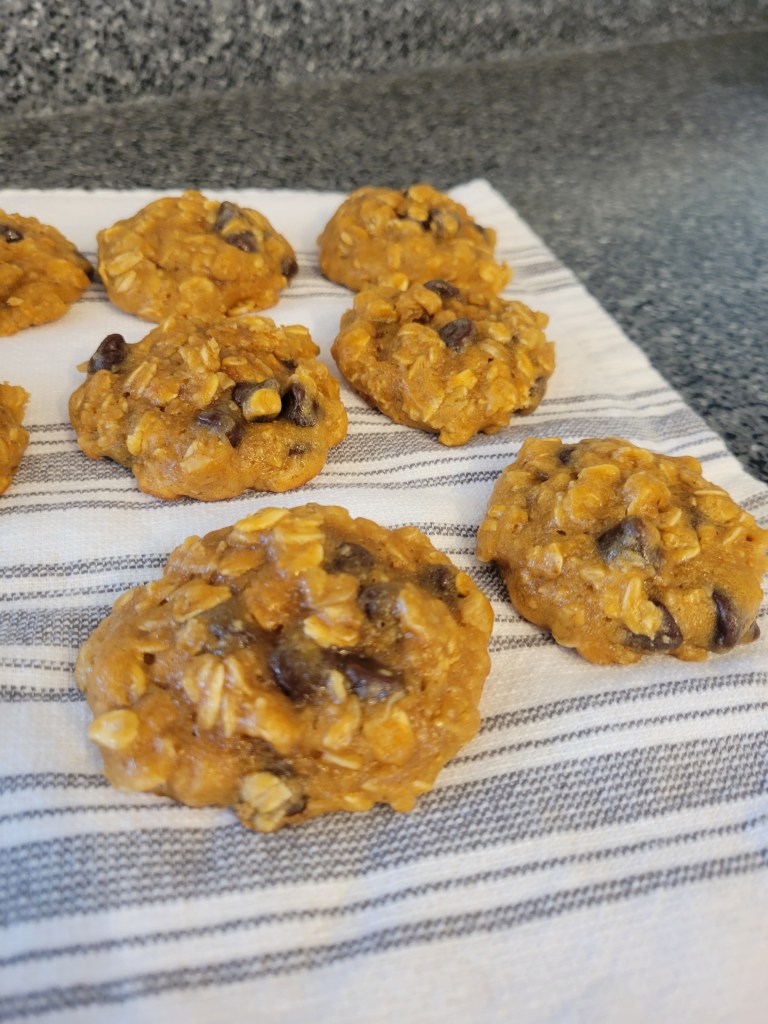
Oatmeal Chocolate Chip Cookies
Beat together: 1 C. peanut butter, 1/2 C maple syrup or honey, 1 Tablespoon vanilla. Then add: 1 C. oatmeal, 2 eggs, 1/2 teaspoon baking powder. Beat well. Very last stir in 3/4 c. chocolate chips. Drop on greased or lined baking sheet. Bake at 350* for 10 minutes. Super delicious and easy!
Chocolate Protein bars
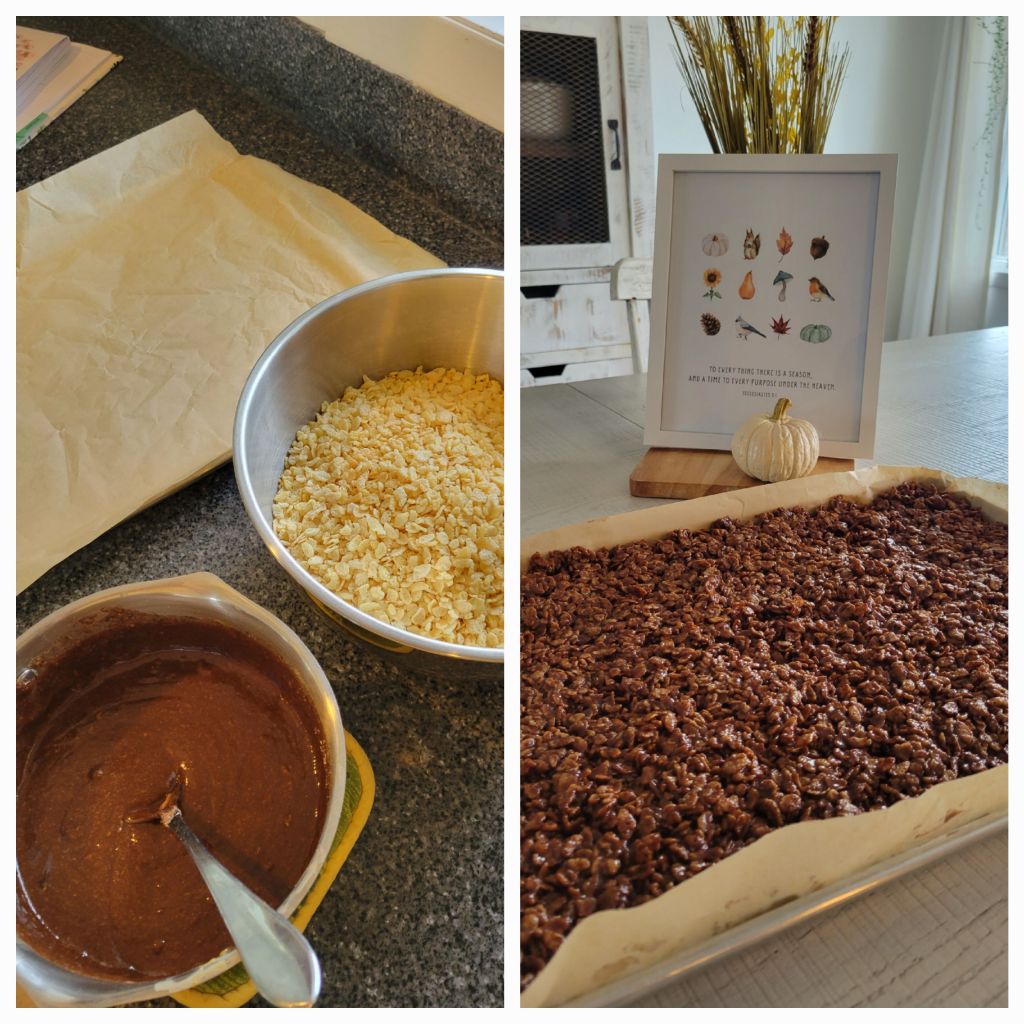
Melt together: 1 C. Peanut butter, 1/2 C. Coconut oil, 1 C. maple syrup, 2 Tablespoons vanilla. Whisk to combine.
Remove from heat and stir in 1 ¹/² C. collagen powder and ¹/² C. Cocoa powder. Whisk to dissolve. Pour over 8 C. Rice Krispies. Stir well. Press into a large cookie sheet lined with parchment paper. Set in freezer to chill. Cut into bars and keep refrigerated or frozen.
My family loves these bars! Credit to my friend Valerie for giving me the idea to swap out protein powder in the original recipe, for collagen. I have learned some things about protein powder that make me skeptical about using it.
Protein Finger Jello
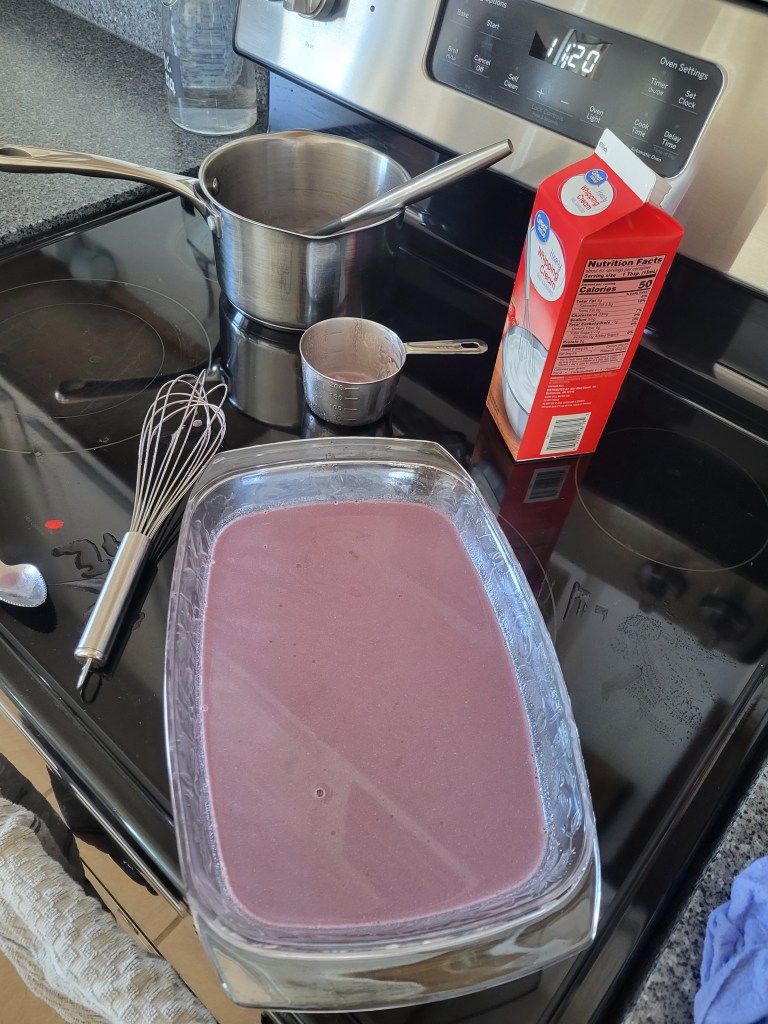
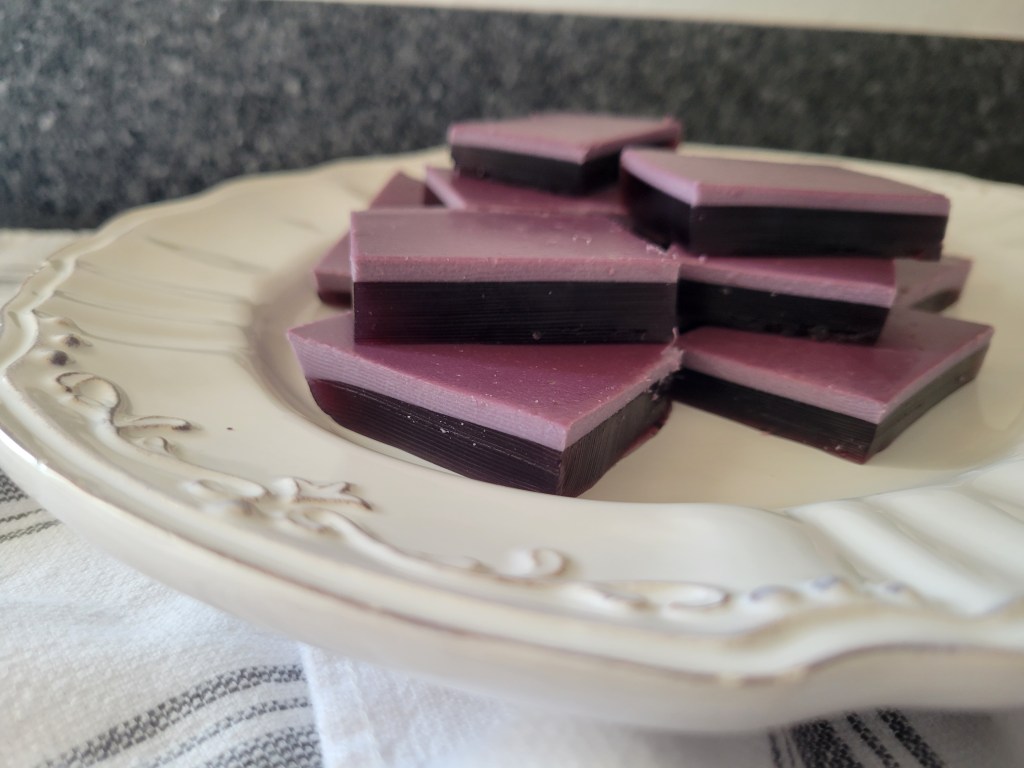
In a saucepan, pour in 2 C. 100% Juice. (We love grape sweetened with stevia) Sprinkle 4 Tablespoons beef gelatin (grass-fed pasture raised) over the juice and let bloom for about 5 minutes. Whisk, and heat on medium until completely dissolved. Stir in 1/4 teaspoon salt and 1/2 C. Heavy whipping creme. Remove from heat and Whisk well. Pour into lightly greased medium sized glass dish. Set in fridge to chill until set, then cut into squares.
Healthy finger jello without loads of sugar and food coloring. Plus, it’s got a protein punch! It’s a win-win!
Additional Lunch Ideas
If you buy bushels of peaches to freeze, reserve some to fill small disposable cups with lids, for a handy lunch option. I like the ones from Walmart. You can find them in the aisle of disposable tableware.
Or make a large batch fruit slush and do the same thing. I’ve done both of these, plus last year I froze applesauce in these cups for another option. But so often, the slush or peaches came home again simply because Josie was tired of it. So this year I decided I’m not going to bother with doing that.
A side note on a delicious way to freeze peaches with out sugar is this. Use straight orange juice concentrate to stir over the peaches. I use 1 12 oz. concentrate to about 10-11 quarts peaches. The orange juice keeps the peaches from turning brown. When I pull a pint out of the freezer, I sprinkle with stevia to taste.
Yogurt is often a lunch option, but don’t be fooled thinking all yogurt is healthy. It can be, but you must be careful when purchasing yogurt or you will easily be consuming way too much sugar and/or food colorings, carrageenan, aspartame or sucralose. I usually buy a plain yogurt with a very low sugar content, then I sweeten it with stevia. Oikos and Chobani are good brands of Greek yogurt with a better ingredient list. But I still recommend checking the label, because it will vary depending on flavors or some contain a topping of sorts that may not be of the best ingredients. There’s been many times I have stood at the yogurt cooler studying ingredients, puffing with disgust! Of course, making your own homemade yogurt would be a great option too!
Another delicious recipe are these peanut butter banana muffins! I often make a double batch and fill a large cookie sheet instead of muffins. I like efficiency!
I’m sure there are more good ideas out there! Tell me what your healthy favorites are.
Are you one of those churchgoers, who, like me, know the struggle of dealing with a rumbling, Sunday stomach? Food for famishing bellies becomes high priority come dinner time. We as Mennonites call it Sunday dinner, but we’re talking about the mid day meal here, not an evening dinner.
Seriously, what is it about sitting through a sermon that makes for ravenous appetites? Social stress of being around people? I realize this is not an issue for some folks but I can identify with this idea. Or maybe it’s only because we’re eating later than on weekdays? Either way, we Moms know the necessity of having food prepared to feed our starving tribe.
Some folks are perfectly content to arrive home from church and fry up pancakes and eggs, or consume a sad bowl of cold cereal. Hey, if that’s your jam, more power to you. But I’ll assure you, my family and I are far from that stripe of Sunday dinner folk.
Both my husband and I grew up with the Sunday dinner tradition. The classic meat and potatoes affair, complete with veggies/salads and often a dessert. And that’s how I cook for us now too. I don’t mean a holiday feast, but a well prepared meal. The catch is, I don’t like to spend hours slaving away in the kitchen on Saturday. Been there, done that!
Sunday is a day of rest; in order to honor that, I don’t like to get up and spin around my kitchen for 3 hours, feeling like I’ve done a day’s work before we ever step foot in church. My Sunday mornings vanish like foam anyway.
About February or March of this year, I had an epiphany. I started making basically the same menu every Sunday. I was looking for ways to cut back on Saturday food prep, yet still be able to arrive home to a tasty dinner.
Remember, we don’t like pancakes and eggs for Sunday dinner? Sure, that doesn’t take any Saturday preparation, but it’s not our style. Here are a couple of theories why I don’t like that method. You don’t have to agree with me.
1) Who in their right mind feels like stirring up pancake batter or frying eggs and bacon after your home from church? When the whole gang is an hungered and nigh grouchy from empty tummies?! Efficiency and time are of utmost importance when we arrive home- we don’t want to wait yet another half hour or more, fixing food!
2) Sunday is a special day of the week. It’s nice to honor that day with some extra special food. We don’t always have dessert with our everyday meals, but I like to have a dessert around for the weekend. It doesn’t always happen, but my hubby appreciates it when it does. Sometimes I manage his favorite custard, or a gluten free cake or bars. Other times it’s simply ice cream from the freezer.
Some people may feel they don’t want to eat much on Sunday because they’re not working hard physically. Maybe they’d rather settle for cold sandwiches for Sunday dinner. There’s nothing wrong with that. But for myself, I’m next to ravenous when we get home and needing something more substantial to fill up on; not empty calories.
So let’s dive into our Sunday dinner menu. It doesn’t require any Saturday preparation (unless you make a dessert or prep salad ingredients/ dressing, etc).
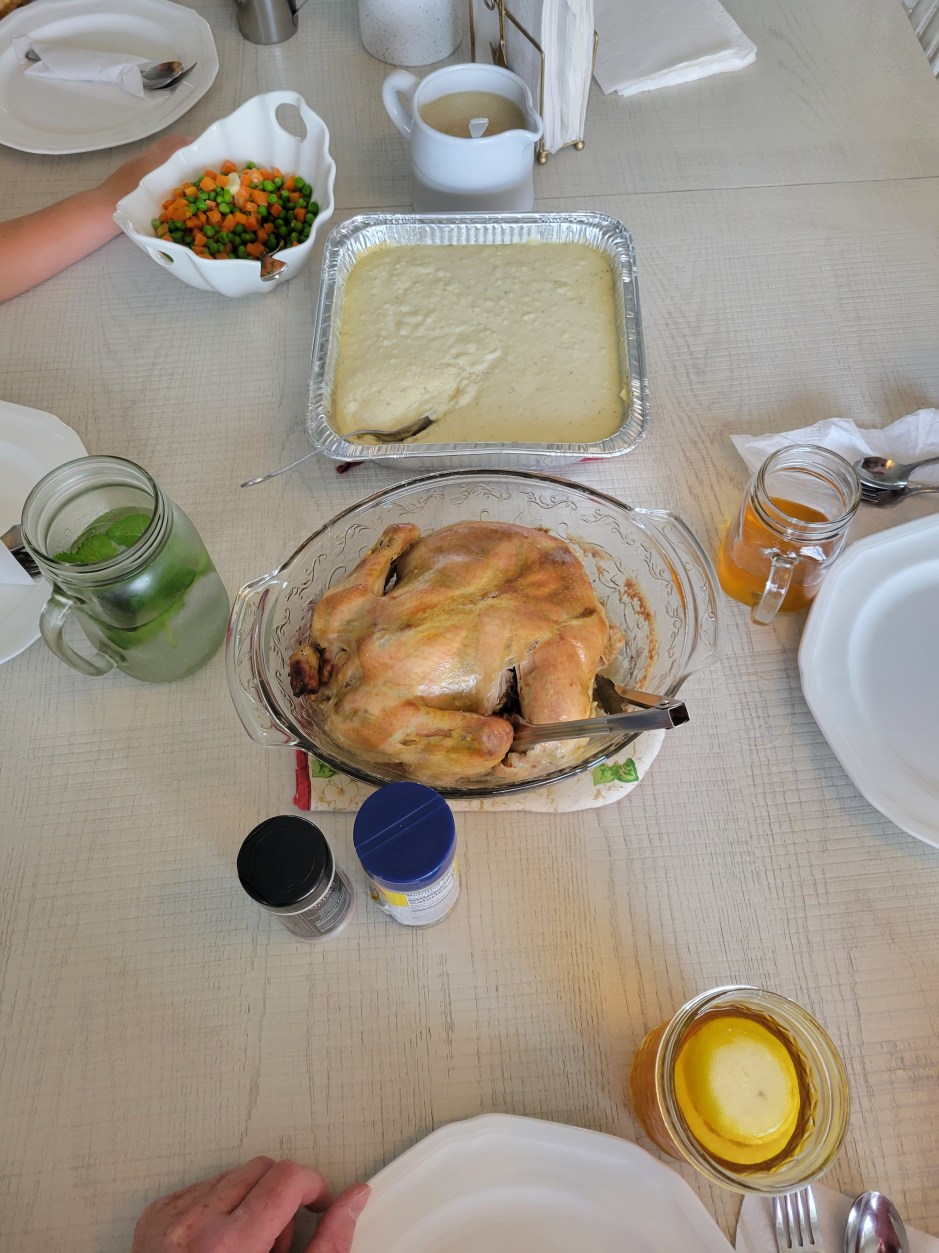
Every spring and fall, we raise our own pastured broilers. A freezer stocked with homegrown chickens feels rich indeed! Every Saturday night before going to bed, we pull one of these whole chickens from the freezer and set it in the kitchen sink to thaw. The next morning, I pop it into my Princess House miracle dish, add water for plenty of broth and slide it in the oven. I bake it at 350 for about an hour, then at 9:00 when we leave for church, I turn it down to about 225*. It’s tender and pull-apart delicious when we arrive home around 12:45.
I don’t worry a thing about all those fancy roasting recipes. Rubbing it up with seasonings, squeezing it with lemon juice or filling the cavity with onions. Our chickens still have the skin on, so I find the flavor doesn’t go into the meat anyway. I save myself time and energy and bake it plain as day. Then we serve it with a sprinkling of Nature’s Seasoning or whatever strikes our current streak. And by the way, the skin is a coveted delicacy at our table. Crunchy goodness, dripping with healthy fat vibes!
After feasting on that succulent chicken, I immediately de-bone it. Then we’re left with a treasure trove of cooked chicken to use for another meal. Hallelujah for leftovers.
Now on to the potatoes. Mashed potatoes was something I did not make often, simply because of the effort it took. You can be sure my family is thrilled to have a weekly dose of creamy potato goodness! Nobody has tired yet of eating these every Sunday.
Here’s my secret. Once a month, I make a super size batch of instant mashed potatoes and freeze them in 3 meal sized portions. (We have potluck at church every 3rd Sunday so I can get by with making enough for the remaining 3 Sundays of the month.) I like using foil pans so I’m not holding up my casserole dishes in the freezer. On Saturday, all I have to do is pull a pan from the freezer and let it thaw all day. I cover it with foil, then refrigerate overnight. About 8:50 A.M, Jerald takes the potatoes to the downstairs oven and puts it in at 175 degrees. It’s such a routine by now, I no longer even remind him to do that or even specify the temperature! With the potatoes being cold from the fridge, this time frame and temperature is perfect to have them thoroughly heated, but not dark around the edges. I love the convenience of two ovens for differing temperatures.
Now I hear what your thinking: instant mashed potatoes?! That’s not healthy! I admit, they’re not the epitome of wholesome food, but I’ve finally concluded, for convenience sake and for my happy family’s sake, we can surely eat this once a week without spiraling into a health apocalypse. Instant potatoes are soooo much easier than peeling aaalllll those potatoes! Plus, these freeze so well! Now back to the potato method….
I hesitate to share my recipe because it’s never exactly same from one time to the next. But here’s my estimates:
Instant mashed potatoes
7 cups milk/ water. I use milk but sometimes add in water to stretch it. Add a couple Tablespoons butter while heating.
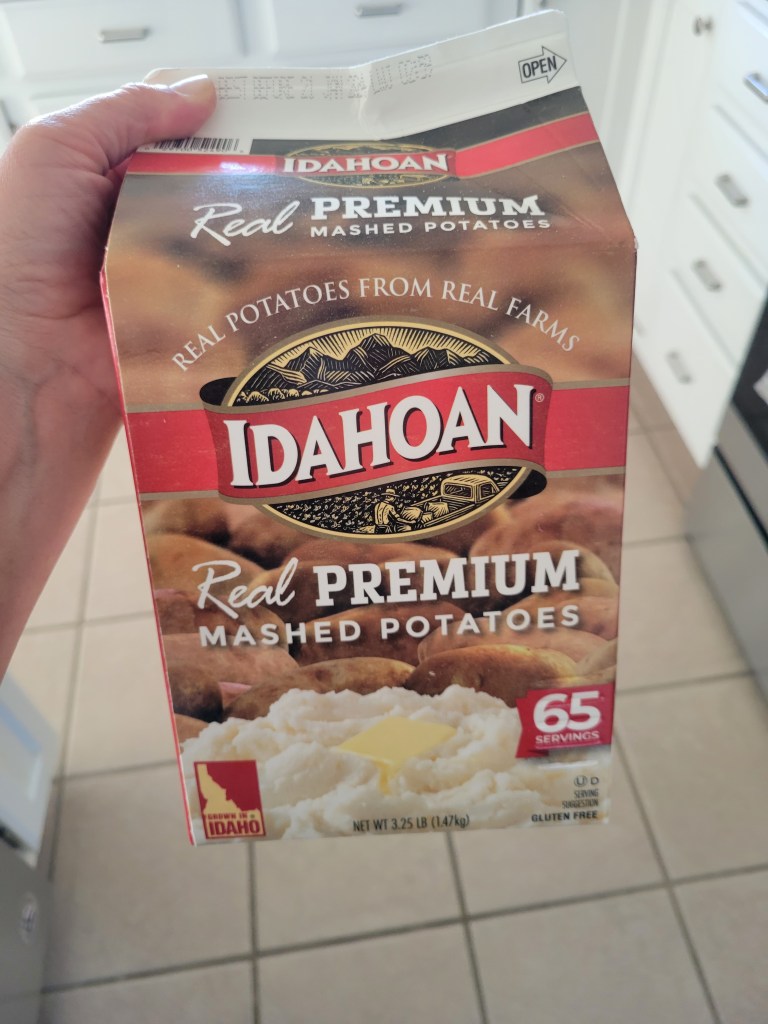
3 ¹/² – 4 cups Idahoan potato flakes
1- 1 ¹/² blocks cream cheese- 8 oz. size
1 large scoop sourcream- probably about 1 cup
1 good teaspoon salt
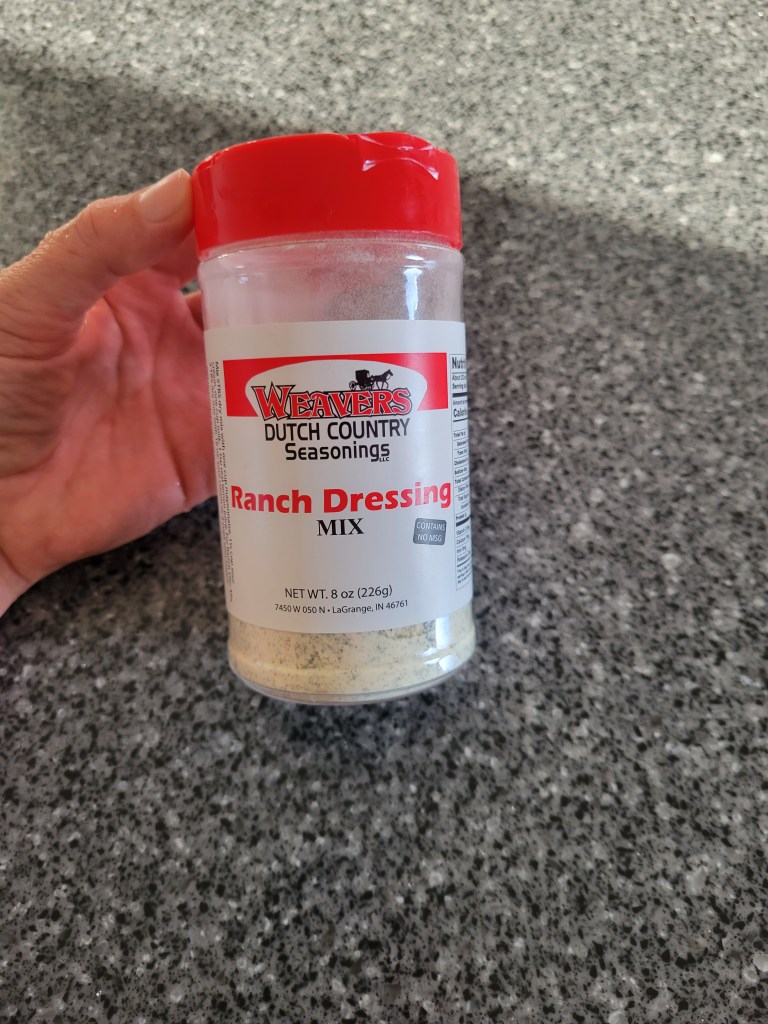
A good sprinkling of ranch dressing mix- probably 2 Tablespoons or so. (I use a different version of ranch mix because I like to avoid the MSG in the Hidden Valley Ranch stuff.
I get this mix from Nature’s Warehouse I keep a big box like this on hand. It feels safest to not study the ingredient list.
Heat the milk to warm but not scalding. Pour in abouthalf of the potatoe flakes and beat well. Add in the remaining ingredients and beat again. Last, add in the remaining flakes as needed. This can vary quite a bit. I’ve learned it’s best to keep them pretty runny! So if in doubt, go for the runnier side rather than too thick. They will thicken right up as they heat. So if you get them to the right consistency while making them, they will end up too thick once heated. Always do taste testing to check about salt,ranch mix, or the desired taste of cream cheese.
Every Sunday, my family raves about my potatoes. It makes me feel like I’ve aquired a Master’s degree in Culinary Arts.
Now, let’s get on to the veggies. The first 6 or 8 weeks, our vegetable was green beans fried with bacon. We’ve discovered we like them blanched and frozen better than canned. Plus, the long beans look so dressy fried up with bacon. Not to mention delicious! But I’ve changed it up lately, with a variety of hot vegetables. Partly because the green beans took too long to cook after we got home. Although I did discover it works to put the frozen beans in the oven, covered, with a little water, just before leaving for church. (Same temperature as the chicken) Then they’re ready when we come home. If I want to fry bacon for the beans, I’ll have it diced and frozen, then dump it in the frying pan just as we leave. It can thaw all morning. All you need to do is turn on the burner as soon as you get in the door. Better yet is fry it ahead of time and you’ll only need to reheat it.
As soon as we’re home, I drain the broth off the chicken and make gravy. At first I didn’t even bother making gravy, (because of the time factor,of course) but we’ve got onto it now. And I can do it real swift like! In the morning I put my gravy shaker with water and pan for the gravy right by the stove. The pan is ready to grab when I drain the broth. The shaker is ready to add my thickner.
If I need water to cook veggies, I fill the kettle half full in the morning and set that on the stove top too. Just before going out the door, I grab a bag of frozen veggies and throw them in the sink to thaw while we’re at church.
If I make a lettuce salad, I like to have it prepared ahead of time. I don’t add soggy things like cheese or cucumbers until we’re ready to eat. But sometimes I make it after we get home while I’m cooking the veggies and stirring gravy. Or if it’s a salad witha dressing to stir in, I’ll have all my ingredients prepared ahead of time. When you get home, grab, dump and stir and it’s ready to eat. Pulling a prepared bowl of salad out of the fridge not only feels efficient; it is efficient!
As for the dessert, I will generally make it on Saturday. Unless I have something I can pull from the freezer.
Our Sunday dinner often includes sweet tea. And to satisfy your curiosity about the leaves in the jar, this time I was drinking chilled mint water.
And that’s it! There’s no energy spent every week, figuring out what to have for Sunday dinner. It’s speedy and not much time spent cooking. It’s all routine. All it takes is some fore thought and preparation. Did you ever think of it that waiting until the last minute to decide a menu really cuts down on options? It does! Just pause a moment and think about it now if you’ve never done so.
Figure out what your family loves and work ahead to make that menu happen. Maybe your method is a crockpot meal thrown together Sunday morning. Or maybe you like putting a roast in the oven on low heat all night. Plan ahead; you will love the convenience of being prepared! And you’ll get to relish a satisfying Sunday dinner without sacrificing your precious Saturday. Bon Appétit! May your Sundays be filled with a delicious helping of joy!
It’s Summertime, folks! Regardless if the calendar hasn’t said so officially, it’s Summertime in our corner of the fields. I think June is one of the most beautiful months of the year! Trees are fully leafed and all nature has that lush, green look. Temperatures are moderate without the oppresive heat of late summer. Flower and vegetable rows stand stately- amidst freshly weeded or mulched pathways. Gardeners’ ambitions have not yet waned. All is fresh with new life and courage.
I want to show you a picture of our garden while it looks virtuous, because it will not look like this in August. As of now, I find it pleasant to gaze in it’s direction. The only exception is the unfinished mulching spots. I dislike those uneven surroundings.
You must remember though, it’s the man around here who loves to garden. Which undoubtedly makes me a stale, pallid housewife. Hey, I helped with part of the mulching when I mowed last week, can I get a mite of credit for that?!
Excuse me, I really got off on a bunny trail there. Bunnies like to hop around the garden if they get a chance and I obviously got sucked into their tracks. What I’m really here to talk about is recipes. Here are a few of our favorites for you to try this Summer. ⬇️
Melt butter, then stir in pecans. After they’ve browned a bit, remove pan from heat and stir in chocolate chips. Stir well until fully melted.
It works well to serve this topping in a small crockpot, because it must be kept warm to serve. It hardens over ice cream in a most delectable manner.
Back when I was a girl, we served this Chocolate Pecan topping at the Old Cookstove restaurant over homemade ice cream. It was and continues to be a favorite there. If you ever happen through northern Alabama on I-65, you really ought to swing into Danville, to try their good old southern, home cookin’! My Ma and Pa started this restaurant. It’s changed hands by now but it’s still the best eatin’ in town!
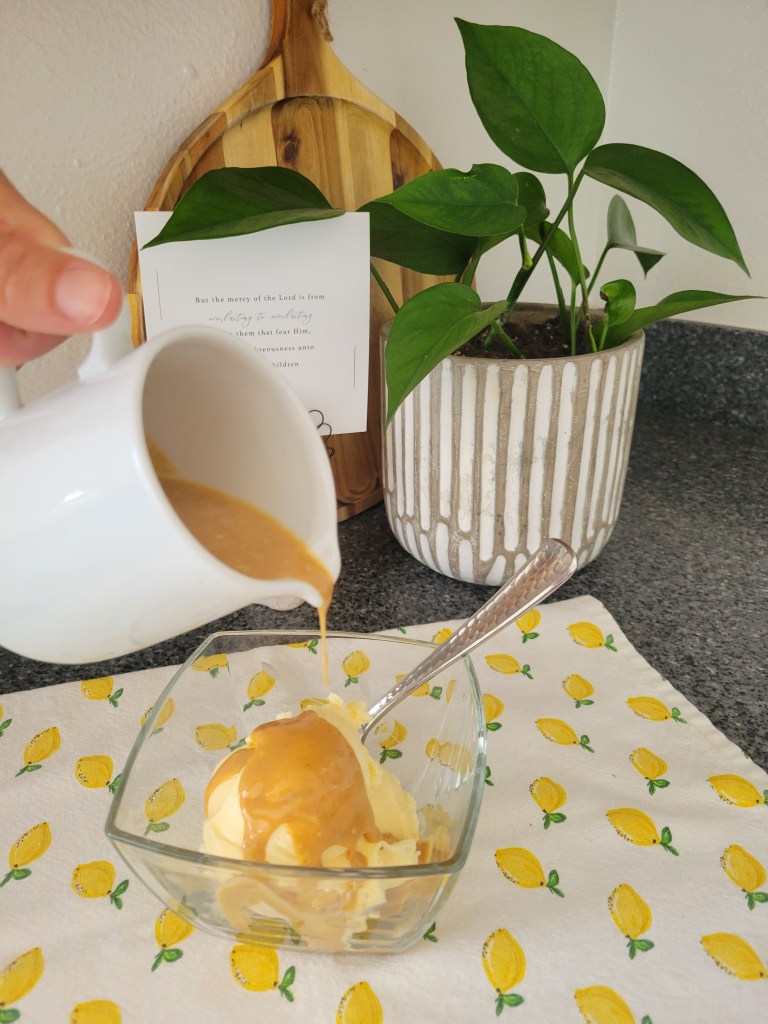
2.Peanut Butter Ice Cream Topping
Melt together 1 cup peanut butter and 1/2 cup butter. It’s as simple as that! Serve over a bowl of Schwan’s vanilla ice cream and don’t think about calories!
This too should be kept warm for serving. Or then reheated before serving.
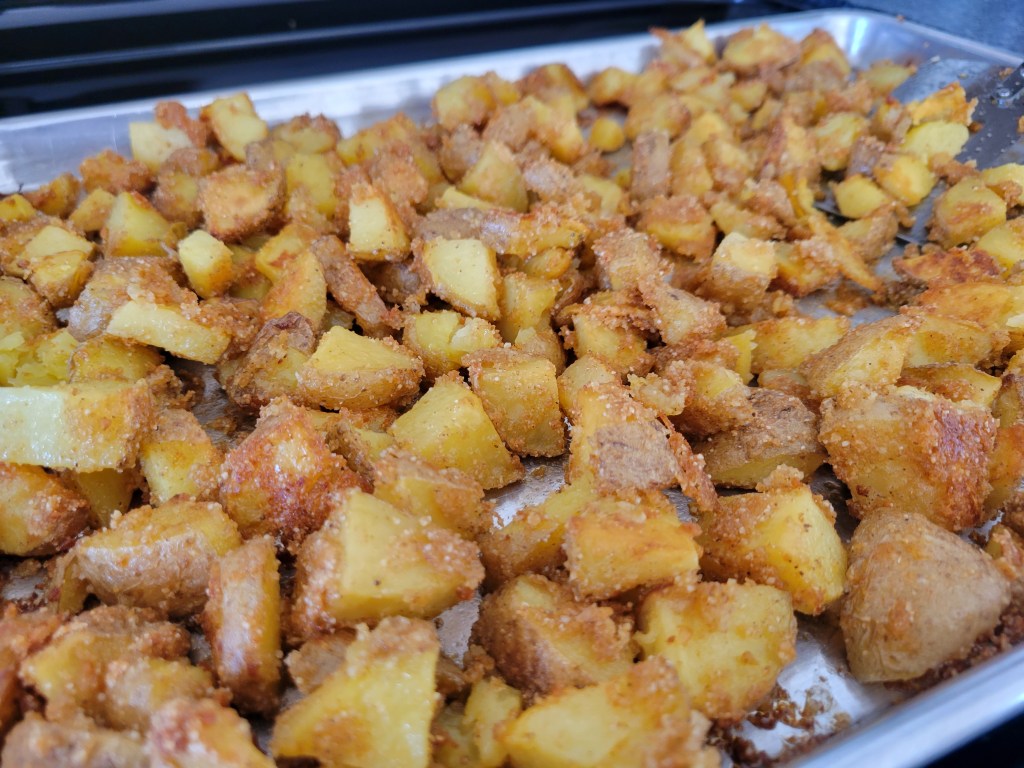
3.Oven Fried Potatoes
I often make these with a grilled meat supper. A quick, easy but delicious way to fix potatoes.
6 large potatoes, diced into bite size. Drizzle with 1/2 cup melted butter.
Pour this over the buttered potatoes and stir to coat. Spread on a baking sheet. Bake at 400* for 30-40 minutes. Stir once during that time to help them crisp evenly.
Typically I use sorghum flour in this recipe to avoid the gluten. I think most GF flours could be used successfully, except I wouldn’t recommend coconut flour.
4. Mandarin Orange Pie
This would be a taste of Summer in one bite- We absolutely love this pie! You can find this luscious recipe in a previous post On Eating Out And Pie
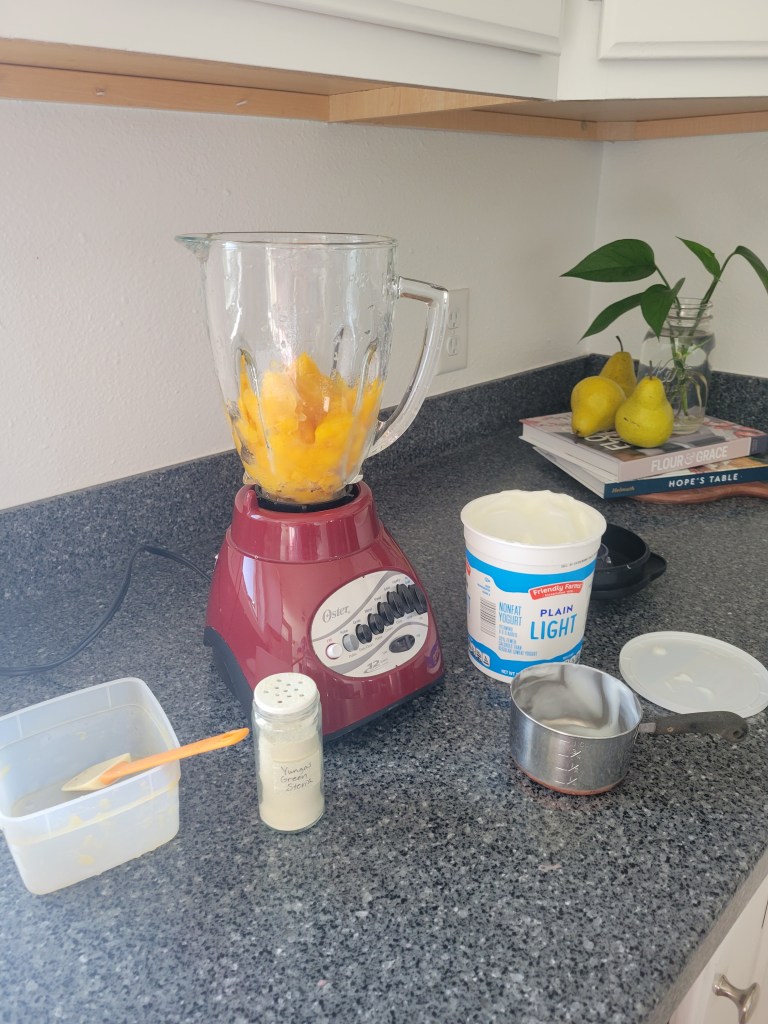
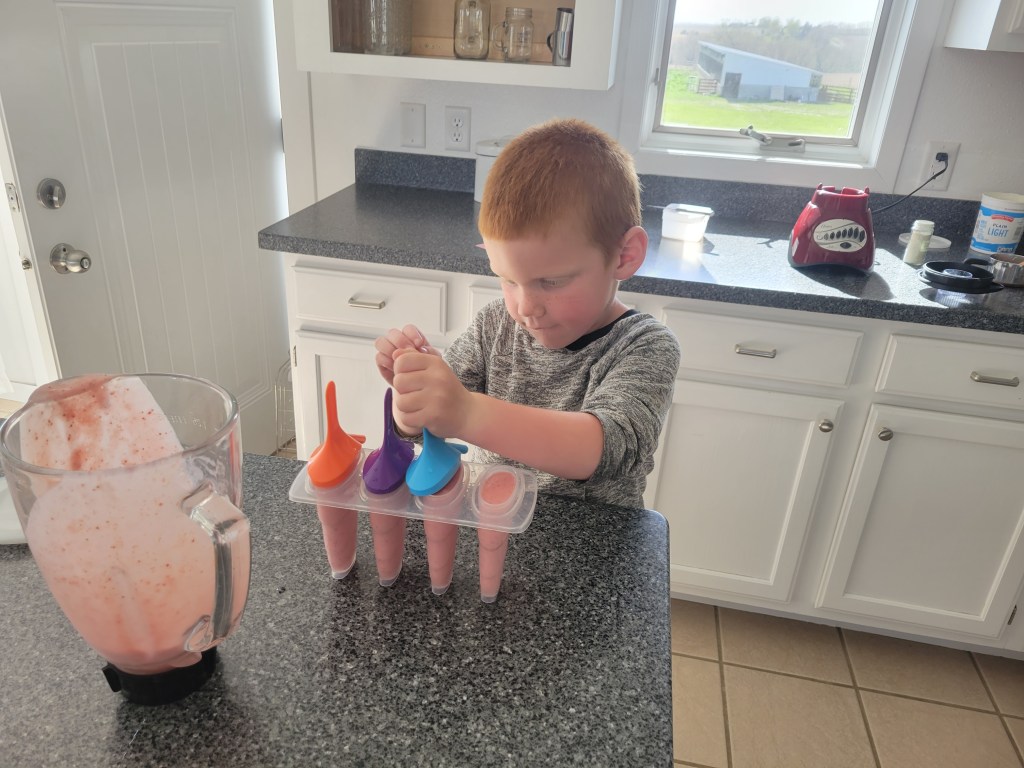
5. Healthy Fruit Popsicles
I cannot approve of my children sucking on those plastic, store bought tubes of popsicles with ingredients that are 100% horrible. I shudder when I think of the consumption of sugar and food coloring!
But I don’t mind my children eating these homemade popsicles frequently. They are free of food coloring and have only natural sugar. (this will vary depending on the yogurt you use. I use an unsweetened, plain yogurt.) These could even be approved for breakfast because they’re really only yogurt and fruit. A popsicle for breakfast? What kind of Mom am I?!
2 to 2 ¹/² cups fruit- fresh or frozen, 3/4 cup yogurt/ liquid, 1/2 tsp. lemon juice, stevia or honey/maple syrup to taste
Blend fruit until pureed. Add remaining ingredients and blend again. Pour into molds and freeze.
I used pints of my frozen strawberries/ peaches for the fruit and it worked great. I thawed them partially first, so they would blend better.
6. Blueberry Lemonade
Bring to boil 1 cup blueberries and 1cup of water. Boil for 8–10minutes. Strain, and add to 1 gallon of your favorite fresh lemonade.
I love the beautiful summery look of this lemonade. It’s extra delicious when I muse on the fact that it’s naturally colored!
7. And here’s my last one- a recipe for happy summer days. Barefoot little boy + puppy + wagon+ sunshine + green grass. 🌳🐶
First up will be an old, simple recipe. I never heard of it until I became aquainted with my husband’s family. Now It’s my family’s favorite breakfast! I make it nearly every Sunday morning. But it can certainly be served for supper too. I fall back on this when it’s one of those disorganized days when supper ideas elude me. It takes basic ingredients and little skill.
Dutch Babies
Turn oven to 410*. Put 1/4 C. butter in a 9 x 13 pan and set in oven to melt.
By the way, the nuts in the picture have nothing to do with the recipe.
In a bowl whisk together 1 1/2 C. flour and 1 1/2 C. milk. Whisk briskly, then let set a minute or two. Lastly whisk in 5-7 eggs. Pour into pan with butter and bake for 20-25 minutes. It will rise up looking proud and mountainous, but it’s only humblefare. Serve immediately with maple syrup. It deflates quickly once its out of its hot environment so be prepared to dig in promptly!
This original recipe is found in The Farmhouse Cookbook but I don’t follow it 100%. For one, this recipe is not as touchy as it sounds like in the book. I have it written in my version and taped inside my cabinet door. I don’t use as much butter as it calls for. If I have plenty eggs on hand I’ll throw in extra. If not, 4-5 eggs is fine. The reason to let the milk and flour sit a bit is to help dissolve the flour completely. It works best to add the eggs after those two ingredients are well combined. And I most certainly do not use the blender as it says to. That would be entirely too raucous for early mornings! Besides, who enjoys washing a blender? Not I!
Cranberry Muffins
These cranberry muffins are simple to make and look so festive! I like that it’s a yummy holiday treat off the beaten path of the ordinary peanut butter/chocolate/peppermint recipes floating around this time of year. I whipped up a batch today to have on hand for my weekend company.
Cranberry Muffins
3 c. sugar
3/4 c. vegetable or coconut oil (melted)
3 eggs
2 1/4 c. orange juice
6 c. flour
1 1/2 tsp. baking soda
1 T. salt
4 1/2 tsp. baking powder
1 12oz. bag fresh cranberries, chopped
Beat together sugar, oil and eggs. Add orange juice alternately with dry ingredients. Fold in cranberries. Fill muffins about 3/4 full and bake at 350* for about 18 minutes. Used with permission from Stutzman’s Culinary Secrets.
This is supposed to be made into 3 loaves but I like the muffins for cuteness and serving ease. I used melted coconut oil rather than vegetable oil. As I typed the recipe I noticed the baking powder and realized I never added it today! So now you know that they bake just fine with only the baking soda! 😅 I also poured in the juice then immediately recognized I hadn’t heeded directions about alternately. I proceeded to dump in the dry ingredients and it was all good! You’ll need to tell me the rules you break when you try them.
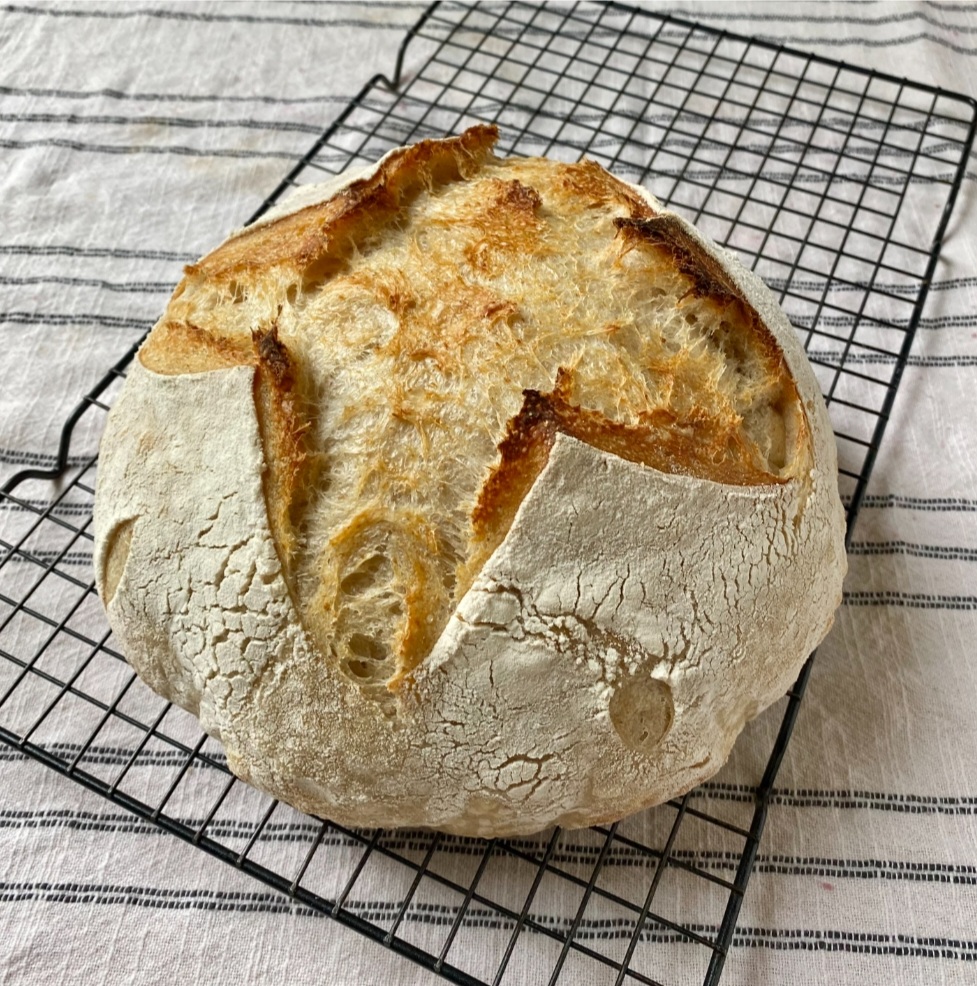
This post is written by my friend Valerie Miller. We’ve been besties for years and both find healthy living intriguing and necessary. Though miles apart, we still often chat a couple timesa week. A year ago she graciously sent me sourdough starter by mail. Since then my family and I happily devour sourdough bread on a regular basis. If you’ve not yet given it a try, there’s no better time than now to delight your taste buds and digestive system!
Sourdough: the rage in many a kitchen across the world. Although sourdough is a hot topic, and a popular trend these days, it’s a trend I’m very happy to subscribe to, so much so that my sourdough starter has taken the status of a pet, and making yummy, nourishing sourdough goodies has become a hobby.
Bread is Biblical!
Its interesting to take note of the way bread was a staple, and necessary for physical survival in Bible times. Of course, most special of all is the fact that Jesus proclaims himself as the Bread of Life, in a spiritual sense. Sourdough is believed to originate in ancient Egypt and remained the main method of leavening bread until bakers yeast replaced it a couple hundred years ago. In recent years, bread has become a villain because so many people have difficulty digesting it. And rightfully so. The bread you find on the grocery store shelf has been made with less than stellar grains, added preservatives, artificial flavors, and synthetic vitamins!
3 Simple Ingredients!
Sourdough bread can be made with 3 simple ingredients: flour, salt, and water. How incredible! I’d love to meet the person who discovered the magic of sourdough! Sourdough starter contains a mixture of lactic acid and wild yeast. During the fermentation process, these beneficial bacteria partially break down and “predigest” the starch and gluten proteins found in grains. Sourdough is not gluten free, but because of this process that has taken place, many people with a gluten sensitivity can enjoy sourdough bread. This process also puts sourdough bread lower on the glycemic index. In other words, it doesn’t spike your blood sugar like yeast bread does.
Baking with sourdough isn’t hard!
I’ll admit, I was intimidated by it at first. I thought it was a finicky thing that would produce only nice bread for the professionals. And I’m not a professional, so I anticipated ugly, flat bread! It’s true that I’ve had my share of flops, but those aren’t the norm. And flops are the perfect opportunity for the yummiest French toast!
Get a starter from a friend.
You can also make your own starter, but its much easier to start out with an established starter. To feed your starter, you will want to feed with equal amounts of starter to flour and a little less water. It’s important to use unbleached flour, and non chlorinated water to feed your starter. My favorite flour to use is King Arthur bread flour. It yields a robust, bubbly starter. Starter stored on the counter at room temperature needs to be fed once a day to keep it alive. Here’s the good part (and what I do): you can store your starter in the fridge if you’d like, and feed it only once a week. When you’re ready to use your starter for baking, take it out of the fridge, feed it, and after several hours, it’ll be ready to use. Before attempting to make bread, you’ll want to take note of how active and mature your starter is. A good rule of thumb is that it must double in 5 hours to be strong enough for a good rise in bread. The day before making your bread, feed it 3 times, morning, noon, and evening. It will be ready to go the next morning. For the recipe below, I start out with ¼ cup starter, feed it ¼ cup flour, and a little water. By noon, I have a ½ cup of starter to feed with ½ cup flour, and water. Before bedtime, its grown to 1 C, which I feed 1 cup flour, and water. The next morning you’ll have 2 cups starter, the perfect amount for your bread! (Be sure to save out a tablespoon or 2 of starter to set back and feed for the next time!)
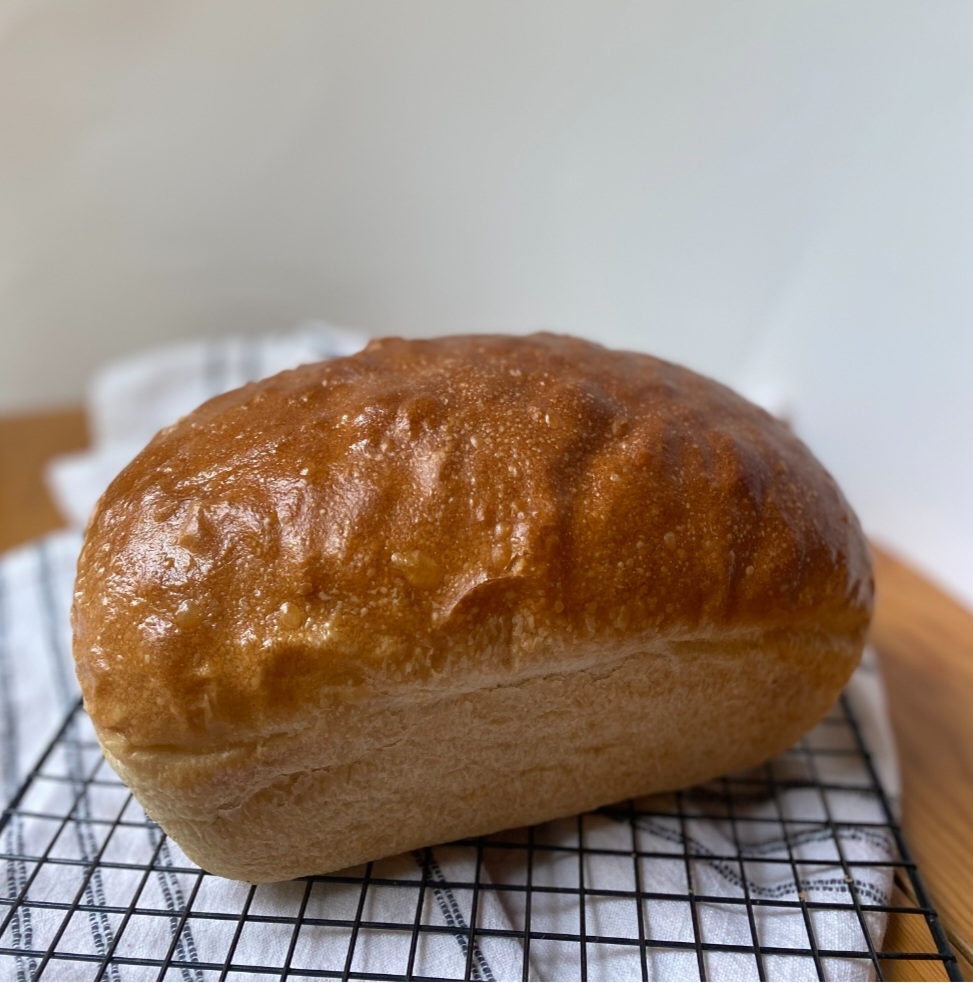
Sourdough Sandwich Bread
2 C fed sourdough starter 1 ½ C water 2 T honey 2 T melted butter, or oil Mix all together in your mixer bowl. Add: 5 Cups bread flour Mix for 3-4 minutes Turn the mixer off and let the dough rest for 20 minutes. Add 2 ½ tsp salt, and mix/kneed for 10 minutes Remove the dough from the mixer, put it into a dish, and cover with a lid or plastic wrap. Let it rise till double, approximately 3 hours. Punch the dough down, divide and shape into 2 loaves. Put the dough into well-greased bread pans, prick with a fork, cover with plastic wrap, and let it rise till double. (Approximately 3 hours) Bake at 375 for 35 minutes. Butter the tops and let the loaves rest in the pans till partially cool. This will help keep the loaves soft and prevent the bottom from getting crusty.
Sourdough pancakes
2 C fed sourdough starter 2 eggs 1/4 C melted butter 1 tsp baking powder 1/2 tsp baking soda 1/2 tsp salt Mix the starter, eggs,butter and salt. Add the baking powder and soda and mix just until incorporated. Fry pancakes in lots of butter!
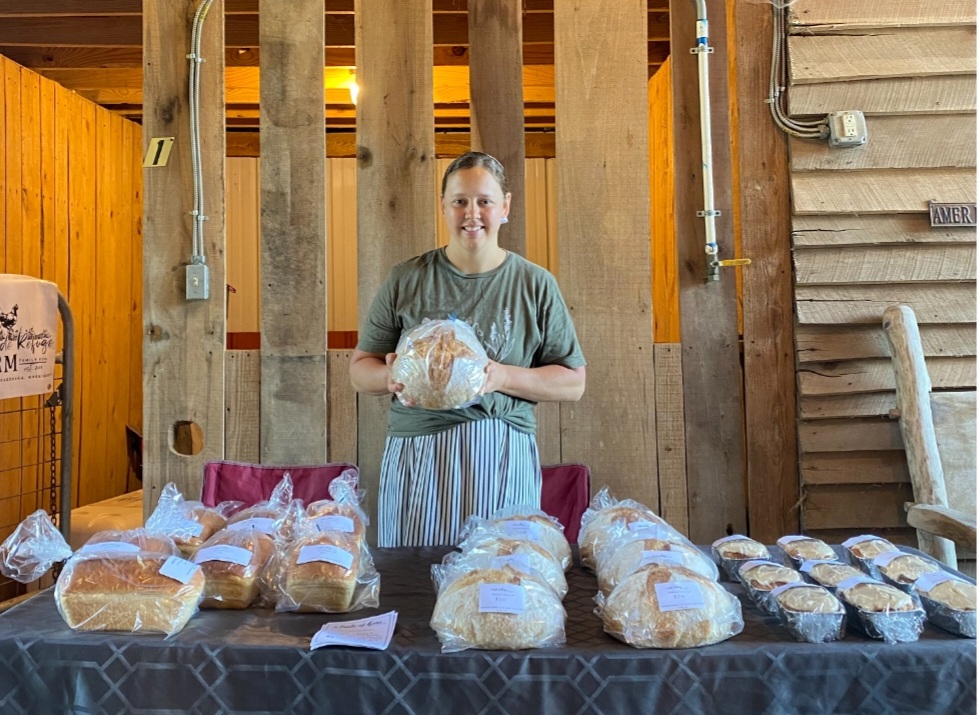
I enjoy selling sourdough goodies at a local Farmer’s Market
I’m Valerie Miller, wife of David and mama to Austin, Felicity, and Eric. We reside in Athens, TN. As a busy mom, with a side of homeschooling, I don’t find much time for hobbies these days. Healthy living/eating, of which sourdough is a large part, has become my “hobby”, and it’s so satisfying to know I’m fueling my family with nourishing food! You can contact me at fivesouthernmillers@gmail.com
Spring hobbled in hesitantly this year with so much huffing and puffing it sounded like it would blow the house down! The weather kept throwing cold spells at us with only a sprinkling of mature warmth. But finally. At the very end of May- Yay!!! Yay for bright sunshine, blue skies, the scent of fresh cut grass and pleasing temperatures! And its an all time triple yay for NO wind!! I’m confident its been worse this year. I don’t want to complain, but can I squeak out one negative comment? I promise to also include positivity. I love fresh air but I only wish it wouldn’t move at such an energetic speed! When we have a day with sunshine and zero wind, it’s in order to pause and meditate on the fact. And for sure, thank the Creator of the wind that there’s no wind!
With the arrival of Summer, we must eat out. At least, if you ask my children. And I doubt yours are much different than mine. Eating out, but not in town. Eat in the country. In Nature. In the shade. In the grass. My children absolutely love to eat outside and I do too. It’s simply enjoyable to eat food outdoors plus it cuts down on tableside crumbs, which makes it a win win! It’s my belief that it takes minimal effort to take the food and accessories outdoors.
Here’s the method I use: First off, just cook whatever you have on your menu. You don’t have to grill or have picnic foods. A casserole or pan of pizza is fine and often more simple than grilled hot dogs or hamburgers with all the toppings.
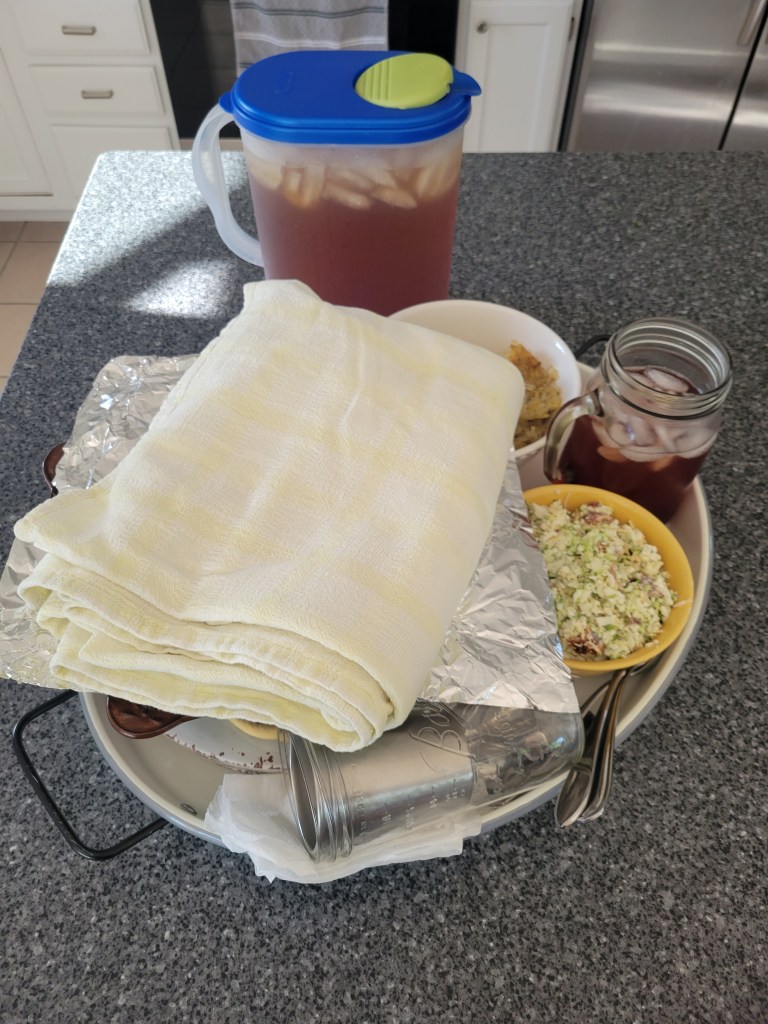
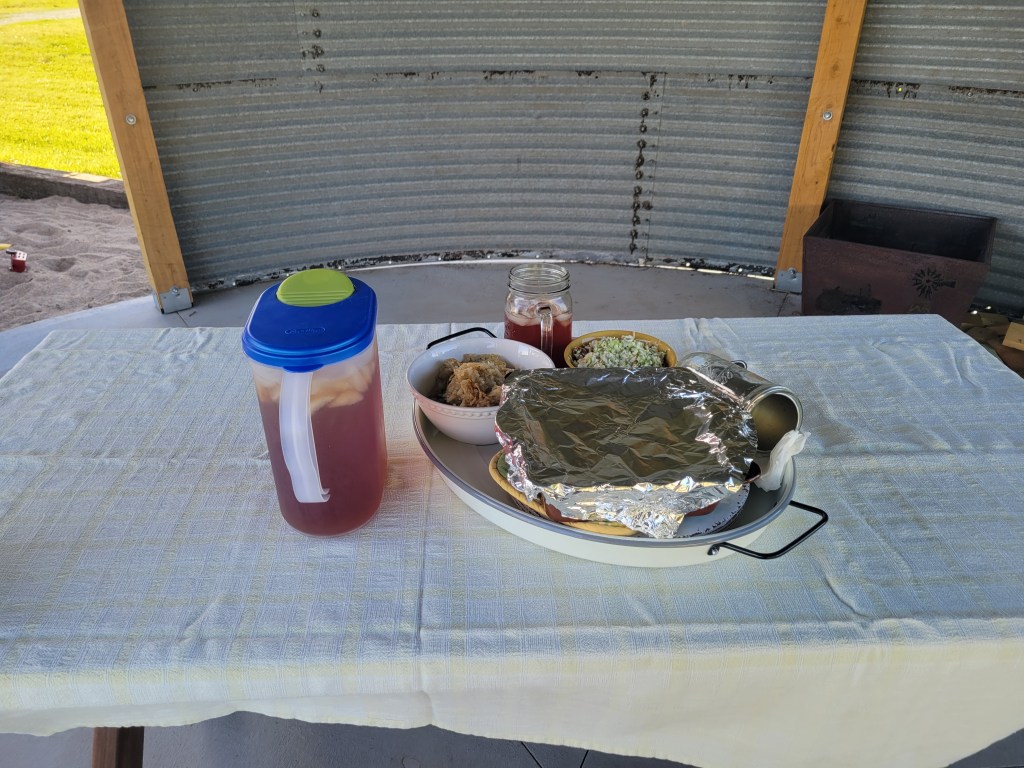
I keep a beautiful Hearth & Hand magnolia tray that’s extra large, within easy reach. This was a Mother’s Day gift from my husband one year and I love and use it so much! On this tray I pile our food, utensils, plates, cups etc. Utilize every possible space. On top of the plates I’ll set the casserole dish or a bowl of food. Stack the cups together. On the very top I throw on the tablecloth. There might be a pitcher of tea and maybe one or two other items to carry separately but my big tray holds 90% of things.
This tray comes from TargetWe ate meatballs, fried potatoes and broccoli cauliflower salad this time
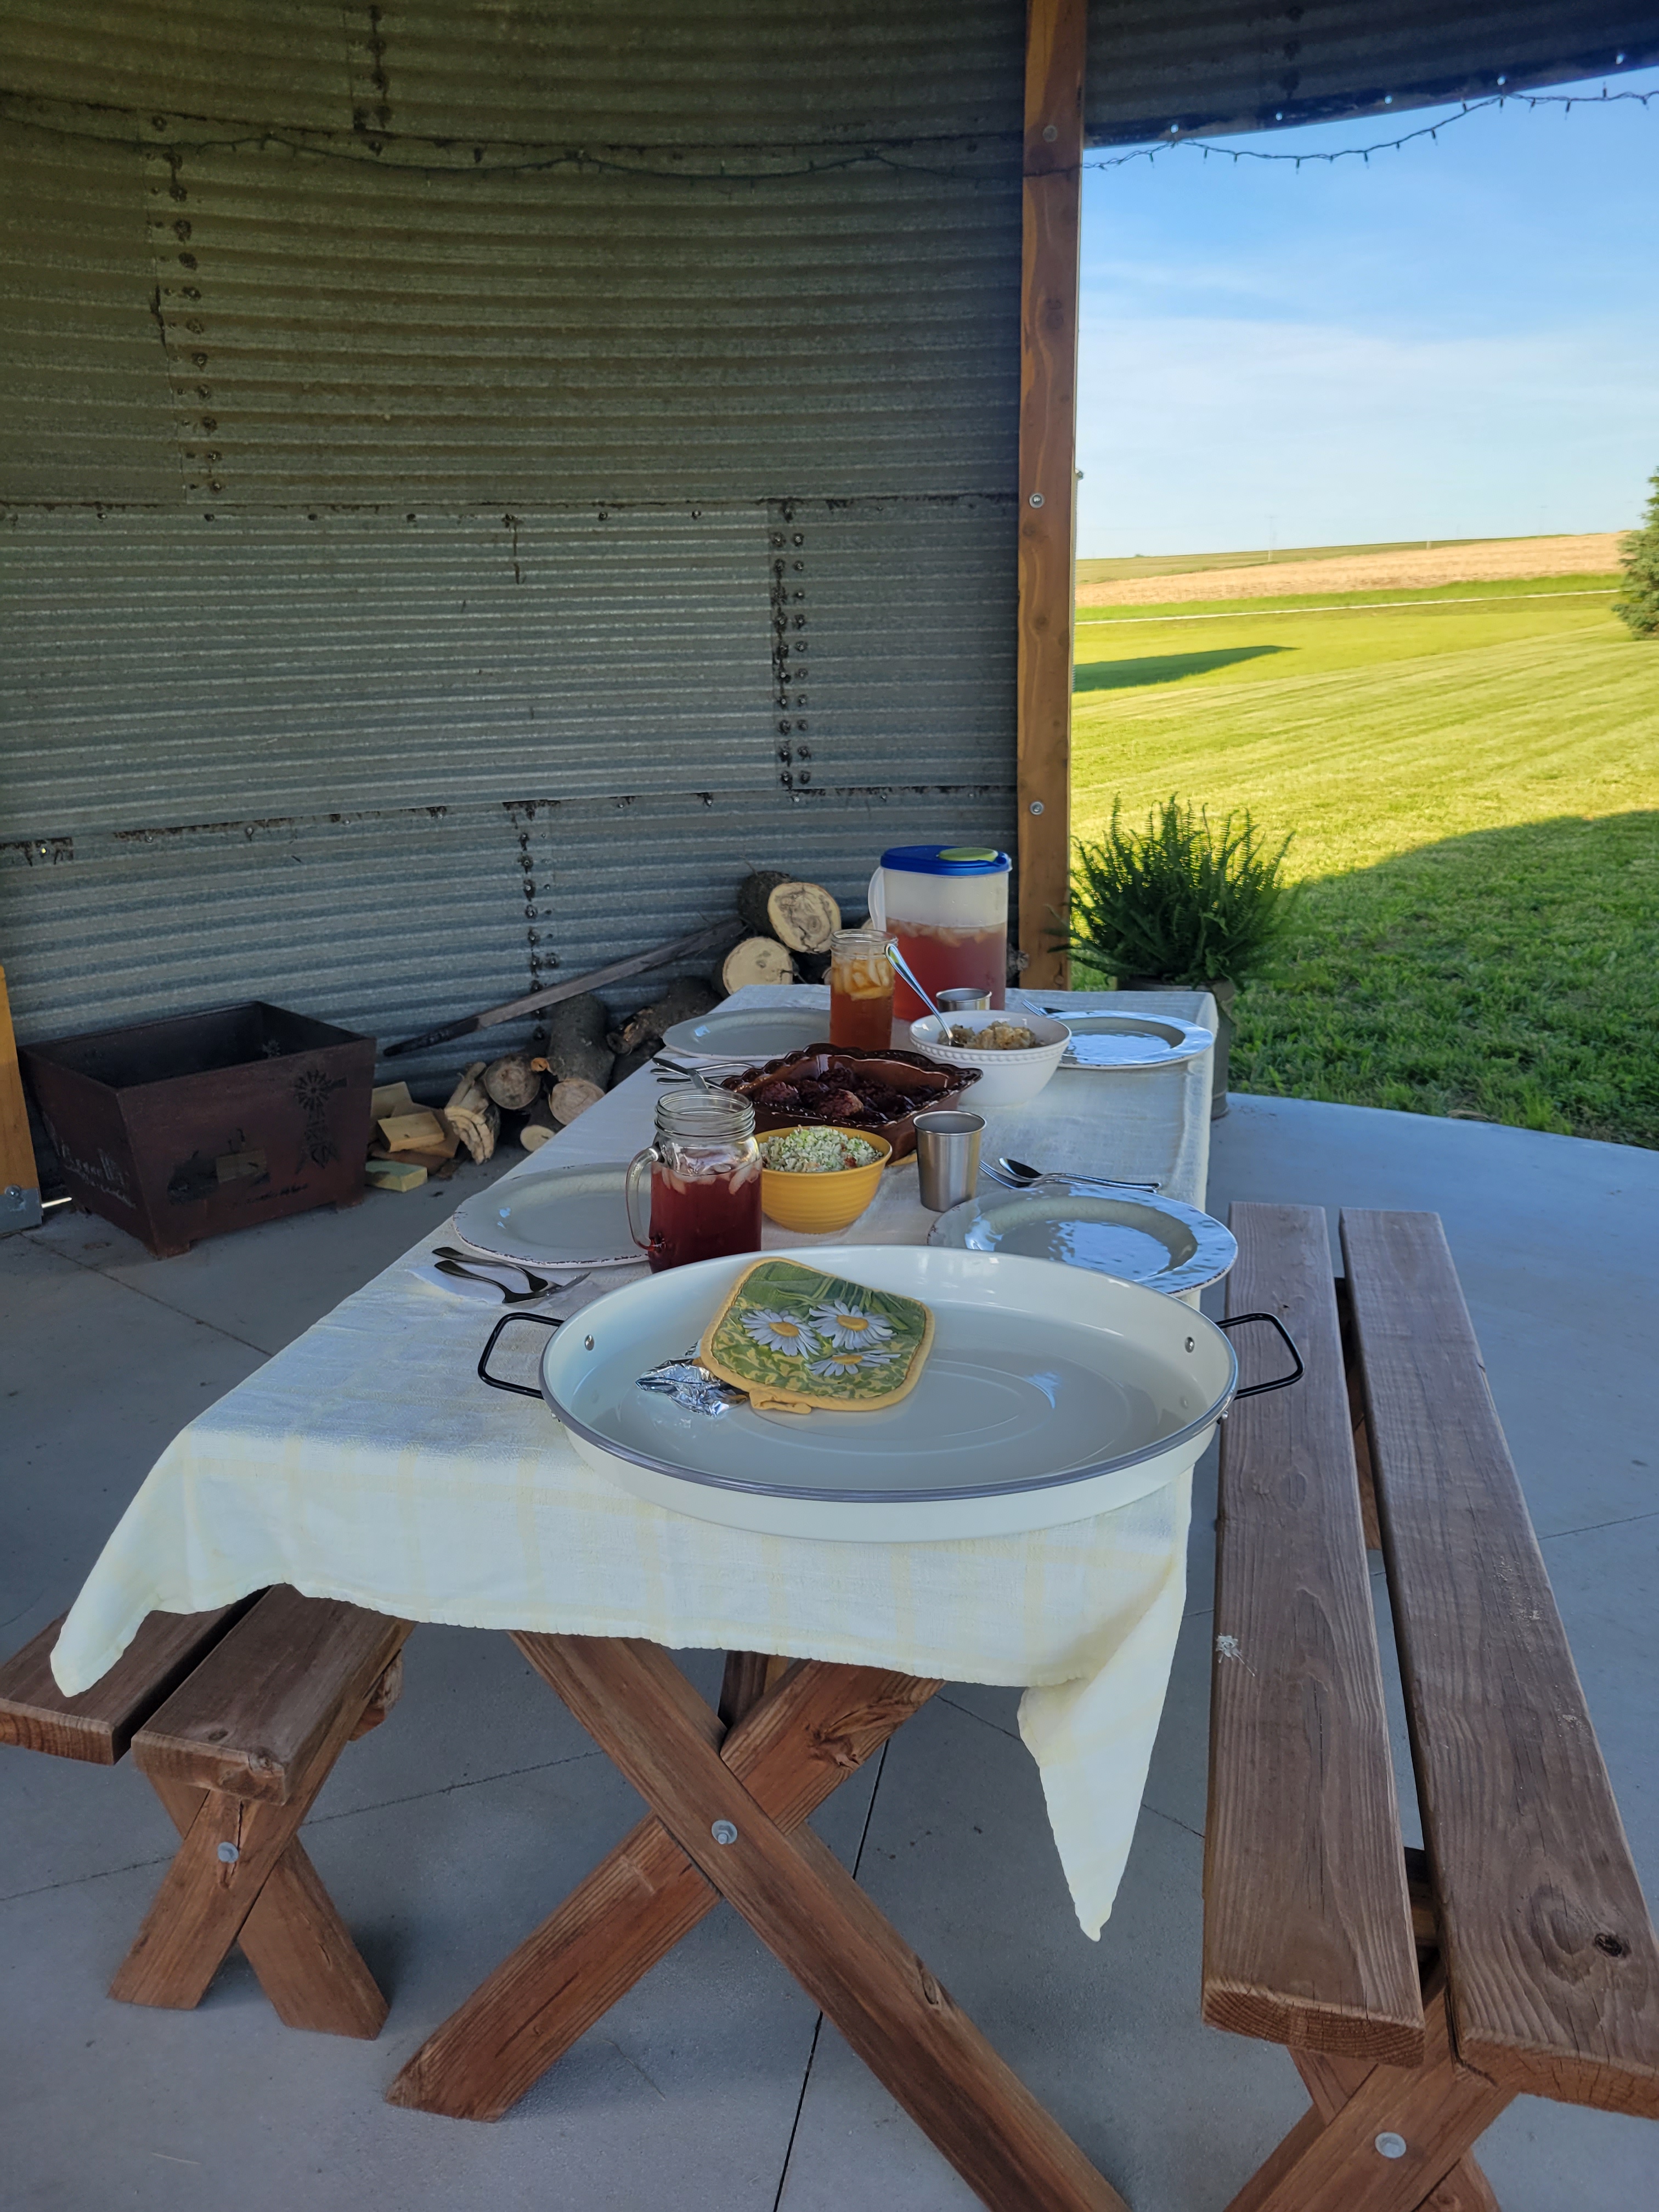
Then you just haul it outside. You’ll need the tablecloth first so that’s why you place it on top of everything else. Throw that on the picnic table (or grass), then set out the plates and food and voila! You’ve got an outdoor meal without making a dozen trips back and forth!
We love our grain bin gazebo Jerald built last Fall! If you’d like info on how to construct one yourself, you can read about it here
This tray method may not work as well if you have a large family. But you could still use the same idea except you’ll need to solicit help to carry out the serving bowls of food, because obviously it won’t all fit on one tray.
Sometimes even for lunch, I’ll fix the children’s plates with leftovers then pile that along with their water cups on a cookie sheet and take it out to where they’re playing. It’s fun for them besides it helps keep the kitchen neat! On a rainy day recently we even had an indoor picnic in their tent under the bunk bed.
When it’s only our family, there’s several reasons I prefer using real dishes and utensils for picnic eating above disposable. 1) It doesn’t blow away in the energetic air. 2) Especially for children who need stability in more ways than one, real plates are much more practical to eat off of. I use a malmac type. 3) The heavier dishes help hold down the tablecloth in the energetic air.
When I’m hosting large groups of people I do like disposables for easy cleanup. But I’d still recommend having a couple malmac bowls if you have small children in attendance. But if you don’t live in Nebraska this may not be necessary.
Now I’m coming at you with that piece of pie- a refreshing orange pie which tastes like Summer in one bite. Not hard to make. Perfect for eating out.
Mandarin Orange Pie
1 ¹/² c water- heat to boiling
5 T. Clear jel
1/2 c water
3/4 c sugar
1 pkg. orange kool–aid
2 15 oz. cans Mandarin Oranges, drained.
While water heats, whisk together clear jel and half cup water. Then stir in the sugar and kool-aid. Pour this mixture into the boiling water and cook until thick. Remove from heat and cool to room temperature. Stir in the oranges. Chill.
White filling: Beat together 4 oz softened creamcheese & 1/2 cup powdered sugar. Last beat in about 3/4 of an 8 oz cool whip.
In a baked pie shell or graham cracker crust, spread a layer of the white filling then top with the orange pie filling. Last, spread with remaining cool whip. Garnish as desired. This can be served immediately or chilled for a few hours. This will make one large pie.
This week, take time to eat outside. That is, if the air isn’t too energetic.
Are frigid temperatures and snowy days hounding you? We haven’t had much and I’m the rarity wishing for more snowy weather. I just love me a good old blizzard! Growing up in Maryland, I remember the excitement of heaps of snow, power outages and our trusty cook stove! It kept the kitchen toasty warm and when we didn’t have other cooking options, you really could cook or bake with it! Although in that case, it took skills to a new level. I remember Mom putting a ham bone and beans on to simmer all day. The shelf above it was a perfect place for rising bread loaves …..Ah what cozy memories!!
I admit I’ve never been caught in a blizzard high up on a lone mountain. Nor have I been homeless, hunkered beneath bridges for cover from the snow. I have always been blessed to experience the comforts of home and by large, enjoy winter on the warm side of the windows. So I have concluded perhaps the reason I love winter so much is the indoor coziness of home. Winter is cold and harsh, no doubt. But it’s also invigorating air, sledding, moonlight on snow covered fields, and warmth of home after a hard day! Love of family and supper’s aroma the moment you step inside speak comfort. Add a pretty tablecloth, a good smelling candle, and China dishes. Every once in awhile it’s fun to get out that China just because! Best of all, enjoy each other’s presence together at home. Tangible comfort at day’s end. That warms the heart!
Our supper table
I also think Spring is more special after you’ve been through real winter. Isn’t that true spiritually too? After several rough months, God sends the warm sunshine and tiny shoots of green growth. We revel in that happiness all over again! Joy comes in the morning! No winter lasts forever, all ye down cast souls. Listen to this promise from God– While the earth remaineth, seed time and harvest, and cold and heat, and summer and winter, and day and night shall not cease. Genesis 8:22
Black Bean and Pumpkin Soup
If you need a hot, nourishing supper to warm up from the freezing climate, try out this Black Bean and Pumpkin soup. I’ve made it numerous times and always hear positive things. “Mom, this is the goodest soup!” “It’s my favorite!” Jerald even suggested this would be a good soup to feed a group of men on a cold day. It’s very hearty and filling!
Don’t let the name scare you… it is for true delicious! I also advise not letting certain picky individuals hear the name, particularly the males in your household. For sure if they’re the type to presumptuously conclude on how it will taste ere they put the first bite in their mouth!
Sauté together: 2 T. Olive oil or butter, 1 green pepper diced, 1 onion diced, 3 cloves garlic.
Add in: 3 cups chicken broth, 1 15 oz. can diced tomatoes, (I like adding a 28 oz. can of tomatoes because it makes more soup and also because we love tomatoes in this) 2 t. chili powder, 2 t. cumin, 2 t. oregano, 2 t. salt, 2 T. parsley. Bring to a boil and add in:
2 1/2 cups cooked chicken, 1 15 oz can pumpkin (or 2 cups), 2 15 oz. cans black beans. Simmer about 10-15 minutes. Serve with corn chips, shredded cheese and sour cream. I love the convenience of having my own home canned beans. I use 2 pints for this recipe. Check out how to easily can your own here. Credits for this delicious soup go to Velma Birky.
A tip on the pepper and onion- I always like to dice the extras from the summer garden, fill little ziplock bags and freeze them flat. Later, you can neatly stack them in the freezer in a larger ziplock, for organization. When a recipe calls for peppers or onions I’m all set to grab a baggie, slice or break off what I need and throw them in!
The frozen onions and peppers
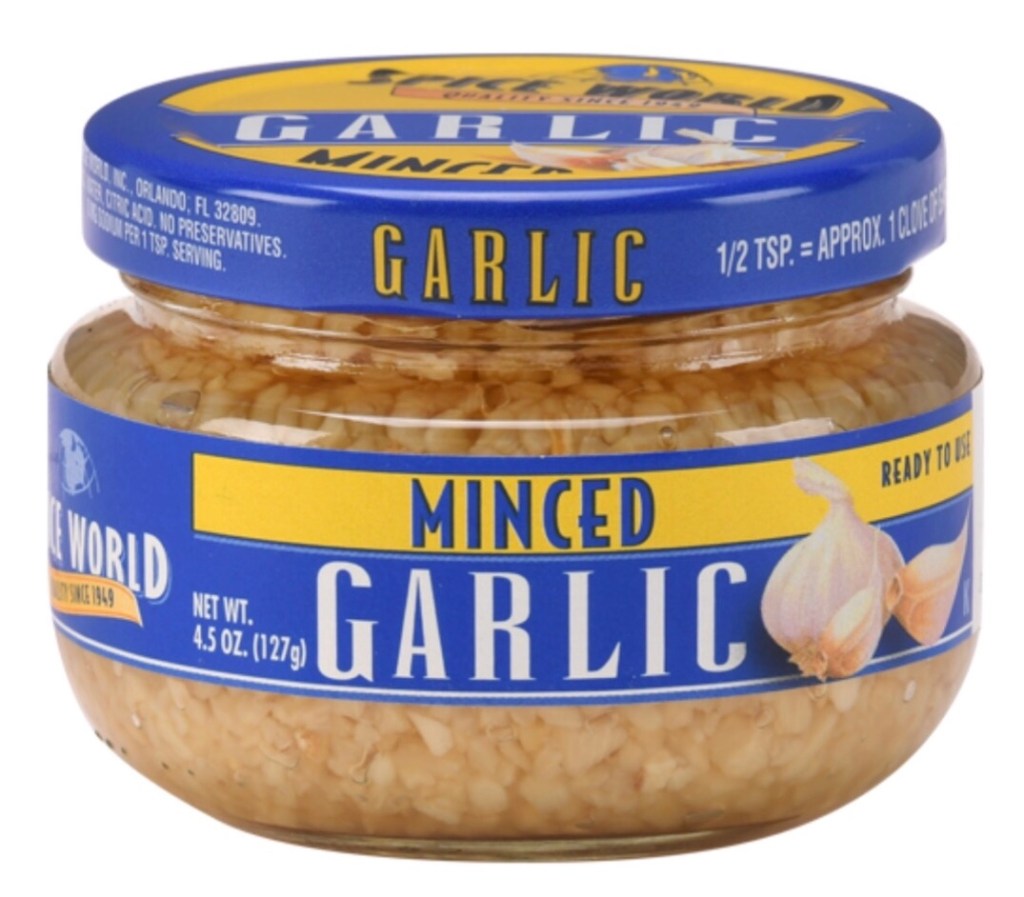
And on the garlic, I never keep garlic cloves on hand anymore since I’ve learned the convenience of fresh minced garlic I can buy. A big plus side is that there’s no garlic press mess either!! It’s super simple to add in to many dishes and it will keep in the fridge a very long time. You can also conveniently sneak in extra garlic for those health benefits!
This is what I like to use
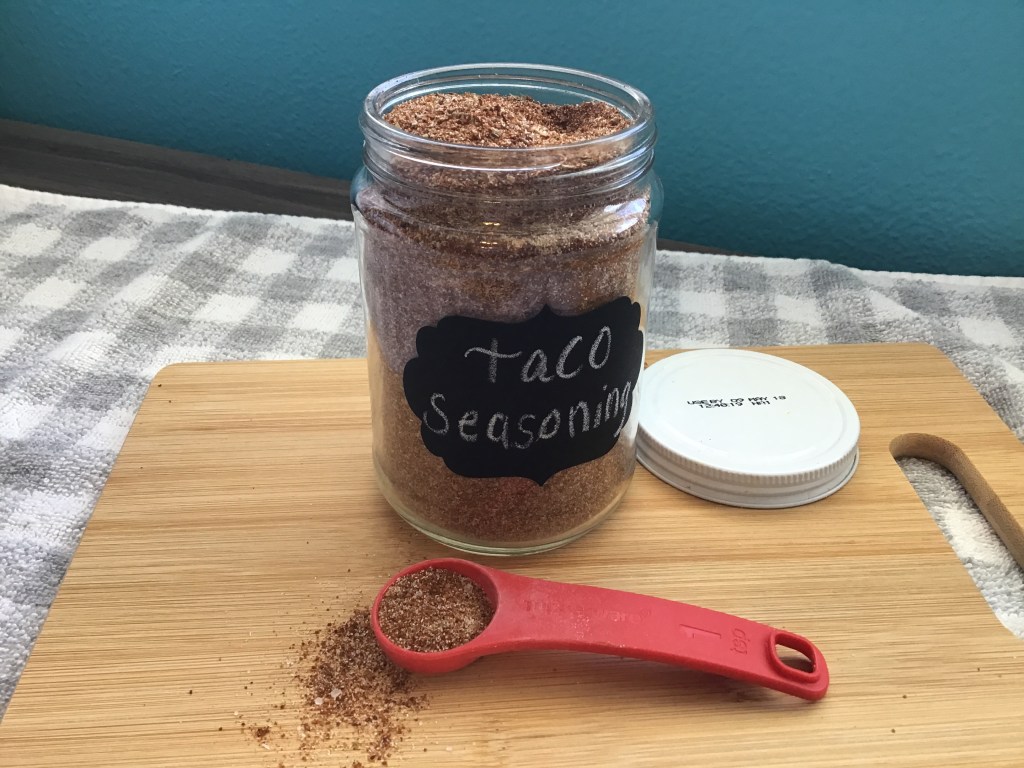
Homemade Taco Seasoning
The last time I made this soup I tried another time saver. I used my homemade taco seasoning to replace all the seasonings except the parsley and salt. It worked perfectly! I used 2 Tablespoons.
I like making a double batch of the following recipe at a time
Taco Seasoning
1/2 T. Cumin, 2 T. Chili powder, 2 t. Garlic powder, 2 t. Paprika, 2 t. Oregano, 4 t. Onion powder, 1 t. Salt.
Mix all together and store in a small glass jar in the freezer. The freezer keeps it from getting clumpy. Remember, homemade things don’t have that anti-caking junk in it! Use approximately 2 Tablespoons to replace one boughten packet of taco seasoning. I normally just sprinkle some in and kinda guesstimate. I taped the recipe on the back side of the jar. When the jar needs refilled you got the recipe right there!
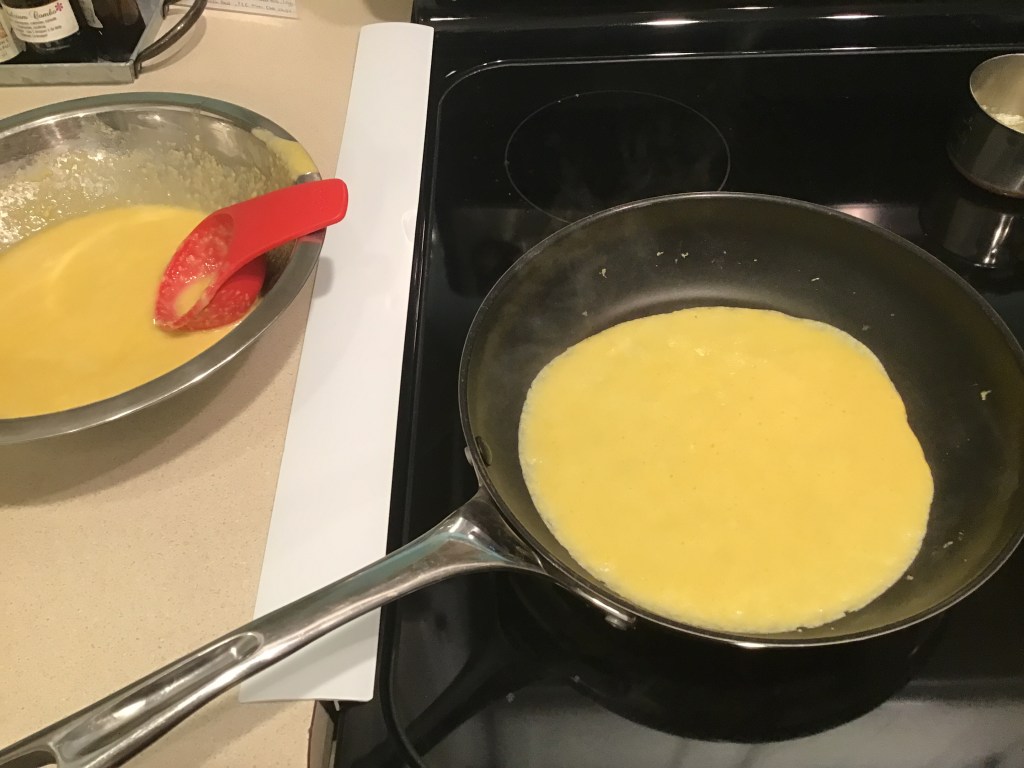
Gluten Free Crepes
Now for some dessert! If your feeling a sweet tooth craving coming on, try out these tasty crepes. They’re not that sweet but yet fit the bill! And they’re so good looking you could easily serve them for a tea party or brunch!
Mix first 5 ingredients. Beat eggs and add in to the first part. Whisk in the remaining ingredients and let set for 5 minutes. Pour 1/3 cup batter into a nonstick skillet. Shake pan to flatten out as thin as desired. Cook on low for 1-2 minutes on each side.
Aim for lightly browned like this on both sides
I put a paper towel between each layer to prevent sticking. These are also fine made ahead of time and refrigerated until ready to serve.
For filling you can put in whatever you choose- yogurt, whipped topping, cream cheese or a mixture of these. I’m liable to throw a few things together but here is a recipe if you’d like.
Cream Filling
2 1/2 T. Simple sweet, 3 oz. soft Cream cheese, 3/4 c. Whipping cream, 1/3 c. Greek yogurt.
Beat cream cheese and sweetner until smooth then add yogurt. Beat whipping cream separately until stiff, then mix into cream cheese mixture. Spread this inside the crepes and sprinkle on fresh fruit or drizzle with any pie filling you desire. Used with permission from Simple Foods.
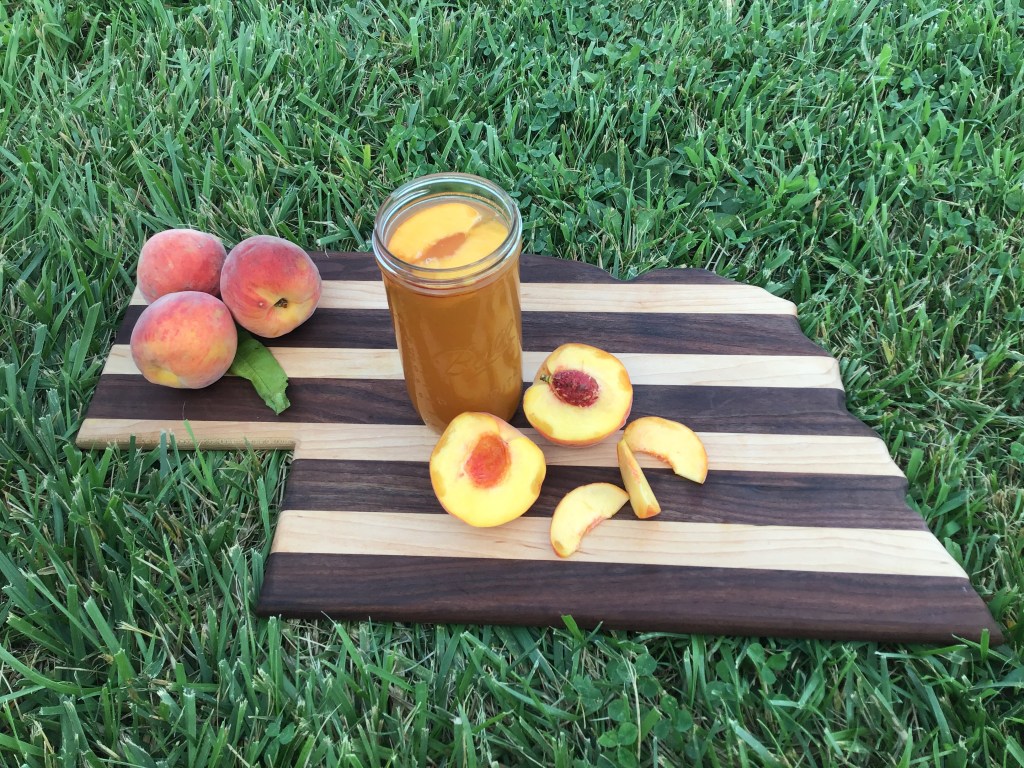
If your an avid sweet tea drinker like my man is, you really ought to try it with peaches! Maybe you love Lipton’s brand of peach tea, but with the second ingredient being high fructose corn syrup, it’s just not legal in my book. So read on if you want a better alternative.
After seeing a recipe for peach tea and trying it out, I recreated it to suit our tastes. We absolutely love this tea! Fresh peaches aren’t always available but that’s the key to this tea!! Don’t despair at the number of steps…..it’ll be worth the effort!
🍑 Sweet Peach Tea 🍑
6 peaches, 4 cups water, 2 family size Lipton tea bags, 1/4 cup lemon juice, 1 1/2 to 2 cups sugar, or stevia to taste. Note- I use 1 1/2 cups raw sugar and 1 teaspoon stevia glycerite. Jerald doesn’t really care for only stevia sweetened tea but I hate adding a ton of sugar, but yet it really needs to be nice and sweet! So topping it off with stevia helps out and you’d never know the difference!
*Halve and slice two unpeeled peaches, laying on parchment paper lined pan. Freeze overnight or at least four hours.
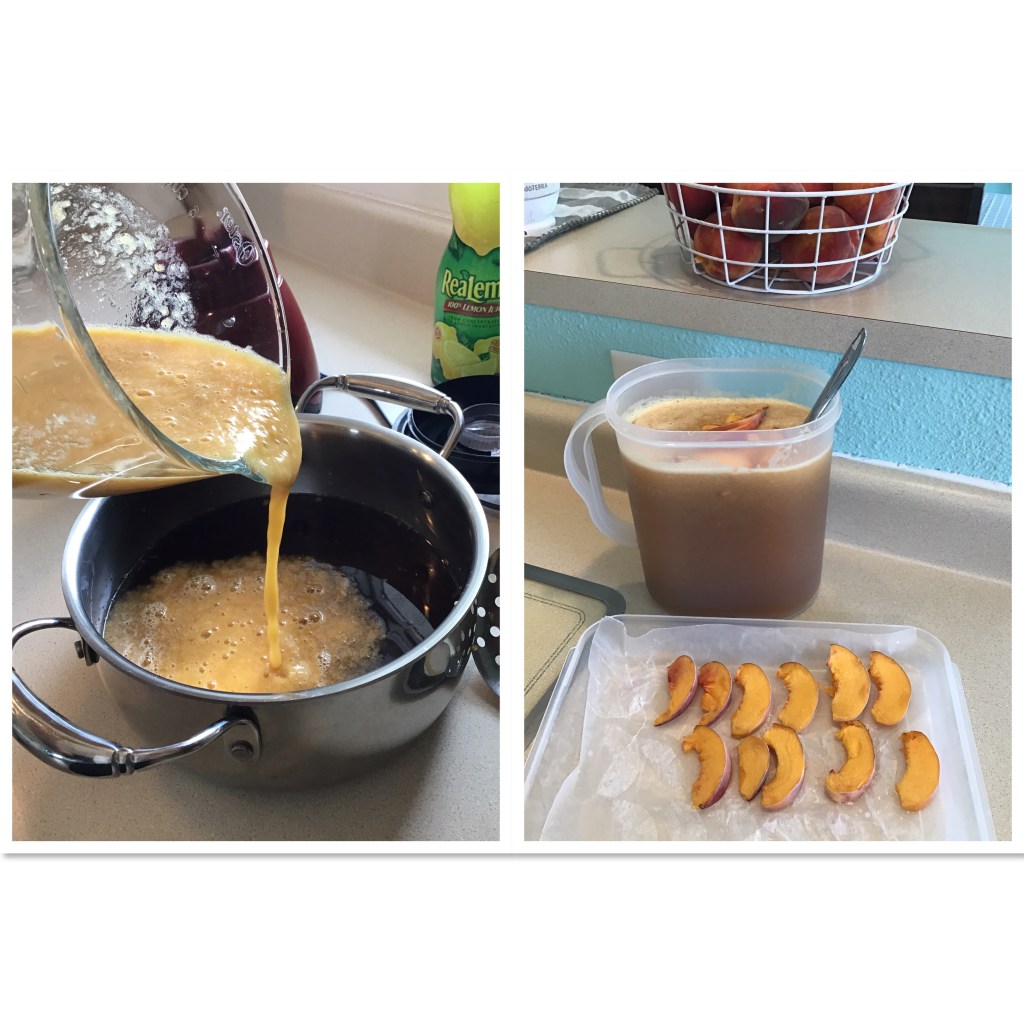
*Bring water to a boil, add tea bags and steep for 12 minutes. Remove tea bags and add sugar. Peel and dice four peaches and add to the brew. Let it set for 1 to 3 hours.
*Using a slotted spoon, dip out the peach chunks and place in blender along with the lemon juice. Blend and add back into the tea brew. Stir well.
*Pour brew mix into a gallon pitcher and add enough cold water to make about a gallon. Add in about half of the frozen peach slices, but save enough for each glass of tea when serving. Chill the tea for several hours. I do not like to add a lot of ice because it dilutes the peach flavor. Also, the peach flavor becomes stronger the longer the tea sits. So if you really want a strong flavor, make it a day before you actually want to serve it!
* Just before serving, strain tea through a sieve and pour back into the pitcher. When ready to serve, place several frozen peach slices in each glass and fill with tea. Garnish the cups with a slice as well. Enjoy a glass of real peach tea without those junky ingredients! Note- if you don’t mind the peach cooties, you can totally drink it unstrained. It just looks prettier if it’s strained.
I’m decidedly partial to this gorgeous cutting board Jerald gifted me last year
This tea always looks stunning served in pretty glasses with the peach slices! It’s delicious anytime but we love it with a grilled summer supper.