Gardens And Greenbeans

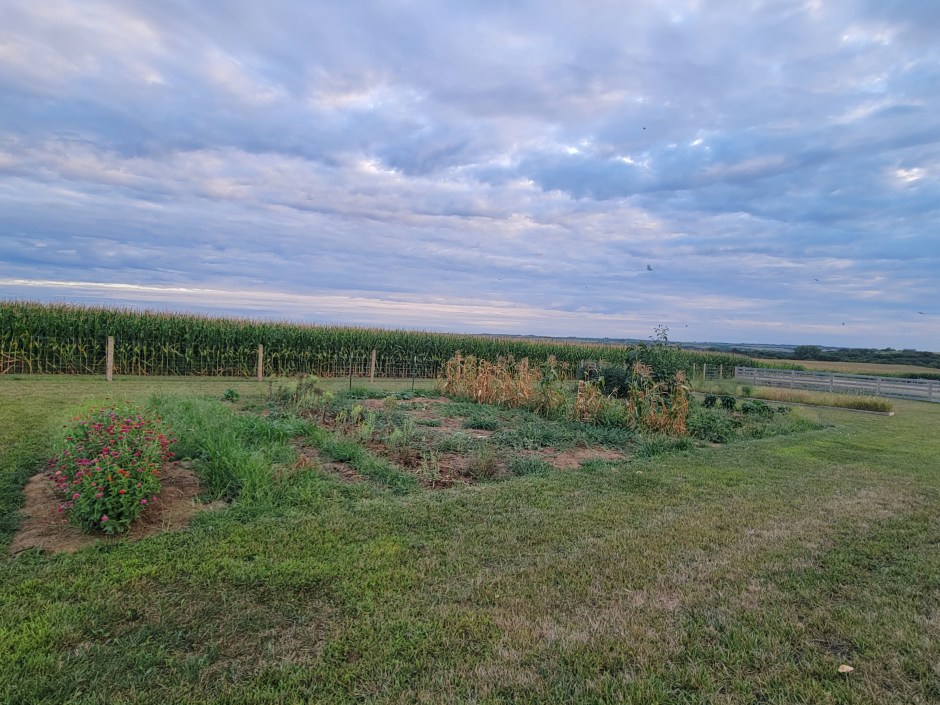
Mary Mary quite contrary, how does your garden grow?

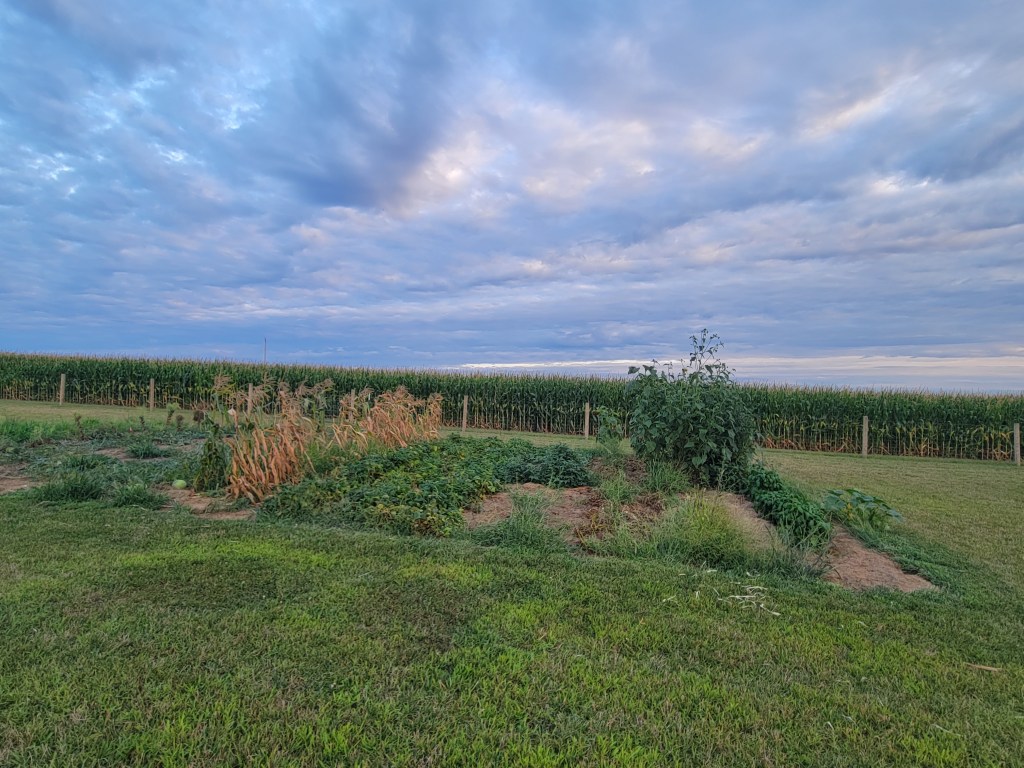
Well, the picture  shows the answer for ours. There’s little produce found amidst the weeds. Jerald is the gardener around here and I help him sometimes with mulching or such. But this year something went koo koo to a greater extent than normal.  It’s an overall flop of about 90%. I wouldn’t be suprised at all if this was the norm if the garden was my responsibility. (Actually, there wouldn’t be a garden if I had to do it- I’d patronize Farmers Markets.) Because of bad experiences like this year, gardens depress me. And some people say gardens are therapy?! Life. Growth. They feel so close to nature.  I see weeds, bugs, probable death of plants and imaginative snakes. I feel close to dirt.  Occasionally there’s actual food to eat.

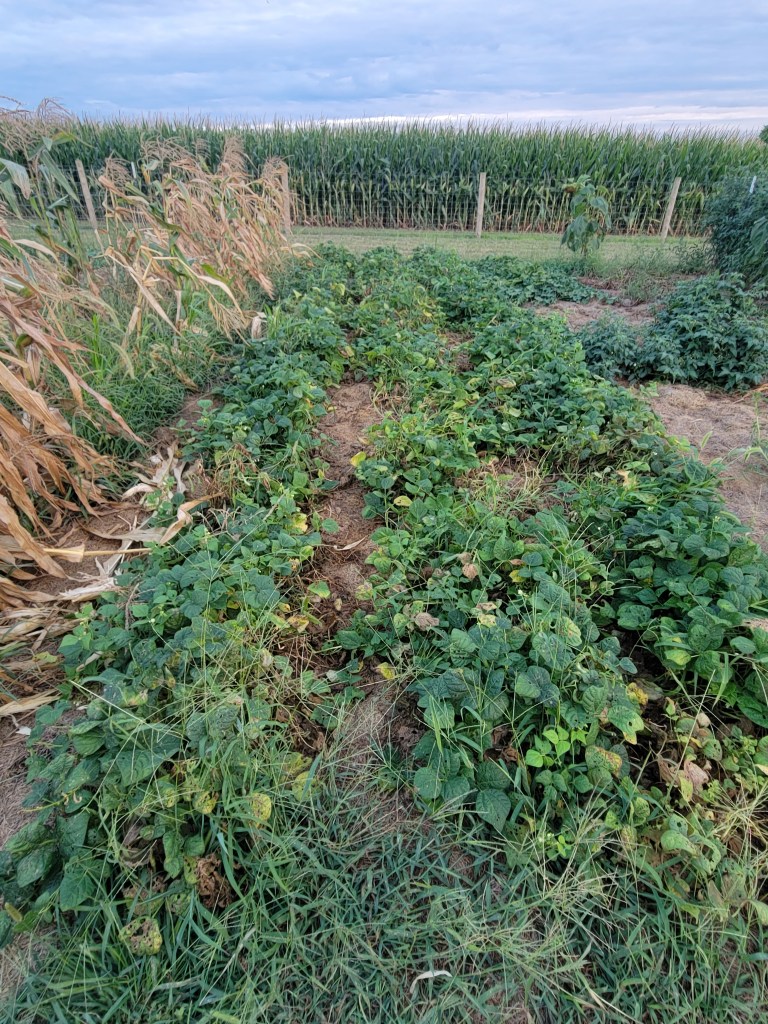
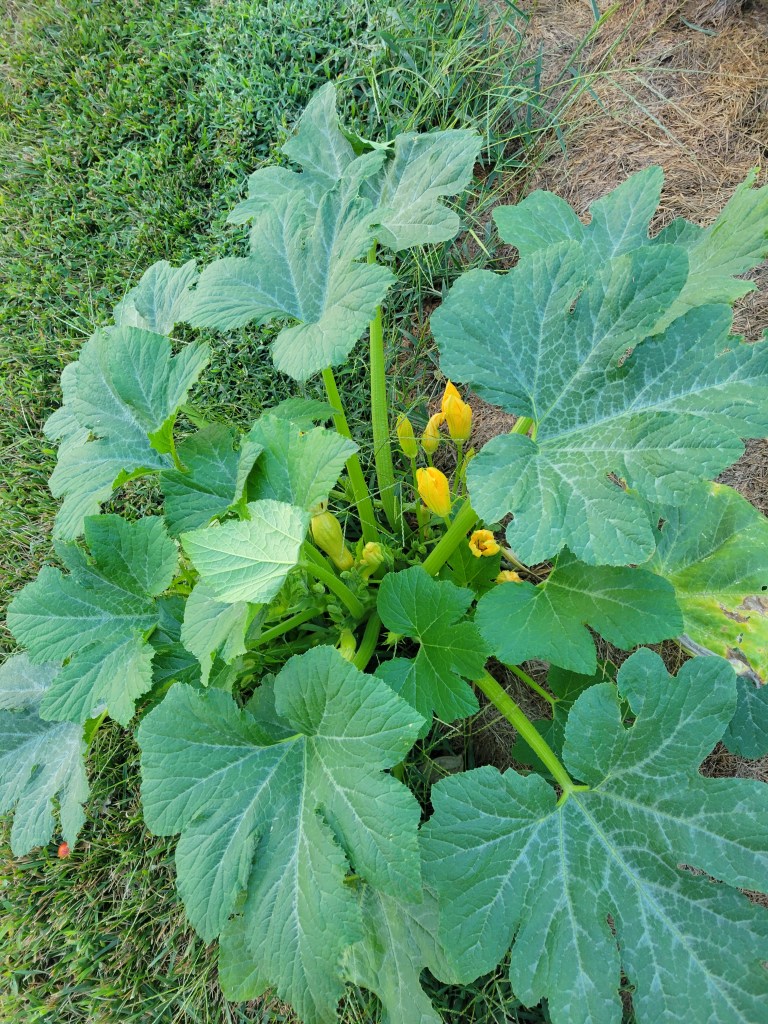
The poor green beans produced a couple pans of beans instead of buckets like usual. We ate corn once and decided we can buy corn on the cob that’s much better, so we never tried it again.  The cucumbers gave a measly crop of 3 or 4 tiny ones that were actually eatable. The melons look promising but the coons have been feasting on them well before their time, so we have yet to see if we’ll get to enjoy any.  The tomatoes finally started ripening last week.  (Way behind times I know, but I’m just grateful to even be getting any!) But that could change too.  It’s either feast or famine on zucchini and this year we hit famine. Not only did the zucchini perish but the summer squash died right along with it. I’m holding my breath for this volunteer summer squash at the edge of the garden. Don’t ask me how it got there.  Just maybe I’ll get a few to eat fresh?! That off colored leaf there worries me.

As far as I know we have a good crop of potatoes because we haven’t dug them yet.  The sweet potatoes look green and viney so I have my hopes up about them too.

If you have a good crop of green beans and want a slick way to can them, try out oven canning! Here’s how I did mine last summer.

Fill quart jars with your clean and snapped beans. Add: 1 teaspoon salt and 1 Tablespoon lemon juice. Bottled is fine.  Fill about half full with water, wipe rims and screw on lids and rings.

Place cookie or bread racks in the oven on top of your oven racks. This gives stability to the jars. Do not place jars on a baking sheet! The jars will need even heat circulating  throughout. 

Fill your oven with jars. Turn to 270*. Begin timing after oven has preheated. Bake for 3 hours. Turn oven off and let the jars inside until they’re mostly cooled. I like to do it in the evening then I can turn the oven off at bedtime and by morning the jars are cool enough to remove. (They may still be warm but will be sealed)

This method can be used for pints but reduce the baking time to 2 ¹/² hours.

I love the simplicity of oven canning!  No need to run that pressure cooker all day long,  getting only 7 quarts canned at a time. You can chuck your oven full of jars and have them all done in one whack! And no pressure to keep you on edge either!

For more oven canning recipes read here.

May you feel blessed that your garden is hardly as bad as mine and if it is, know your not alone! 

I’m not a gardener, so my  flowers should be admired. Only one germanium has died so far! 😜 And we love our front porch at day’s end.

On a different note, I will be taking a break from writing for some time.  Because of my mental health the last two months, we are trying to cut out any possible stress factors. I enjoy writing and don’t like to count it as a stressor, but my hubby thinks otherwise.

I do have a guest post coming in the next month, so will still be posting that. 

Thank you for reading and understanding!

Sew Basic Cape Dress Patterns

Before I met Sew Basic dress patterns, I had an old pattern that I used back when I was in my twenties. As any Mommy knows, going through pregnancies & nursing can change your body a lot. I would just guess around on my pattern, adding or cutting off here and there, or exchanging my regular bodice for a nursing pattern when I needed it. I had to play around with it until I got it perfected. But then if you loose weight after baby, or perhaps can’t loose that weight, your previous dresses may or may not fit. I did a lot of changing around and adjusting with many dresses I sewed! Seams didn’t always match up either. Also, with my old pattern I would use the bodice piece for the cape- I  had to remember to fold in the side, & not cut as wide, but then cut wider at the top, making my own guesstimated slant cut. (Actually not as complicated as it sounds) But its another thing I love about the Sew Basic patterns- they have a separate cape pattern included!

Around 2 years ago I finally tried out the Sew Basic Cape dress patterns for myself and absolutely love them! Yay what preciseness and yay what beautiful seams!! I’ve used the little girl dress patterns quite awhile for Josie. It’s super easy to just order the next size whenever she needs it! Or for myself, I have lost over 30 pounds in the last year, and it was so easy to simply order a smaller pattern!

Sew Basic dress patterns were designed by a Mennonite lady, Michelle Oberholtzer. She has an Estsy shop where she sells a wide variety of sizes.  From little girls dresses all the way up to women’s size 48. They are just as the name suggests- basic and simple.  I love the design and easy to understand pattern! These patterns are also available at many Mennonite or Amish fabric stores.  Mt. Hope Fabrics & Gift Shoppe in Mt. Hope Ohio carries these patterns as well as a beautiful selection of fabrics. They have prompt shipping services too! You can look them up online or call them at 330-674-5292.

I haven’t used these yet but Michelle has added a nursing bodice to her line of patterns. What a brilliant idea! Now when you need to have nursing access you can simply use the nursing bodice in your size!

The dress patterns come printed on large paper, which you will then need to cut out  yourself. It comes with a sheet of step by step instructions on how to sew the dress as well as a sheet of pattern adjustment how to’s if needed. She thought of everything. And these are beautiful patterns!

The patterns all come with a variety of options. You can do a fitted or gathered sleeve. You can do a fitted, gathered or elastic waist. There’s different skirt patterns clearly marked with the style.

To figure out your dress size, you simply measure your bust and that number will give you the size of dress. If your between two sizes, you choose the one you think would fit you best.  Example, when I first started with these patterns I ordered size 42 even though I measured a little smaller. (I hate tight dresses and would rather err on the side of having it a bit loose than too snug.) It fit well for me, although I made some minor adjustments to my liking- I felt the sleeve hole was a little snug, so I cut the pattern a tad deeper. The bodice tends to be more short waisted, but that’s not a problem because I just cut the bodice pattern a little longer.  If your really short waisted, there’s the option of folding up the bodice to make it shorter.

Bodice & cape patterns

The neck line in these patterns tend to be a bit large, so you may want to keep that in mind. Just don’t cut quite as deep and don’t sew the neck line as deep either. Snipping the inside of the neck almost to the seam line really helps the neck to lay neatly.

When I first started with this pattern, I had  used the fitted skirt pattern which only has darts in it. It fit nice but later I decided it was not ample enough. So now I use the gathered skirt, cutting it just a tick smaller and then I have plenty of extra to put in two good sized pleats- approximately 2″ each.  I really like my dresses this way. It provides fullness without the bulkiness of a bunch of gathers. I feel it’s important to have enough fullness in the skirt for modesty and only a dart or very small pleat will not give you that fullness.

The skirt pattern I use. I have the side folded in where I cut it smaller.

I don’t care for puffy, gathered sleeves, so I use the fitted pattern. Although its fitted, there’s enough extra that it doesn’t fit tightly over my arms. That’s something I would  caution against; don’t have your fitted sleeve so tight that it fits snugly over your arms. It can easily happen. Tight sleeves aren’t modest just as tight skirts aren’t either.

My sleeve pattern

These adult dress patterns have a lot of darts. I don’t like the time it takes to sew them in, but it truly is worth it! (And it really don’t take long to sew them in, it’s just that I’m always in a hurry and I don’t like the extra step.) The darts in the bodice makes for a neat fit. And I especially think the darts in the back cape, helps so the cape doesn’t awkwardly stand away from the bodice. I don’t utilize the darts in the front cape but instead, I cut it wider to allow for pulling in gathers. Without an elastic waist, I feel gathers really help with adding fullness in the cape, so that it doesn’t outline what shouldn’t be seen.

One of my favorite dresses using the Sew Basic pattern.

These dress patterns are great for anyone but especially for someone learning to sew because they’re so simple. If you’re looking for a quality pattern for yourself or daughters, I would urge you to try one of these! I love to sew and what’s more rewarding than turning out a neatly sewed dress? It always makes me feel accomplished!

I like to organize my patterns in plastic sleeves in this large folder. Using masking tape & a sharpie makes it easy to see what style pattern I’m looking for.