Four DIY Spa Products

Shortly after I was married, I began taking a great interest in health. I remember becoming aware of all the hidden toxins in body products. It was hard to grasp that such awful things like “cancer causing substances” were in my body wash and lotions! I distinctly remember a certain body wash that I had gotten especially for our honeymoon and my hubby loved the smell! I hated so much to just throw it away! I think I used it a few more times before I trashed it. I know the sorrow of leaving beloved scents behind. But! Your sense of scents will change as you switch to natural products!

And now? I wouldn’t dream of shopping for body products at normal places like Walmart or even Bath and Body Works. Not only because of parabens and phlathates swimming in the stuff, but the scent!! Powerfully disturbing! I’ll just say my family and I are now very sensitive to chemical fragrances, and besides, synthetic fragrances are endocrine disruptors!

So. Let’s look at a few things we can make ourselves that are great to use and completely non toxic! They don’t take a lot of hard to find ingredients. A few basics and the rest you may have in your home already!

1. Bath Salts

2 cups epsom salt, 1/2 cup baking soda, 1/4 cup sea salt, 6-10 drops essential oil of your choice. Stir together and pour into a pretty jar. Use about a 3/4 cup in a hot tub and soak until your wrinkly!

2. Sugar Body Scrub

3/4 cup raw sugar. (I like to grind mine up so it’s not as coarse.) 1/4-1/2 cup sweet almond oil, or oils like grapeseed or jojoba. Stir these together. I guesstimate a bit as to how it looks. You want it rather a bit extra oily than too dry. Add in 5-8 drops essential oils of your choice. After you pour it into your jar, the oil will separate and that’s ok! Just stir before using. Rubbing this on your body exfoliates the dead skin. Rinse off and pat dry. Now, aren’t you starting to feel pretty good about yourself, coming out of that soak and scrub?! But we’re not done yet!

3. Hand And Body Lotion

3/4 cup sweet almond oil. I’ve found this to work best so wouldn’t substitute. 2 Tablespoons beeswax pellets. *Using a white beeswax makes a whiter lotion. Melt these two on low heat until beeswax is completely melted. Cool 1-2 minutes.

In the blender pour 1 cup distilled water. *Using distilled ensures a longer shelf life because it’s pure water without contamination. Start running blender on high, then slowly drizzle in the oil/beeswax mixture and keep blending till emulsified. This happens pretty quick, but keep blending. Scrape the sides as it becomes more emulsified and there’s no water left. Add in your essential oils of choice- approx 30 drops. Blend again. Have your jars ready for pouring. As soon as it’s finished blending, pour the lotion into them. It does set up a little, so I like to scrape it out as soon as I can. And now finish off your spa night with this lotion! I bet you didn’t know lotion could be this easy to make! It also makes a unique little gift!

The worst part is the messy blender to clean. After scraping it out really good, I use paper towels to wipe it out as much as possible, before adding hot soap and water and blending. If you try washing it with greasy sides, it’ll be harder to wash because it won’t wash off as easy as food does!

4. Lip Balm

Melt over low heat: 1/2 Tablespoon Shea butter, 1/2 Tablespoon sweet almond or coconut oil, 1 scant teaspoon beeswax pellets. I use a small stainless steel measuring cup or bowl on the stove because I don’t like to use the microwave and besides, it’s easier to watch the progression of melting. Remove from heat and add essential oils. I just drop in as I feel led! If it’s peppermint oil, you don’t want too much, so maybe like 2-3 drops. But for lavender you can do more like 4-6 drops. Have your lip tubes ready and pour in quickly. This sets up pretty fast as soon as it’s away from heat. Cool before capping the lip tubes. I buy my tubes at Hobby Lobby.

* I have had a lot of trial and error in getting these lip balms to the exact consistency I like. If it’s too hard, add less beeswax and if it’s too soft add a tad more. I used to add a half Tablespoon beeswax but kept experimenting and cutting back. The most recent time I made it I used coconut oil and the scant half teaspoon beeswax. I was really pleased with the lovely softness of it! I like it buttery smooth but sometimes I’ve had trouble with it being harder to rub on. Then I just “huff” on it before using. The warm breath softens the balm a tiny bit and it rubs on better. Keep playing around if it doesn’t suit your likes the first time! *If it gets pebbly after a few months, remelt it, and pour back in the tubes. I’ve had that trouble especially with some salves I’ve made and I believe it’s the beeswax. After its remelted it’s nice and smooth again! Remember, these products have no preservatives and chemicals so it won’t be quite like your ‘normal’ lip balm or lotion. But if you’re like me and enjoy natural body care, you won’t mind! And besides, this way you KNOW what’s in your products!!

And just for what it’s worth… My latest batch of lip balm I made, I actually prefer over the lip balm from a very popular brand of natural body products!! Sure, their’s have more flavor variety but are hard to rub on! Mine just glides over my lips so smooth and shiny, it makes me beam with accomplishment! And I don’t even have to “huff” over it! 😜

* You can buy Sweet Almond oil, Shea butter and beeswax pellets at most health food stores or Amazon. I mostly use the Now brand. My beeswax is Sky Organics.

Adding labels and corralling these items in a cute basket makes a special gift most any woman would enjoy! My labels are very basic and you could print some much prettier than these, I’m sure!

Do you make some of your own body products? I’d love to hear about it!

Layered Cakes And Love

This post will be short and sweet. Well, actually more sweet than short. If your looking for a scrumptious dessert for a Valentine’s lunch or dinner, I recommend this Red Raspberry White Chocolate layer cake. An absolute paradise for the taste buds! Every once in awhile, I enjoy laying aside all gluten and sugar free recipes and bake up a lovely, fluffy cake! I usually take it to social functions so we have help eating it!

Red Raspberry White Chocolate Cake

Assembling the cake

Mix a white cake mix using directions on box, then melt 4 oz. baker’s white chocolate and beat into cake batter. Divide batter into 3 8” round cake pans. I first line them with wax paper then spray them well so they will release easily. Bake at 350* for 18-20 min. Flip onto wax paper lined plates to cool.

Red Raspberry Filling:

Whisk together 3 T. flour and 6 T. milk. Heat and stir over medium heat till thickened. Cool and set aside.

Cream together 6 T. Shortening and 3 T. Soft Butter, then beat in 4 T. melted red raspberry jam, 3 C. powdered sugar, 1/2 t. red raspberry flavoring and a pinch salt. Last beat in the cooled flour mixture. Beat very well.

Frosting:

Beat well 8 oz. soft cream cheese and 1 stick soft butter. Add in 4 oz. baker’s white chocolate squares, melted, and 3 1/2 cups powdered sugar and a pinch salt.

To assemble the cake, put one cake layer on platter or cake stand. (It works best to make the cake layers ahead of time, wrap individually in Saran Wrap and freeze for a day or at least a few hours. This makes them so much easier to work with when frosting and assembling!) Spread with red raspberry filling, some fresh raspberries, cut in half, then another cake layer. Repeat. Once the 3rd layer is on, frost with the white chocolate icing. Decorate with fresh raspberries and white chocolate peels as desired. Some fresh mint sprigs would look beautiful but I did not have any. Also, this is really sweet, so if you want to ice it with the ‘naked’ look, you could cut down on the sugar intake.😛 One of my friends did this cake like that for a party and it looked really pretty too!

Enjoy a taste of yum!

Now here’s another cake idea but without all that flour and sugar! This doesn’t look Valentine’sish but it still works for a healthier yum! Surprisingly it has no flour in it at all! Though it’s not a tall, fluffy cake, it is still quite tasty!

Layered Ho Ho Cake

8 eggs separated

1/8 t. cream of tarter

8 oz. cream cheese

1 t. vanilla

1/2 c. simple sweet

1/ 3 c. cocoa

Beat egg whites with cream of tarter until stiff. Mix rest of ingredients together, then gently fold in egg whites. Divide batter into 3 8” round pans lined with wax paper. Bake at 300* for 30 minutes. Flip onto wax paper lined plates to cool.

Filling:

6 oz. cream cheese

1/4 c. simple sweet

1 t. vanilla

3/4 c. whipping cream

Mix cream cheese, sweetner and vanilla until smooth. Beat cream till stiff and add to cream cheese. Place one cake layer on plate or stand and spread on half of filling. Place another cake on top and spread with remainder of filling. Top with last cake.

Glaze:

2 T. Butter

2/3 c. Lily’s chocolate chips (or you can use another brand of sugar free chocolate chips if desired)

1 T. Simple sweet

1 t. Cocoa

2 T. Whipping cream

Melt butter and chocolate chips on low heat, then remove from heat and add rest of ingredients. Mix well. Cool a little before pouring over cake. Used with permission from Simple Foods.

More important than eating beautiful cakes is the love in your heart for those around you. I think this quote is so true- “Your love for God is no more than your love for the person you love the least.” When we have the Redemptive love of Christ in our hearts, He will help us love those ‘hard to love people’. “Beloved, let us love one another: for love is of God; and everyone that loveth is born of God, and knoweth God. He that loveth not knoweth not God; for God is love.” 1 John 4:7, 8. “By this shall all men know that ye are my disciples, if ye have love one to another. John 13:35 A true test of whether we are really followers of Christ! In this day of social distancing and mask wearing, we can be the quiet, courageous person displaying love and kindness to all around us. There are many opportunities in this cold and fearful world. Be kind today!

Cranberries And Christmas

Isn’t the month of December such a unique month?! Always filled to the brim with all the holiday excitements of special baking, shopping, gift wrapping, food making, Christmas suppers, programs and get togethers….

We are probably too quick to take a lot for granted…. At least I am. There’s so many in this world who are extra lonely and sad right now, because they know it’s a time for families to get together and they have none. (Or maybe aren’t allowed to get together!) And worst of all, many do not know the real meaning of Christmas! They’ve never experienced the Joy of Jesus in their hearts and thus knowing the real meaning of the coming of Jesus as a baby so many years ago! Are we compassionate and showing the love of Jesus to others wherever we can?!

Recently I read a story of a family who enjoyed visiting a live nativity at a church. When the children peeped in to see “baby Jesus”, there was nothing but a few rolled up blankets! What disappointment! A lesson for us, let’s be very conscious of the fact that people are watching us as Christians and are they seeing Jesus in us or will they be disappointed too?! Are we ministering to the needy around us and thus showing Jesus?

Here’s a different twist to add to your holiday snacks…. I was super pleased when I tried this out!

Cranberry Salsa

1 12 oz. package cranberries, fresh or frozen, chopped

1 c. sugar

1 jalapeño seeded and chopped

1/2 c. chopped fresh cilantro

a bit of chopped onions

Mix the chopped cranberries and sugar until well mixed, then stir in the remainder of ingredients. I think 1 cup sugar is plenty but I know cranberries are sour. But feel free to experiment with less or using a sugar substitute! This gets juicy after it sets a bit. Serve with cream cheese and crackers. Yum!!

Cranberry Salsa

Cranberry Nut Cookies

Here’s another recipe I just got and made very recently. Thanks to a new friend I “met” recently on a WhatsApp chat, namely, Rachel Weirich, who was so kind in allowing me to share on here!!

2 c. almond flour (not packed)

1/2 tsp. baking soda

1/4 tsp. salt

1/3 c. simple sweet or sweetner of choice

2 eggs

1/2 t. vanilla

1/4 c. melted coconut oil or butter

1/4 c. chopped pecans

1 c. frozen, chopped cranberries

Mix dry ingredients together then add in remaining ingredients and stir well. Drop on to greased cookie and flatten with fork. Bake at 350* for about 10-12 minutes. Once cooled, drizzle with melted dark chocolate. I couldn’t drizzle the chocolate in a beautifying fashion so I ended up just spreading the chocolate over top!😜

Cranberry Nut Cookies

I was happy to have another yummy gluten free cookie recipe to add to my collection and especially a pretty and healthy Christmas cookie at that!

Cranberry and Popcorn String

Cranberries and Popcorn String

Thread a needle, knot the end, and let your children have fun stringing together cranberries and big popcorn for simple holiday decor!

May you and yours enjoy a blessed Christmas and New year! How thankful I am for the assurance that we have the Lord to walk beside us every step of the unknown year ahead! He will not forsake his own and is so worthy of our trust!

Jerald & Violet Josie Kate- 5 Reece Edison- 16 months

All Things Pumpkin

Cheers for cooler days, blue skies and pumpkin lattes! Are you with me that fall is just pretty awesome? With today being the first day of Autumn, I wanted to share two Fall recipes. Isn’t it splendid to bake up pumpkins into delectable dishes that are full of fall flavors? I love to bake and made several batches of pumpkin bars in the last month. Not because that was the only thing I wanted to make but because I was trying to “healthify” them! You know those classic, delicious pumpkin bars with cream cheese icing? I could eat way too many of those! To eliminate gluten, I used an ordinary recipe, then swapped out the flour, sugar and oil for healthier choices. The sorghum flour can be found in most any health food store or if your grocery store carries a section of Bob’s Red Mill brand of flours and grains, you could probably find it there. I like it because it’s a fine flour more like typical white flour. Almond flour is more grainy but I still used some of that too. I use sorghum flour quite a bit, so have started ordering the berries online, and then I grind it myself, since I have my own NutriMill grinder.

Pumpkin Bars

4 eggs

3/4 c. refined coconut oil, melted

1 1/4 c. coconut sugar

1 c. pumpkin

1/2 t. salt

1 t. pumpkin pie spice

2 t. cinnamon

1 t. baking soda

1 t. baking powder

1 c. almond flour

1 c. sorghum flour

Beat eggs; add oil, sugar, and pumpkin. Mix well, add dry ingredients and beat again. Bake on greased 12 x 17 cookie sheet at 350* for 20 minutes. Cool and frost.

5 oz. soft cream cheese

1/3 c. simple sweet

3/4 c. heavy whipping cream, whipped

Beat cream cheese and sweetener, then mix in whipped cream. After frosting bars, store in refrigerator. These are moist and delicious. (You can also frost with your favorite cream cheese icing if you prefer)

Pumpkin Spice Latte

2 c. milk

3 T. pumpkin

1/2 T.vanilla

1/2 t. pumpkin pie spice

1/2 t. cinnamon

1/4 – 1/2 c. coffee

1/2 t. stevia glycerite or you can use stevia powder to suit your taste. (I sprinkled in a little stevia powder besides the glycerite) Top with whipped cream and sprinkle with pumpkin pie spice.

It’s July- Lock Your Vehicle!

We all know we should lock our vehicles, right? But why should we especially lock them in July? To keep them from becoming loaded up with your friend’s surplus zucchini and summer squash!!

These plants seemingly either die or produce an over abundance. They certainly don’t seem to know much about moderation…..This summer ours died so we have none. Thus it was I happily grabbed up the oversized zucchini (last one in the box) on my way out the church door Wednesday evening. Somebody’s plants are over producing but thankfully they didn’t load up our vehicles! They just kindly set a big box in the church entry free for the taking! Then some summers I feel disgruntled because I can’t even give away enough zucchinis! And we end up feeding the compost pile.

I love a good old summer medley of fried zucchini, squash, onions and mushrooms! So yum and full of good nutrition! There’s so many ways to fix these veggies and likely you already have your favorites. Perhaps you’ve been diligently making those dishes with your over producing garden plants? And your tired of recipes including zucchini? I’m so sorry if this is the case and here I come loading you up with more recipes! (Hey, at least it’s not a box full of unwanted zucchinis!) I tried a new recipe the other day and was so glad I did! I actually made a double batch of them a few days later because they were so good and didn’t last long! I’d like to share this cupcake recipe with you today. Plus two more recipes that I’ve made other years that are quite tasty!

Chocolate Zucchini Cupcakes

1 1/3 c.small chunked zucchini

4 eggs

4 Tbsp. soft butter

2/3 c. Simple Sweet

1 1/2 tsp. vanilla

1 1/2 tsp. baking powder

1 tsp. baking soda

4 Tbsp. cocoa

3 Tbsp. coconut flour

1 c. almond flour

2 Tbsp protein powder

Put zucchini in blender and chop till almost smooth. Add remaining ingredients to the blender and blend till smooth. Pour into lined muffin tins. Bake at 350* for approximately 20 to 25 minutes. Cool and frost with the following recipe.

2 Tbsp. soft butter

3 oz. soft cream cheese

3 Tbsp. Simple Sweet

2/3 c. whipping cream, whipped till stiff

Beat first 3 ingredients until smooth, then beat in the whipped cream.

After frosting the cupcakes, store in refrigerator. You can add 2 Tbsp. cocoa to the frosting but I omitted it because I’m not a complete chocolate fan. I thought they were quite delicious and pretty with a white frosting! These cupcakes are super moist and yummy! My family enjoys them! Used with permission from Simple Foods cookbook.

Now, maybe you don’t like ‘healthy’ recipes and would rather bake with regular old flour and sugar. If so, here’s a scrumptious recipe for you!

Shredded Zucchini Bars

2 c. sugar

1 c. oil

4 eggs

2 c. flour

1 tsp. baking soda

1 tsp. baking powder

1 tsp. cinnamon

3 tsp. vanilla

2 c. shredded zucchini

1 c. chocolate chips

Beat first 3 ingredients. Add remaining ingredients except zucchini and chocolate chips. Very last mix in those two. Pour in a greased cookie sheet and bake at 350* for 20 to 30 minutes. Cool and frost with cream cheese icing.

6 oz. soft cream cheese

1 c. soft butter

2 Tbsp. milk

4 c. powdered sugar

Beat cream cheese and butter then add powdered sugar and milk.

These are soooo soft, delicious, and moreish!! Musty too! (Must have more) Last summer a church friend made these for us when she brought a meal after Reece was born. Other people’s cooking is so good when your just recuperating from having a new baby and nursing besides! And so it was that I asked her for the recipe!

Recently I attempted to revise this recipe of zucchini bars, since I need to avoid gluten… I used Bob’s Red Mill brand of gluten free 1 to 1 Baking Flour in exchange for the regular flour. The dough looked a little dry, so I added in some applesauce. It was not too bad, but I tried a second shot at it before I was satisfied. I don’t normally use this kind of flour because it doesn’t seem as healthy as almond, sorghum or coconut flour. But it is handy when your in a pinch. This 1 to 1 flour can be used in exchange for one cup of all purpose flour, which is so handy, because then I don’t need to figure out the flour ratios and all that! This blend has a mix of rice flours, sorghum flour and several starches. If you want to bake those zucchini bars the healthier version, here’s what I changed: 1 cup simple sweet and 1 teaspoon stevia to replace the sugar, 2 cups gluten free 1 to 1 baking flour, to replace the regular flour. Then I added a half cup applesauce and used sugar free chocolate chips. Bake at 350* for 25 minutes. Then frosted it with the same frosting recipe I used for those zucchini cupcakes. I was pleased and they were very good! They are a bit flatter than the regular version but that’s normal when you’re not using gluten flours. Store in refrigerator after frosting.

(Some grocery stores have a health food section where you could find this flour or online. I got this at our local Fareway)

Lastly, I bet you can fool your family with the following recipe… It tastes amazingly like apple crisp! But it’s made with, well, you know what! I have not made this recipe this year so do not have a picture.

Zucchini Dessert

8 c. peeled, seeded and cubed zucchini

1 c. sugar

1 tsp. cinnamon

2/3 c. lemon juice

Cook together until zucchini is tender. Set aside.

Blend the following into crumbs:

4 c. flour

2 c. sugar

1/4 tsp. salt

1 1/2 c. soft butter

Press half of the crumbs into the bottom of a 9×13 inch pan. Bake at 375* for 10 minutes.

Add half of the remaining crumbs to the zucchini mixture and stir. Pour over baked crust. Add 1 tsp. cinnamon to remaining crumb mixture and spread over zucchini mixture. Bake at 375* for 35 minutes. As it cools, it will thicken. This is wonderful served with ice cream! Used with permission from Stutzman’s Culinary Secrets.

On Stevia and Sweeteners

🌿 After my last blog post on mint tea using stevia, I had several requests about the stevia or where to get it. So today I’d like to share with you the stevia and sweeteners I use and what I like. I’m not making claims on certain products, but just what I’ve found works for us and what I feel are safe to use.

It can look rather daunting when you first starting looking into using stevia or other sweeteners. One thing to be sure to check if your looking for a stevia is that there are no fillers or additives! Maltodextrin, dextrose, or fructose are all unhealthy ingredients that are sometimes used in cheap stevias. They take a small amount of stevia extract and mix it with a filler or two. How convenient for the marketers but not for our bodies! Maltodextrin is highly processed, usually made from corn, and is very high on the glycemic level, which means it spikes your blood sugar. Beware of these ingredients!

Some people declare the bad after taste and therefore hate all stevia. Yes, there are some with that after taste or can turn bitter if you use too much! I feel most of the ones I use have very little or no aftertaste. And too, your taste buds do adjust once you use these awhile. I’ve been using most of these for a number of years already so here’s what I like.

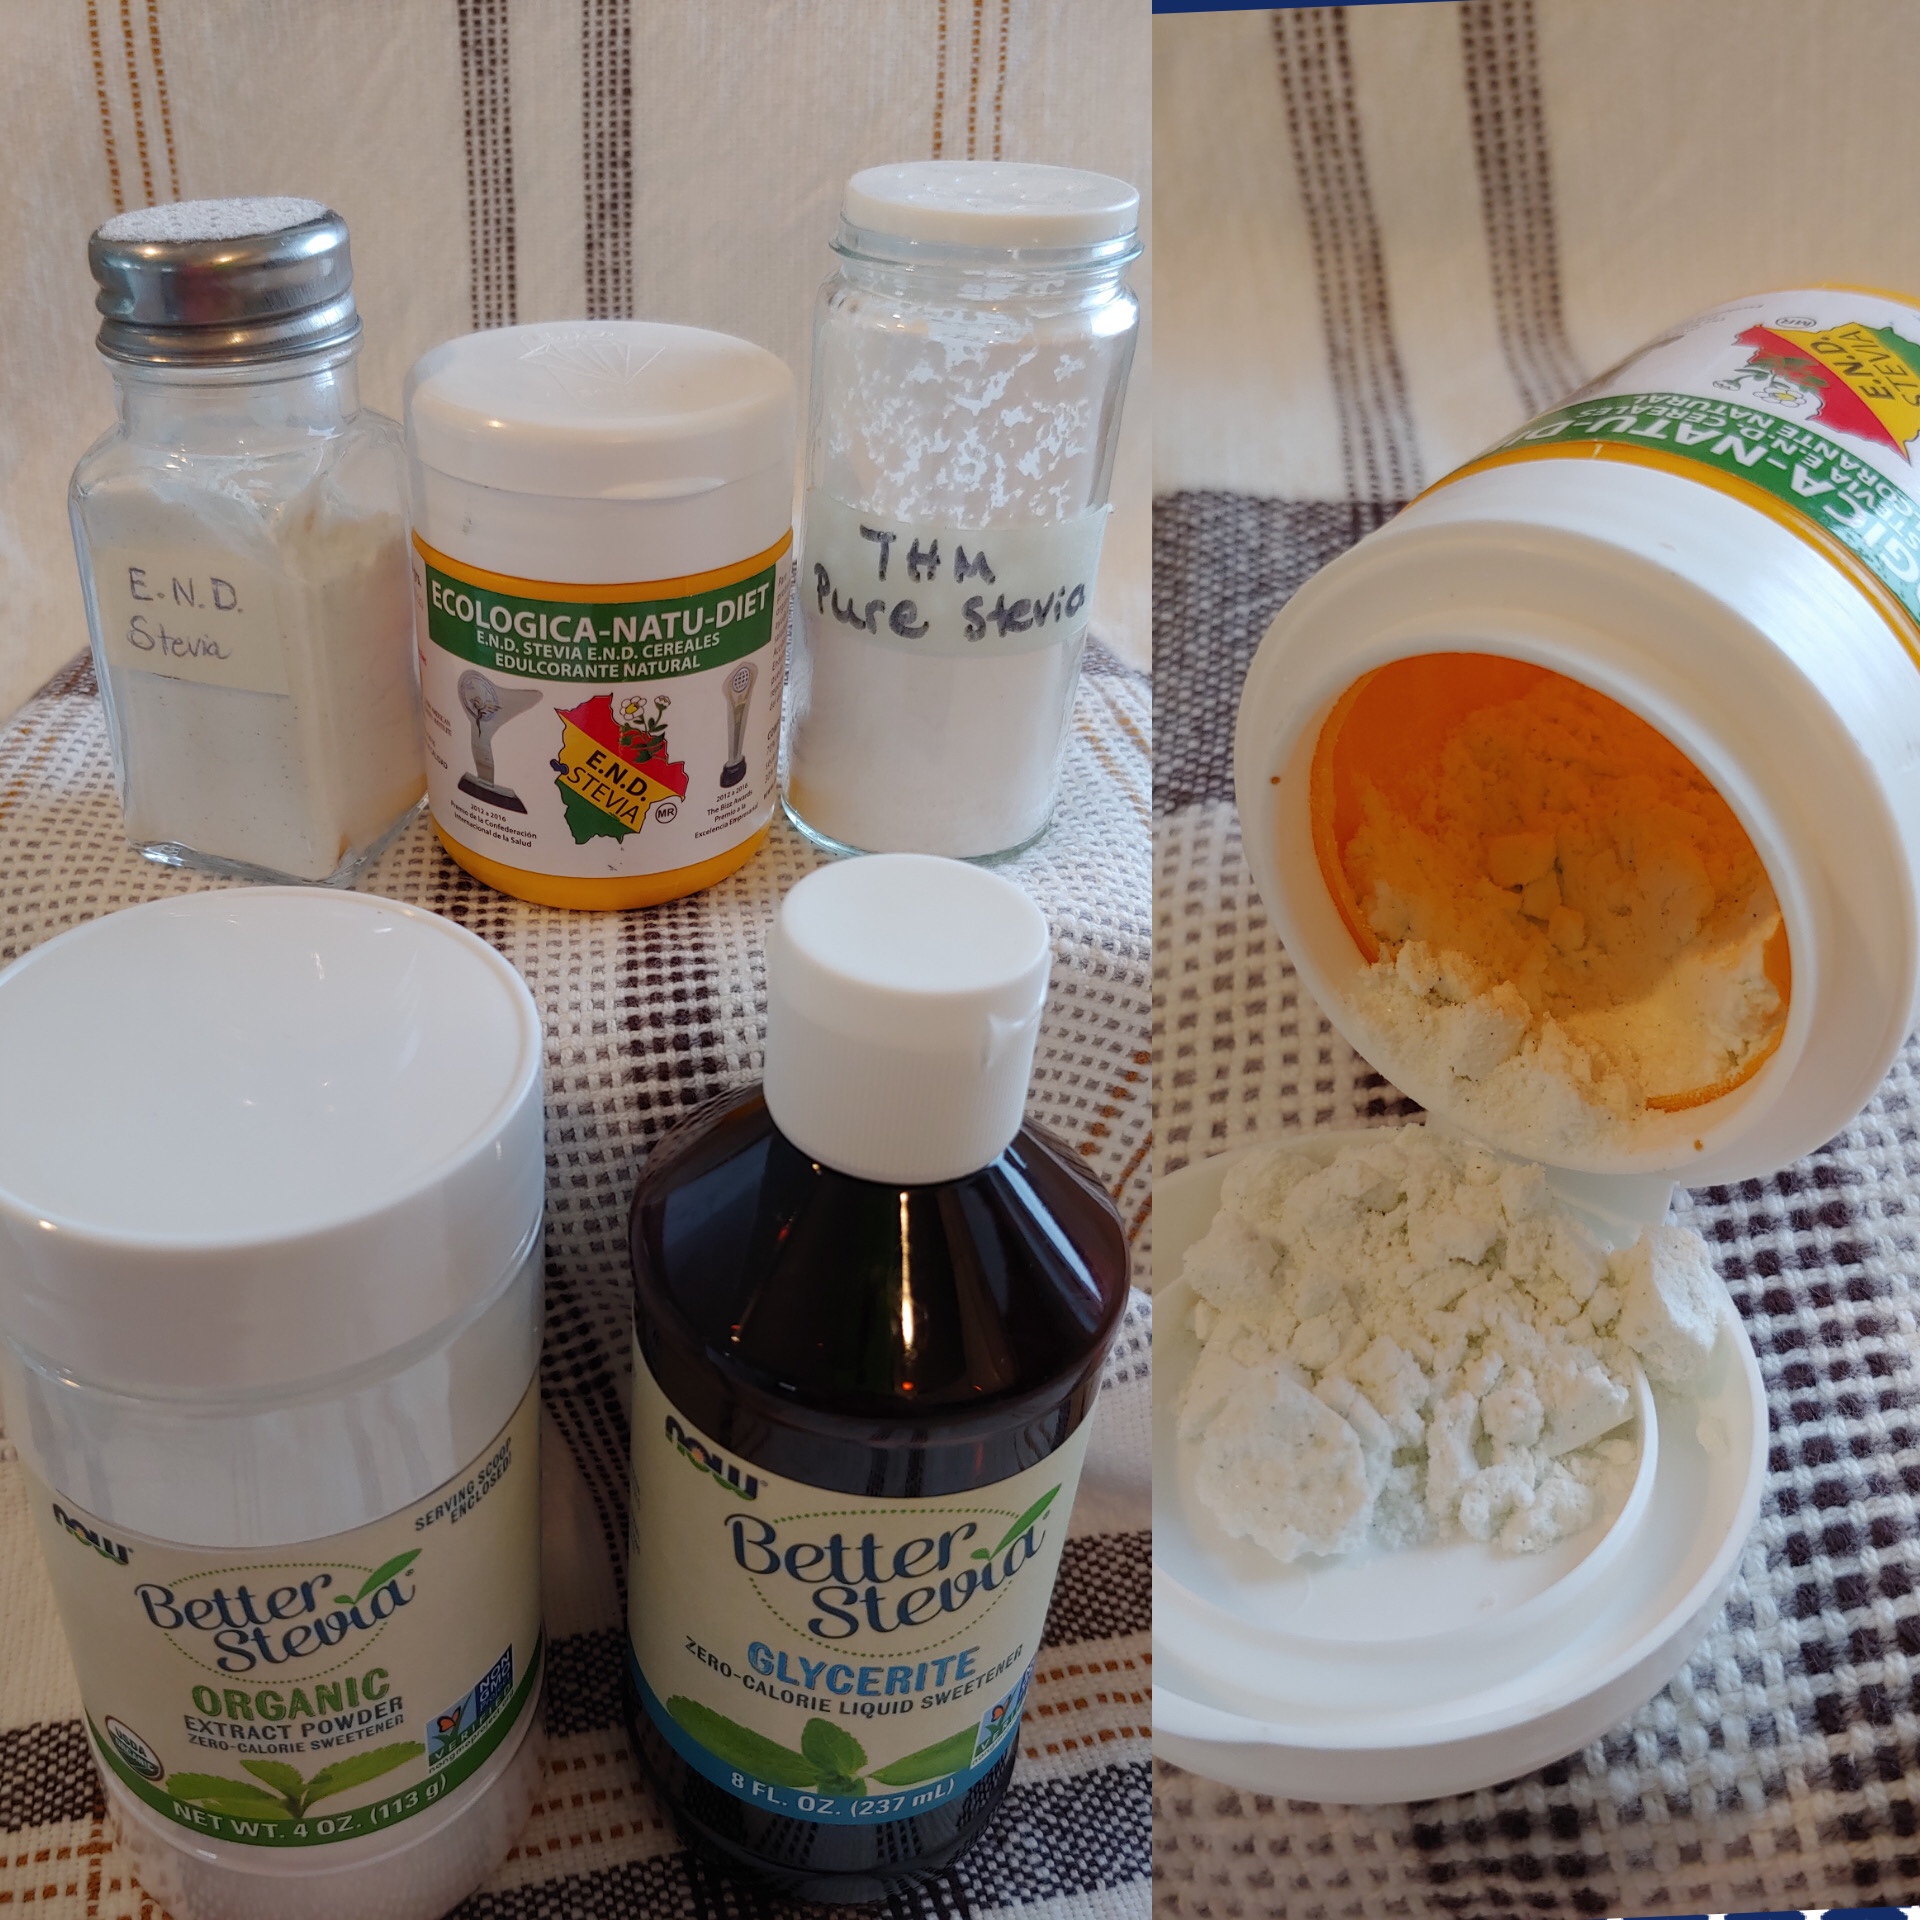
The Now Organic Stevia Extract Powder is an affordable, good stevia without fillers. It’s a very nice, fine powder. The Now Stevia Glycerite is another zero calorie sweetener but this is in liquid form. It’s base is vegetable glycerin, which is sweet alone and safe to use. (It’s also what is used to preserve many herbal tinctures) I love the Stevia Glycerite for sweetening drinks! It dissolves a bit easier than the powders and just does a good job. Nature’s Warehouse sells this but it’s called Better Stevia Liquid, but I think its the same thing. They also sell the Now Organic Better Stevia Extract Powder.

Trim Healthy Mama has a very good, pure, organic stevia powder. It is more pricy but is worth it. It has no fillers or additives. It is pretty clumpy so you have to be a little careful to not get too much in, because it comes out in clumps. This one can very easily get bitter if you use too much. Many people enjoy this stevia. You can buy it online or at Nature’s Warehouse.

Sweet Leaf Stevia Sweetener is another one that I feel is safe to use. I’ve used it some but do not have any on hand presently. This one could easily be found at a health food store or online.

More recently I’ve found out of a good stevia that comes from Bolivia. It’s called E.N.D. Stevia. But beware what you buy from Bolivia!! The Bolivian climate is an excellent place to grow stevia. The problem is, about 50% of the stevia from there is fake!! In fact, I had heard of and used just a little of another Bolivia stevia. It was shiny, white little crystals. I was pretty skeptical about it because of different things. So Jerald and I started researching and we came across this one blog that said enough to scare me! If you would like to read that article you can find it here.

The REAL stevia from Bolivia is in powder form and slightly green. Maybe you can see it in the pictures. It sweetens very well and I really like it! There is a definite difference in the two Bolivia stevias I tried. If you would like to purchase this stevia you can do so on Etsy.

I like to keep the powder stevias that I use the most, in small glass salt and pepper shakers. It’s so handy to just sprinkle in to my yogurt, shakes, smoothies etc. I freeze my fruits unsweetened and then when I get them out to use I let them thaw, then just sprinkle in to taste! “Just right!” says Amelia Bedelia 😂😂

Another sweetener combination I use is a mix of Erythritol, Xylitol and stevia. Erythritol and xylitol are both sugar alcohols that pass through your body without adversely affecting your blood sugar. Erythritol has a zero glycemic index and is easiest to digest. Xylitol is very low on the glycemic scale but can cause stomach discomfort. There is mixed research as to the positive and negatives of these sugar alcohols. I feel it’s fine in moderation, but would still feel stevia is a better choice. Both the Erythritol and xylitol can cause stomach discomfort or diarrhea but the xylitol is the worser culprit. That’s why I really like the following recipe because it uses less xylitol! This is great to use in baking because it adds bulk to substitute for the sugar. You can use it about anywhere you want to replace sugar. Be sure to buy Organic Non GMO. We buy the Erythritol and xylitol online at Amazon. Nature’s Warehouse also sells them as would most any health food stores.

Here is the recipe I use.
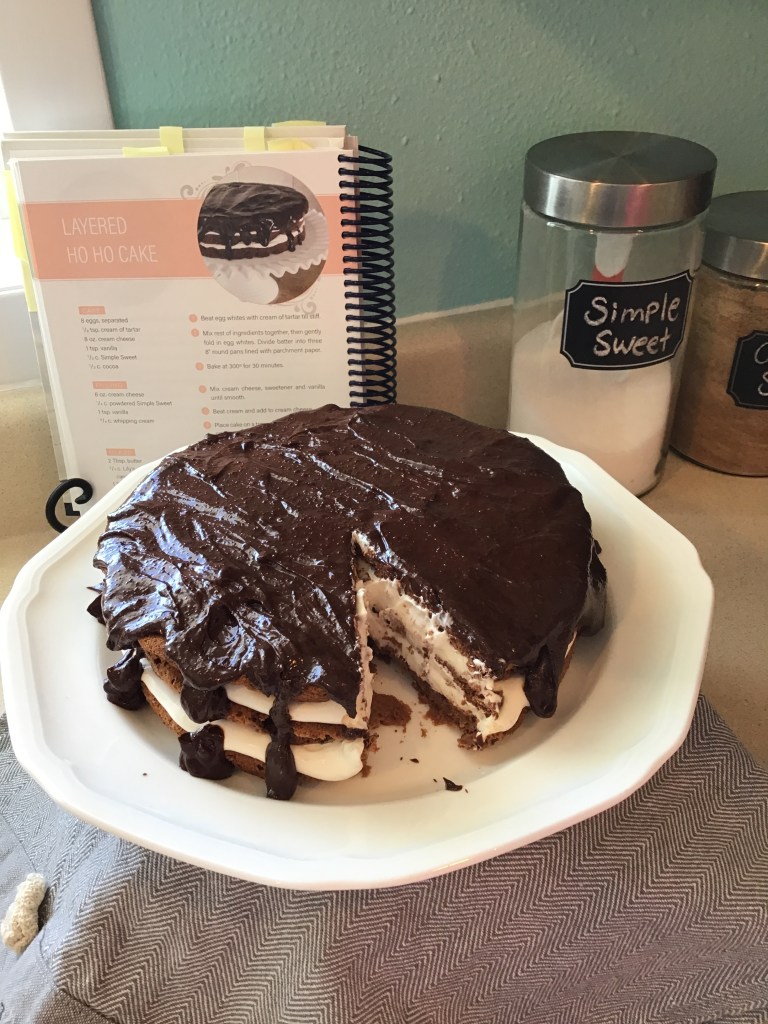
Simple Sweet

5 c. Erythritol

2 c. Xylitol

1 T. Better Stevia Extract Powder

2 T. Sweet Leaf Stevia Sweetner

Combine all ingredients in a large bowl and mix very well. Store in airtight container. Use 1/3 cup to replace 1 cup sugar. Used with permission from Simple Foods cookbook.

I have already substituted Better Stevia for Sweet Leaf and it was fine.

If the 1/3 cup doesn’t make your food sweet enough, I would suggest adding in a bit of stevia to finish it off, till you get your desired sweetness.

I also use some Coconut sugar or honey in my baking. Coconut sugar is a healthy sugar with a lower glycemic level. It still raises your blood sugar some, but does not spike it like regular sugar. I feel it’s a very good, safe alternative, but if your trying to lose weight, I would be cautious in how much you consume. Coconut sugar can be found at Walmart.

Honey has a high glycemic index, however if it is raw, local honey, it still has health benefits. So again, if your trying to lose weight, I wouldn’t consume a lot, but is still a healthy sweetner. But Do Not buy Supermarket, pasteurized honey! It is much too likely it is mixed with high fructose corn syrup or some other additives. I read an article on this once, and I could definitely tell a difference between my store bought honey and the raw, local honey I use.

If you still don’t want to use any of these stevias or sweetners I suggested, you could at least use raw sugar. I buy the Zulka Morena Pure Cane Sugar in a green bag at Walmart. It is at least not quite as processed and bleached as regular old white sugar! But it’s still sugar! I use this for any regular baking/cooking for company or when I take food to gatherings. 🌿

🍰 Stop eating sugar, you are sweet enough already 🍫 🥰

🍯 Life is short and it’s up to you to make it sweet🌿 Sarah Louise Delany

Mint Tea and Custard Pie

Mint Tea

What is Spring or Summer without delicious mint tea?!….Some call it garden tea, Some call it meadow tea, some call it creek tea. Whatever you call it tea, would you like a glass of tea with me?

Do you know what is more refreshing than a pretty glass of mint tea? A glass of mint tea sweetened with stevia instead of all that sugar!😛 I really like the Now brand of Stevia Glycerite for drinks. 2 teaspoons nicely sweetens one gallon. If you are used to having it really sweet, you can try 2 1/2 teaspoons. And there is no bad aftertaste! I do not mind my family drinking a lot of this tea because they’re not drinking sugar tea. Reece slurps his down like it’s an emergency when I fill his sipper cup!

I do not have measurements for my tea and I’m guessing most of my readers know how to make this tea too, without specific directions…. I brew a batch of tea about like this for one gallon. Fill with ice and water and sweetner. A refreshing taste of summertime!!

Custard Pie

Jerald enjoys a good pie. One of his favorites would be Custard. A plain, simple, easy pie. I certainly can’t complain on it being too much work to make it for him! Especially when you have crusts in the freezer! I buy my crusts from our local bulk food store. I’m just not a crusty person! 😜 And when you can buy beautiful, flakey crusts at a very reasonable price, why not? It simplifies things for this mom, especially since we don’t eat a large quantity of pies.

And so it is I find myself, often on a Saturday, thinking what could I make for Sunday dessert? I like to make a dessert for Sunday because Sunday is a special day! Custard pie fits the bill at any given time. Especially if I want to surprise my man!

So this is how you make it. First, you dash out to the freezer and remove one of the pie crusts and let it thaw. It doesn’t take long, so you can immediately begin making the filling. Turn oven to 415*. Heat 2 1/2 cups of milk to scalding. While its heating, crack 4 eggs in a small bowl and whisk them up with 1/2 cup raw sugar, (or less) 1/4 teaspoon salt, and 1 teaspoon vanilla. By then the milk should be scalding but not burned yet. If you have a baby, it’s easy to forget things like heating milk temperatures, and thus you end up with burned milk. In that case, discard the milk and heat some more. Unless, of course, you like a burned flavor and black flakes in your pie, you can still use the same milk. So now add the very warm milk to the egg mixture and whisk it all up real nice. Pour it in the crust which by now will be thawed. Or maybe even over thawed because you had to change the baby’s diaper, hang out a load of laundry, and tend to your other screaming offspring. After it’s in the crust, sprinkle it lightly with cinnamon. If your young cook is helping, they will want to sprinkle the cinnamon which will get an overdose, but that is ok. Cinnamon is healthy and the pie still tastes good. If you have time and energy left, it’s lovely to drop in a few raspberries on top. (Fresh or frozen) Or even a few thin slices of fresh peaches. And oh yes I need to mention! This makes a tad more than one pie, so you just pour that extra filling into a small dish to bake. Very gently now, with no toddlers bumping you, set the pie in the oven along with the small dish of custard filling. Bake for 15 minutes, then turn the oven down to 350* for another 25 to 30 minutes. If your unsure if it’s finished, you can slide a table knife in the center to see if it comes out clean, then it should be done. As soon as the small dish of custard is cool, sneak into the bathroom or another private room to eat it by yourself. It’s a small reward for all the effort it took to make a simple pie!!

I never knew my Grandpa Kurtz, but Mom would always say that when he ate pie he’d say “pie without cheese is like a kiss without a squeeze.” 😍😍

Protein Bars and No Flour Muffins

Do you need an idea for something to put in your school lunches this week? Or maybe a healthy snack option to curb your preschooler’s hunger? Or a quick bit of dessert for supper? These are very quick, simple recipes that even young cooks could make. We enjoy both of these!

Protein Bars 🥥🍯

3 1/2 c oatmeal

1 c unsweetened coconut

1/2 c flax meal

1/3 c chia seeds

1 c peanut butter

1/2 c melted coconut oil

2/3 c honey

Stir together wet ingredients and pour over the dry ingredients in mixing bowl. Stir well to combine and press into a 9×13 pan. Refrigerate. These firm up nicely when you store them in the fridge.

These bars are very tasty and chuck full of good ingredients! I use Smuckers Natural Peanut Butter because it doesn’t contain extra sugar or hydrogenated oils. You can use either refined or virgin coconut oil. I grind up both my flax seed and chia seeds and keep them fresh in a jar in the freezer. A Juice Plus Doctor’s wife told me that chia seeds go right through you if you don’t grind them up first, so I like to make sure I get their super health benefits! (and just a hint, likely your picky eaters won’t notice them if they’re ground up!)

Banana Muffins 🍌🍌

1 c peanut butter

3 eggs

1/4 c honey

1 tsp vanilla

2 ripe bananas, mashed

1 tsp baking soda

1/2 tsp salt

1 tsp cinnamon

1/2 c chocolate chips

Whisk together first five ingredients then add the rest and blend gently. Pour into lined muffin tins. Bake at 350 for 20 to 23 minutes. They will sink down a bit as they cool. Makes one dozen. (Used with permission from Simple Foods cookbook)

You would not guess these muffins have no flour in them! Using sugar free or dark chocolate chips is a healthier option. This recipe is also a great way to use up those forsaken bananas sitting in the fruit bowl!

Josie LOVES these muffins!! 😋