Days In My Life

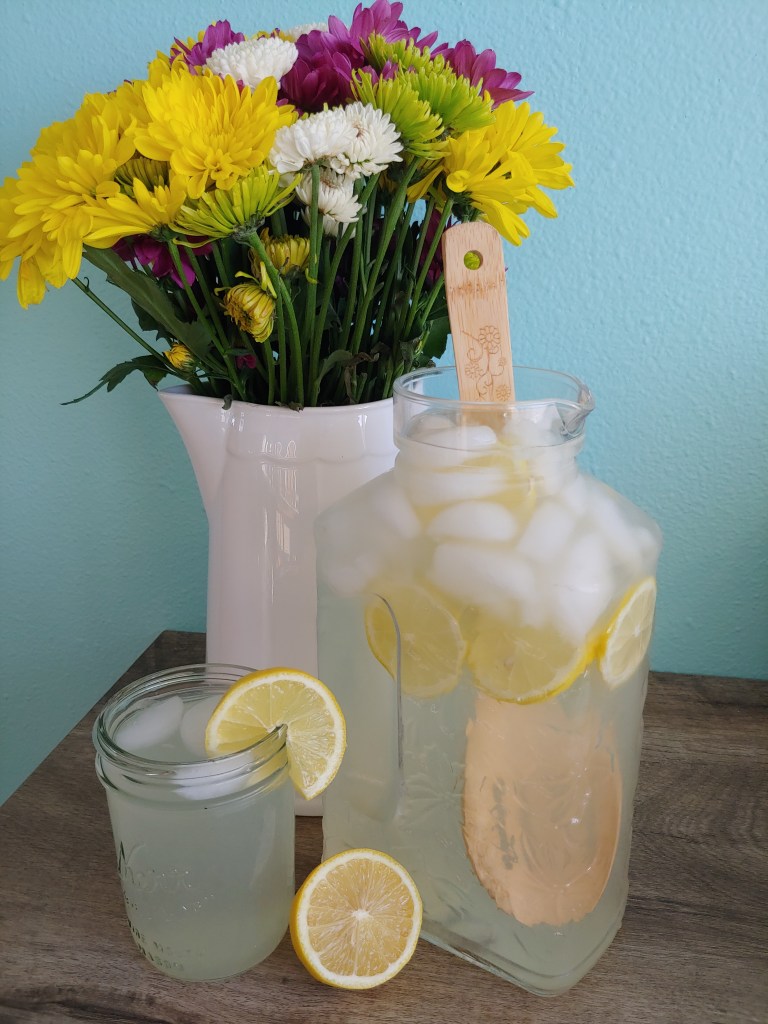
It feels like the playful temperatures of Indian summer have indeed left us for the fierceness of winter. Still, the dreary, chilled days make it feel cozy inside with warmth of heat and the ambiance of candles. I’ve started burning my favorite Welsh Mountain Candles.  I love their clean wax and essential oil scents.

My stomach ulcer has been flared up considerably the last 2 months. Anytime I have too much going on, it gets worse. My brain tells my body I can’t handle much stress. We have intentionally needed to cancel some events and plans to lighten things up for me. It feels rather intimidating when others can be busy and going full throttle, yet they don’t seem worse for the wear. But then I have to watch my thoughts, or I’ll be slipping down the well-worn tracks of despondency at an alarming speed, for this treads closely to comparison. And, comparison is the thief of joy. But more than that, the Bible admonishes us that we are not to compare ourselves among ourselves. (1 Corinthians 10:12) Nobody is superwoman anyone, right?! Even when it may look like it from a distance.

And so it is, I’ve been puttering around home  trying to rest both mind and body. There’s still the daily care of my family and house work, but prioritizing naps and saying “no” to big projects has felt amazing. I’ve definitely not been doing  major things like fall house cleaning or sewing or decluttering or the like. I did very little canning this fall too. And this restful mode has felt so so good!  I get a sort of panicky feeling when my week fills up with lots of outside obligations. Anyone else know what I mean, or am I the only weirdo?

So here’s a glimpse into what I have been doing. If you get bored, you’ve got full permission to read other people’s posts with more flare.

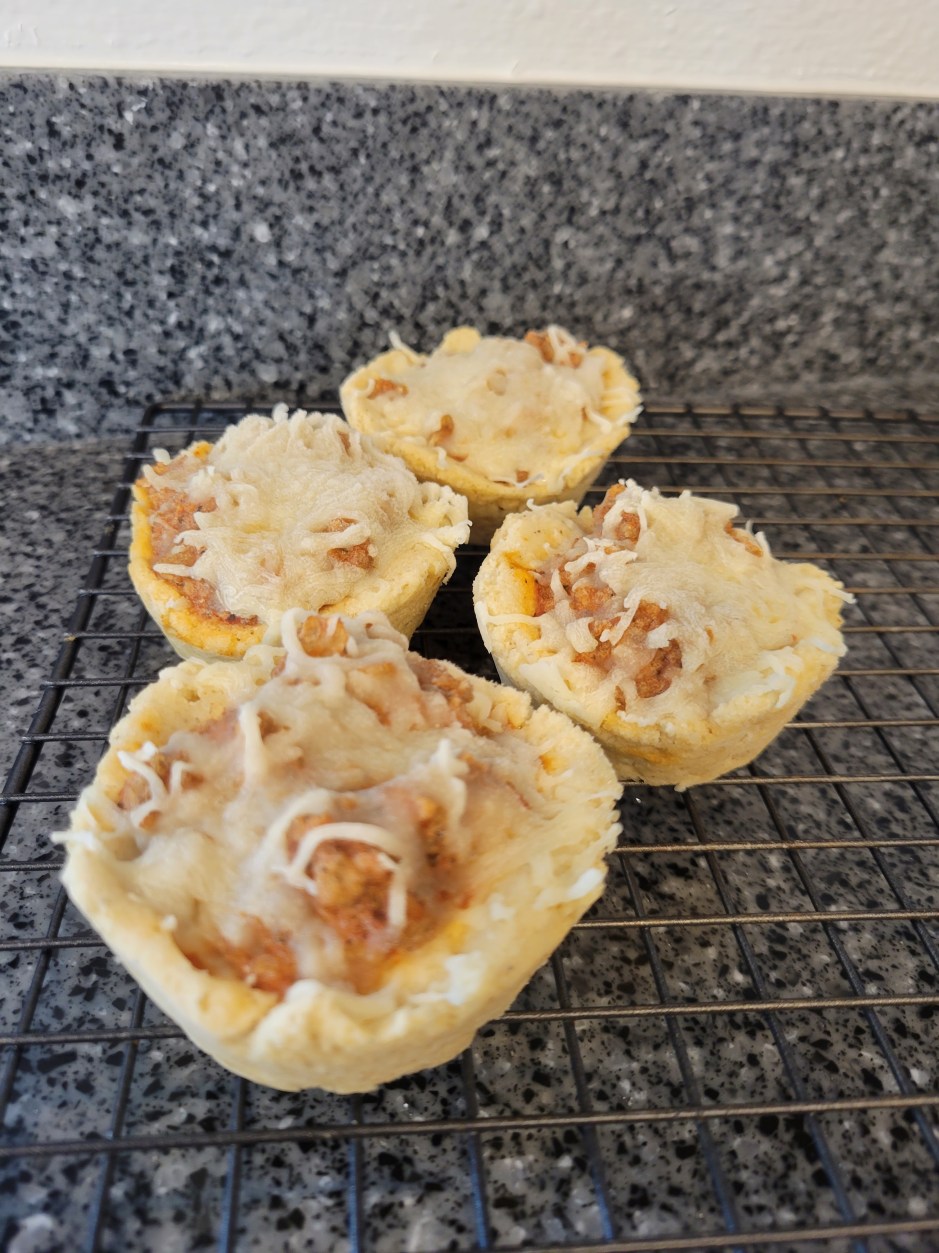
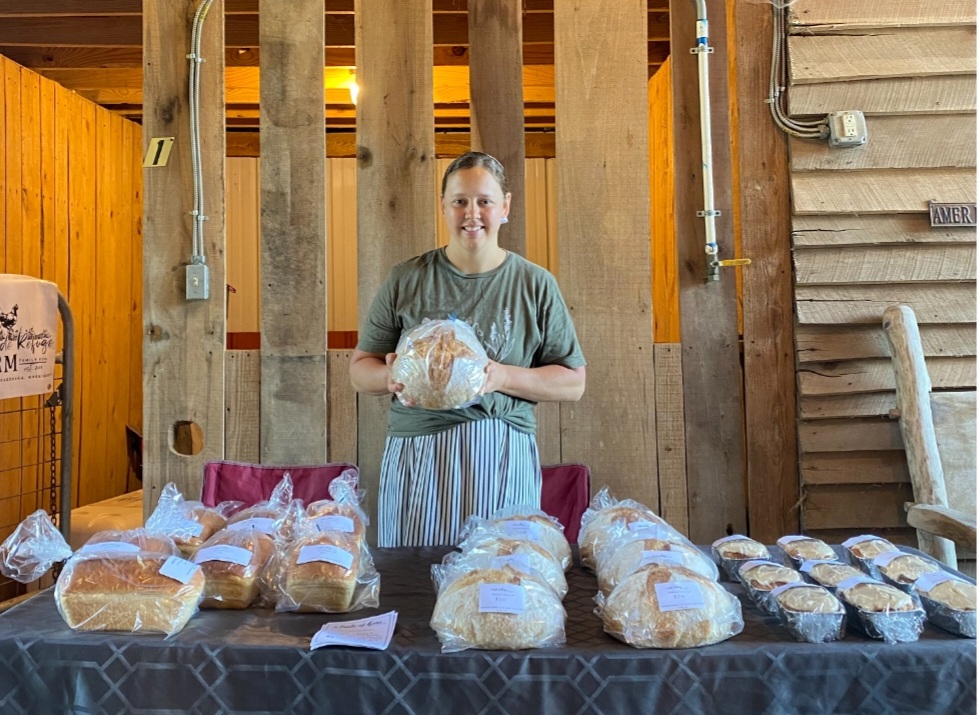
With the fall season, there seemed to be a need for pumpkin pies. Two weeks ago, I made two pies and took one to carry in dinner at church.  It felt like minimal work since I had crusts in the freezer. Plus, I also baked 2 dishes with only filling because we don’t eat much gluten around here. I don’t know how to adequately describe the lusciousness of my mom’s pumpkin pie recipe, but I’ll have to say it’s the best there is! Rich, creamy, and comforting goodness! Mom always made large batches of this pie when I was growing up. Large as in a dozen pies! It’s like, if you’re going to the bother of making pie, make it worth your time and make a bunch! (I still like big batch cooking for efficiency.) She frequently made pumpkin pie for company, plus, I had 5 big brothers who ate a lot of food! The boys loved when the basement refrigerator was stocked with extra pies because this is one kind of pie you can sneak and eat on your way out to do chores! To this day, it is a favorite for me and all my siblings. 

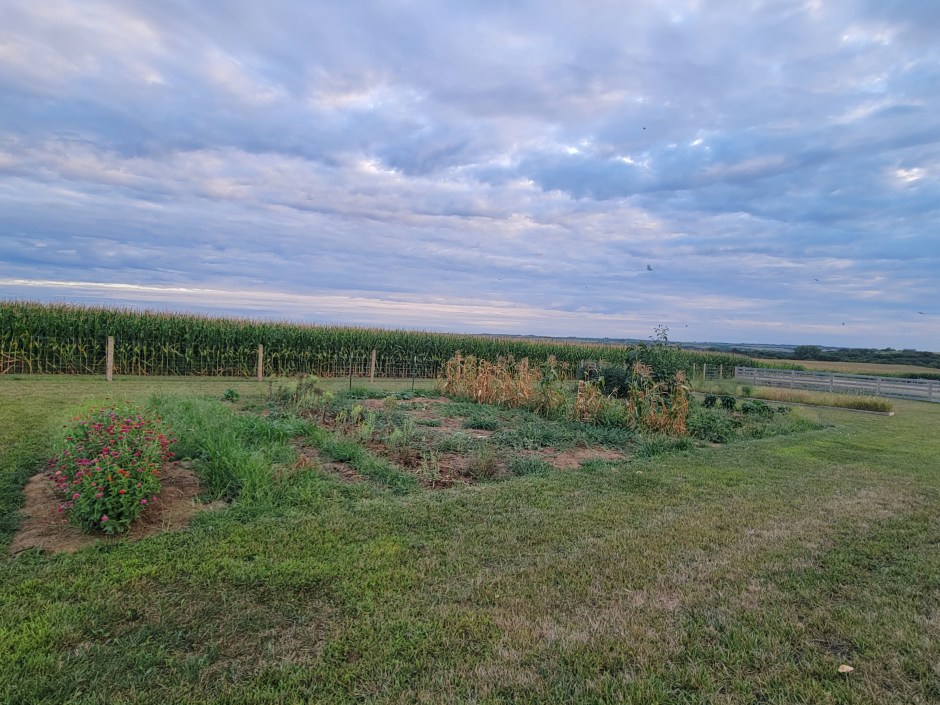
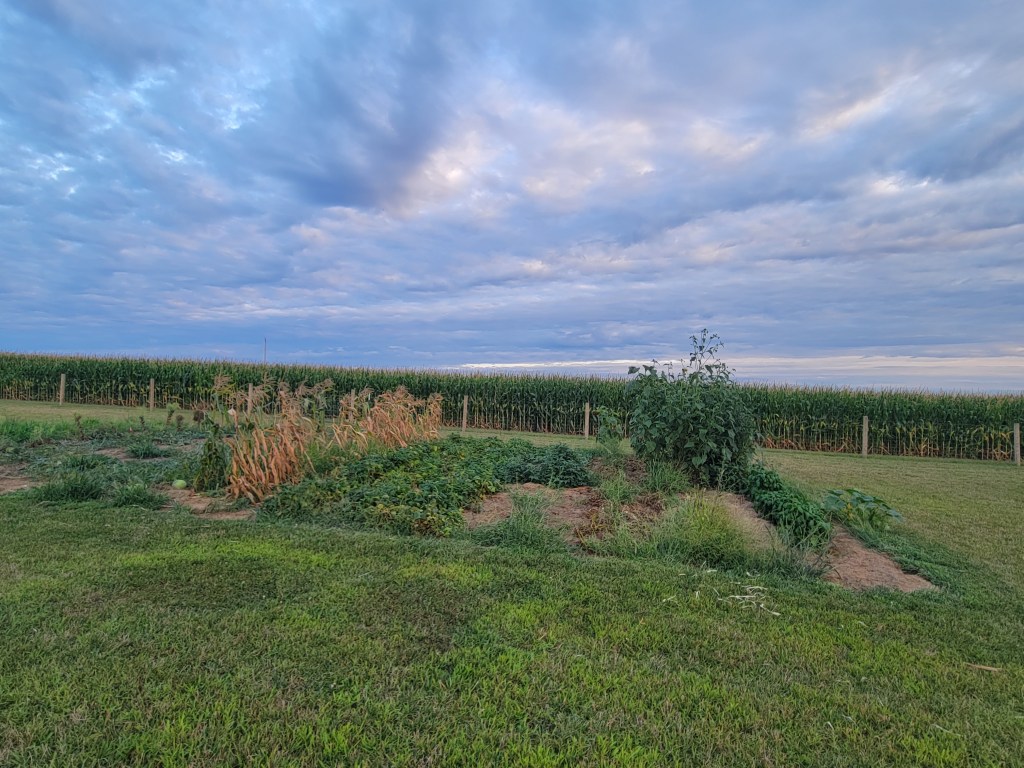
We don’t have the brilliant display of leaves in this area like the trees up north. Ours are more dull colors of rust, gold and pale yellow. This has its own kind of beauty, but I miss the mountains with their dazzling splendor of maples in autumn garb.

I was hankering for fall colors inside my house the other week, So one afternoon, I decided to bring fall foliage inside to spruce things up. I parked the Yukon and climbed up the bank beside our road and feverishly cut weeds with a scissors that was much too small. It was windy and cloudy with a chill and beginning to rain. I fervently hoped no one would come along and ask if I needed help because I didn’t.  It just looked like I did. Of course, someone had to stop just as I was  getting back into my vehicle. I quickly informed them of my mission but figured they probably questioned my words. I mean, who would be out picking crusty bouquets in this weather?!

Here’s what the bouquets looked like a day or so later. Even though they dried up a lot more, I still enjoy their rustic, natural beauty.
This maple is in our front yard and one of the precious, colorful trees around! I have so enjoyed it’s magnificent display! But it didn’t last. Within a week or less of this picture, it was swept bare and bleak. 

One day the other week, I met a friend at a cute coffee shop to chat about life.  It was such a refreshing time. I came away grateful and thanking God for the privilege of friendship!

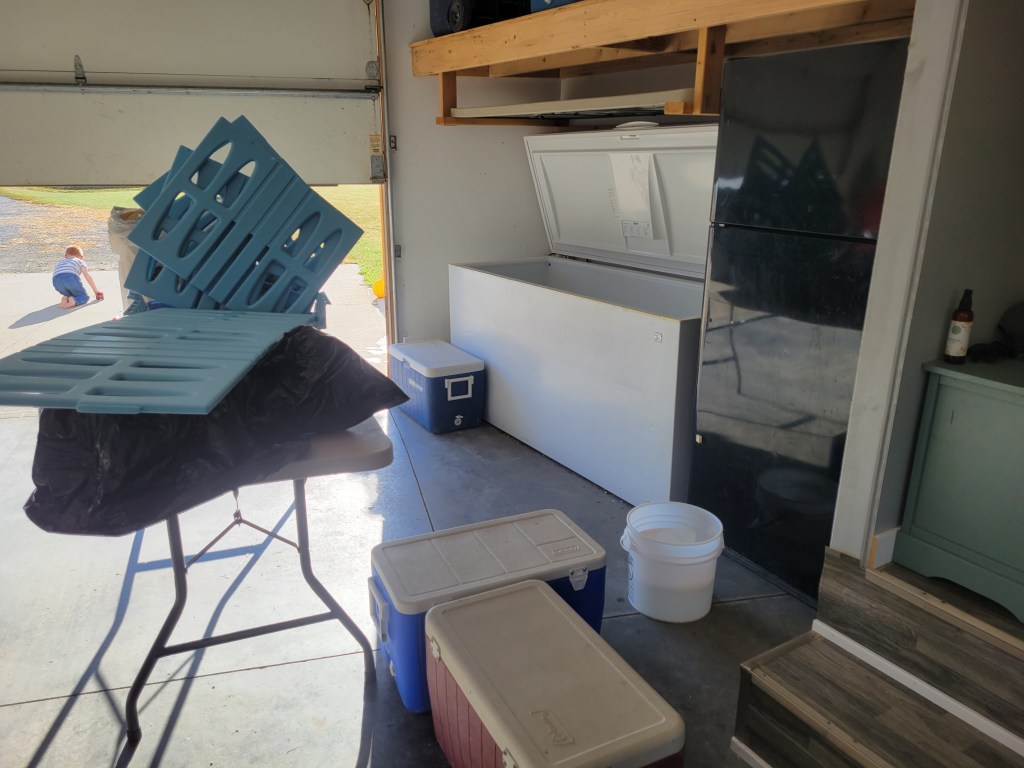
I felt very accomplished to be able to defrost both my freezers in the last weeks. That and the pumpkin canning I’ll tell you about later,  are the biggest jobs I’ve done the last month.  Defrosting freezers is a job I hate. But find it’s best to do it twice a year to simplify the process. What really irritated me was that the very week I cleaned my chest freezer, was the week we put in our jugs of apple cider. About half of the jugs spilled out their stickiness and made a brown river down the center of the freezer! It was like the rest of the freezer items whispered cold secrets to the cider that they were in a freshly cleaned space. And the cider decides it should do its share of “mess- making” in an effort to give the housewife job security. I’ll admit I re-cleaned the freezer with plenty of groaning and moaning as I saw the entirety of the mess and all the food that was required to move to clean underneath! At last, my freezer and I can both rest in peace!

Here’s a few tips for freezer cleaning:

* Unplug the freezer.  (In case your blonde and might forget this step)

* Use ice chests or coolers to stack in the majority of the food. 

* Set up a table to pile other things on that don’t matter to set out for a few hours.

* When it’s totally empty, get a rag and a bucket of hot water and a scraper of some sort. Soak the frosty spots with hot water and scrape off chunks the best you can. 

* When all the sides are cleaned of frost, get a dust pan and scoop up the water and pour into your bucket.  This is a quick way to rid all that water and ice chunks. 

* When it’s mostly emptied of liquid, get rags to wipe out remaining moisture.  Lastly, get dry rags to wipe down the whole freezer.

* Now you get to organize and stack your foods back in. I love the dividers and baskets that came with this freezer.  But in our upright freezer, I find it very beneficial to use baskets to keep the variety of meats and things separated. Adding labels is always a good idea.

* Plug in the freezer and enjoy your chill food space!

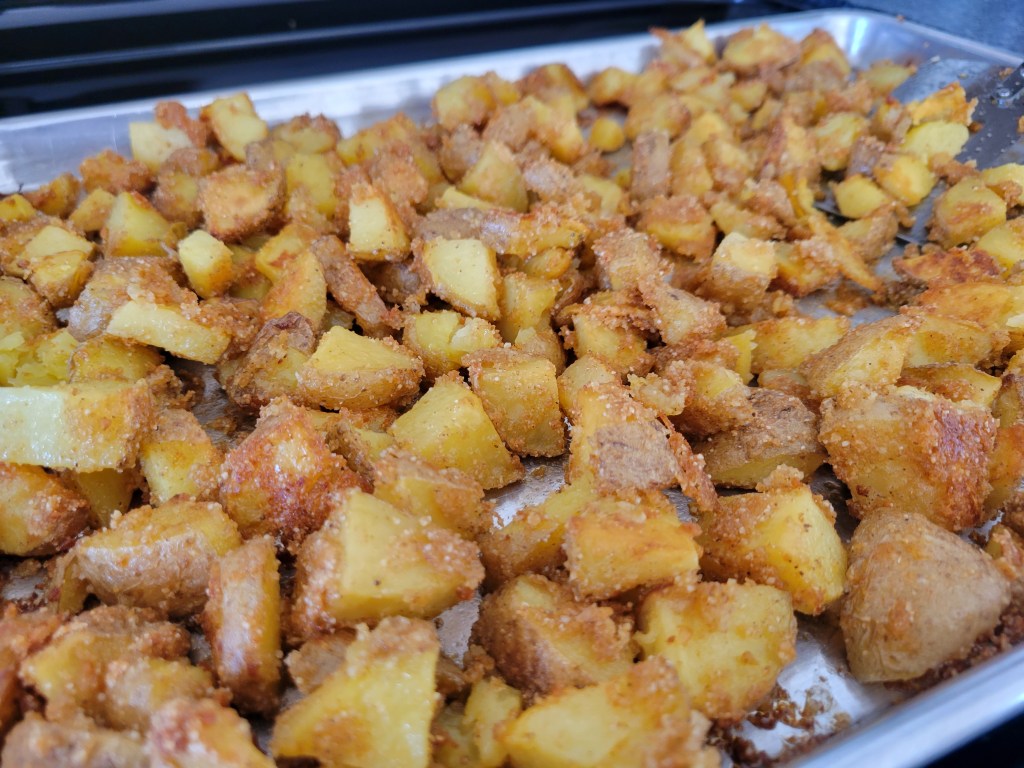
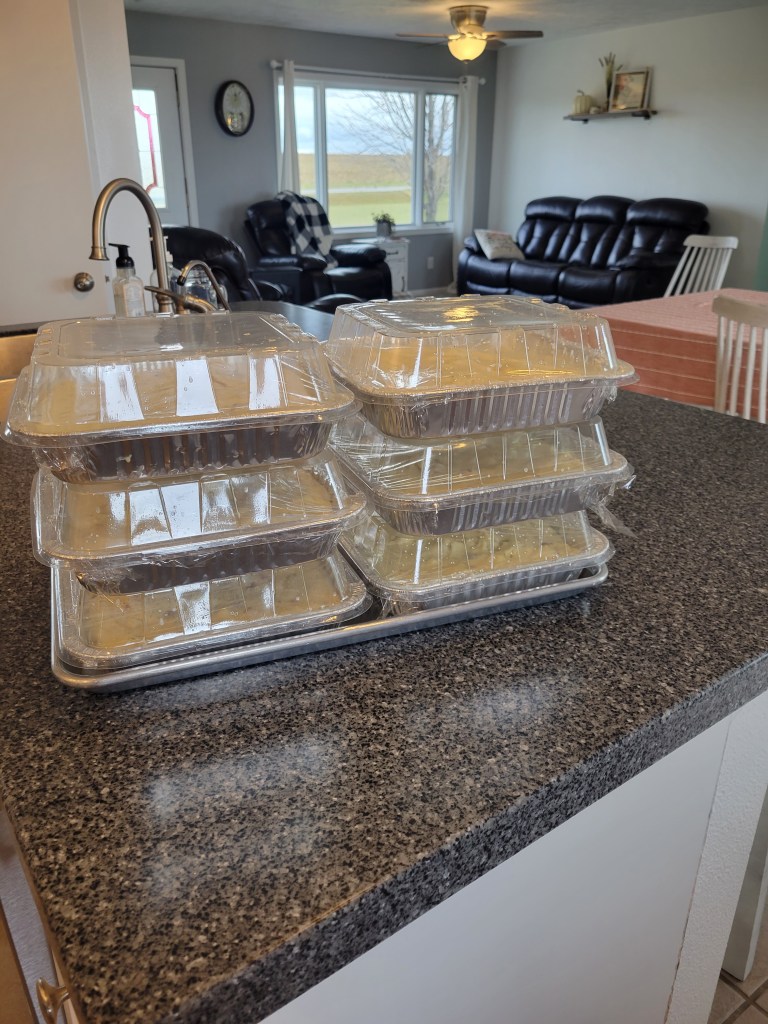
I was also pleased to restock my freezer with Sunday dinner mashed potatoes last week.  I made a tremendous batch that should last until the end of the year.  This includes a Sunday or two of being gone plus carry in at church 2 Sundays. And oh, yes! I must tell you I changed up my recipe again🤭 We had red garden potatoes that needed to be used up, so I cooked up a batch of mashed potatoes without peeling! Still added the cream cheese and sourcream, etc. They freeze fine, and we don’t mind the peelings and little chunks of potatoes in it. We all love these potatoes just as much or better than the instant ones. After eating these a couple of Sundays, I got kinda convicted about eating instant potatoes on a regular basis. Not peeling them is key to speed, which is why I decided I could go this route. You won’t catch me peeling 10 lbs of potatoes on a regular basis. 

I cooked the potatoes in this big kettle, then used my hand mixer and made it in here too.
Ready for the freezer. I tell you folks. This is an amazing feeling!

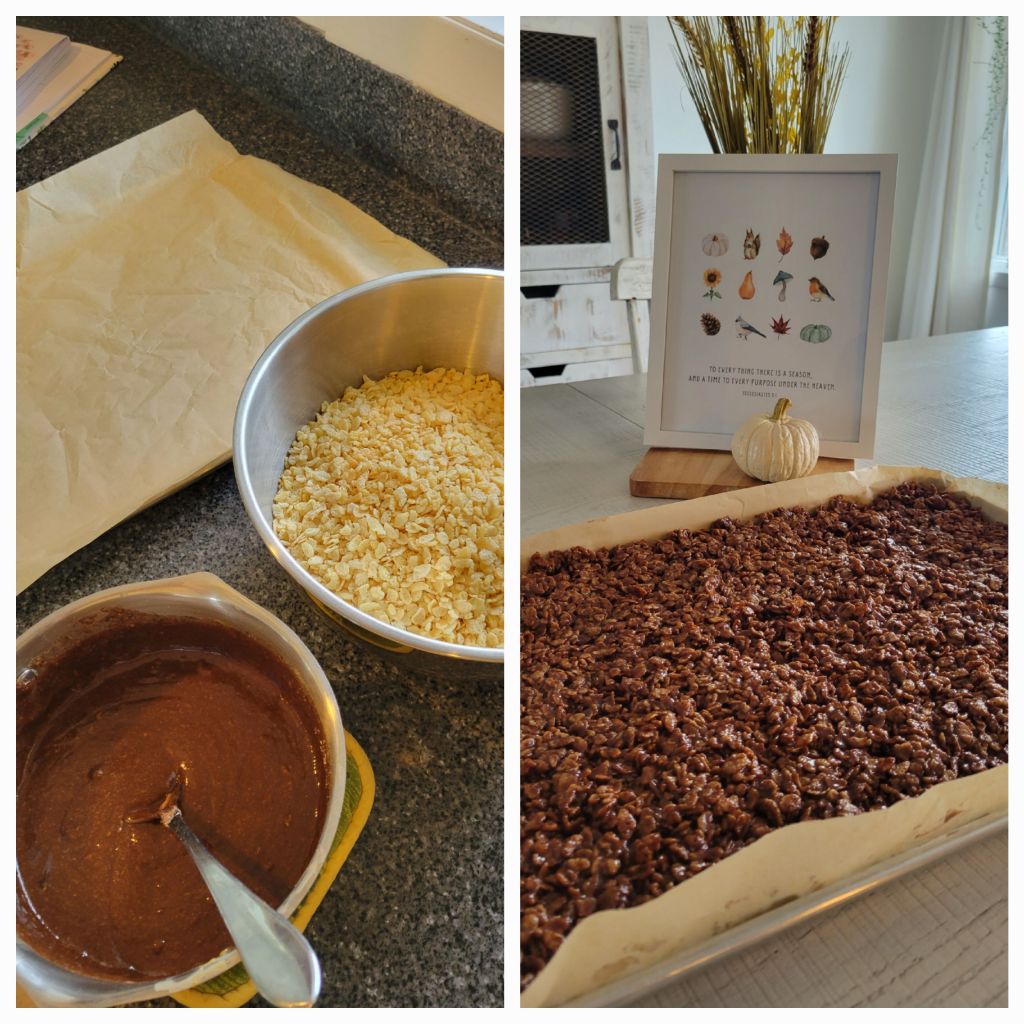
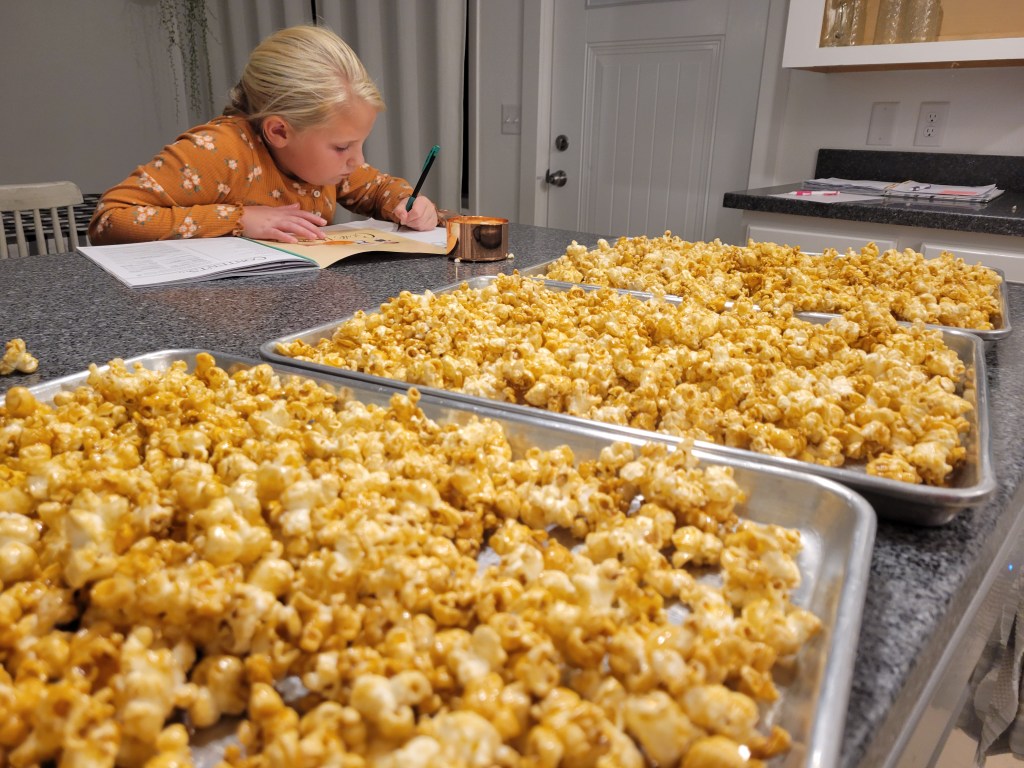
One evening when Jerald was gone, I mixed up a batch of Caramel popcorn. The children enjoy making popcorn, but the Caramel makes it extra yummy. It’s a special treat now and then, and the reason it’s special to me is that it does not have corn syrup in it! The children sat coloring at the bar while the popcorn toasted in the oven. Along with stories, the evening passed rapidly. With the ages of my children, I enjoy doing these sort of things with them. They both get so excited about being all coo-zzy inside on a cold or rainy day/evening. Playing games, reading stories and drinking hot chocolate rate high on their list of all things cozy! It’s these kind of moments we all want our children to remember in years to come, isn’t it? And so much of it is up to us moms to make those moments happen.

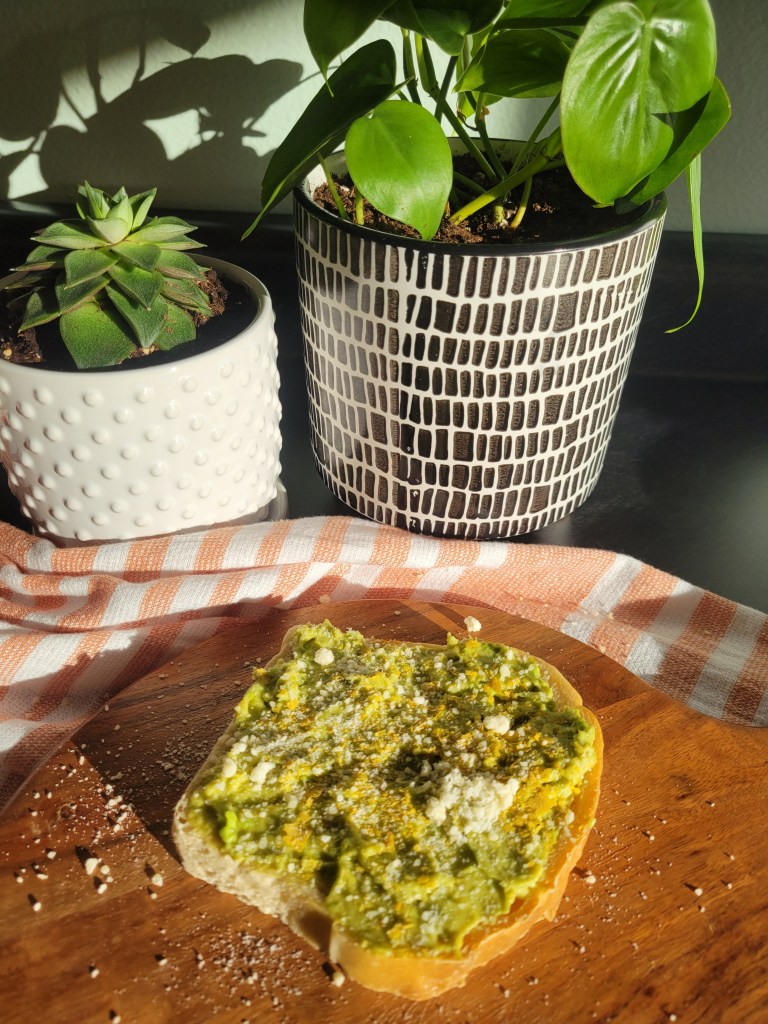
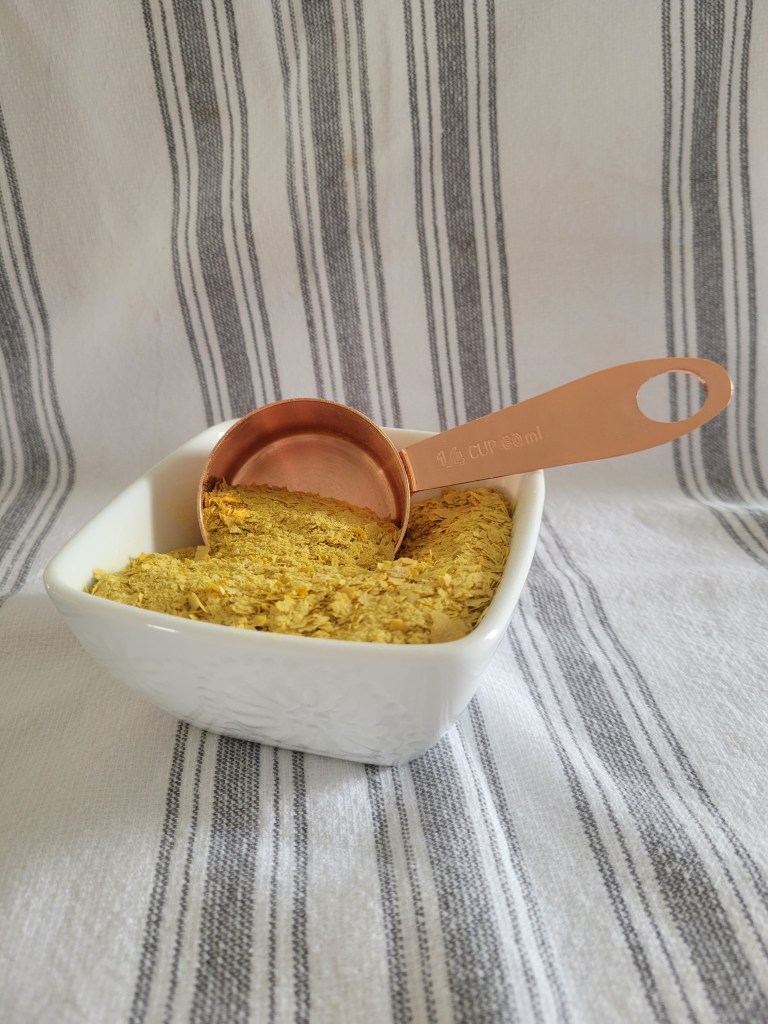
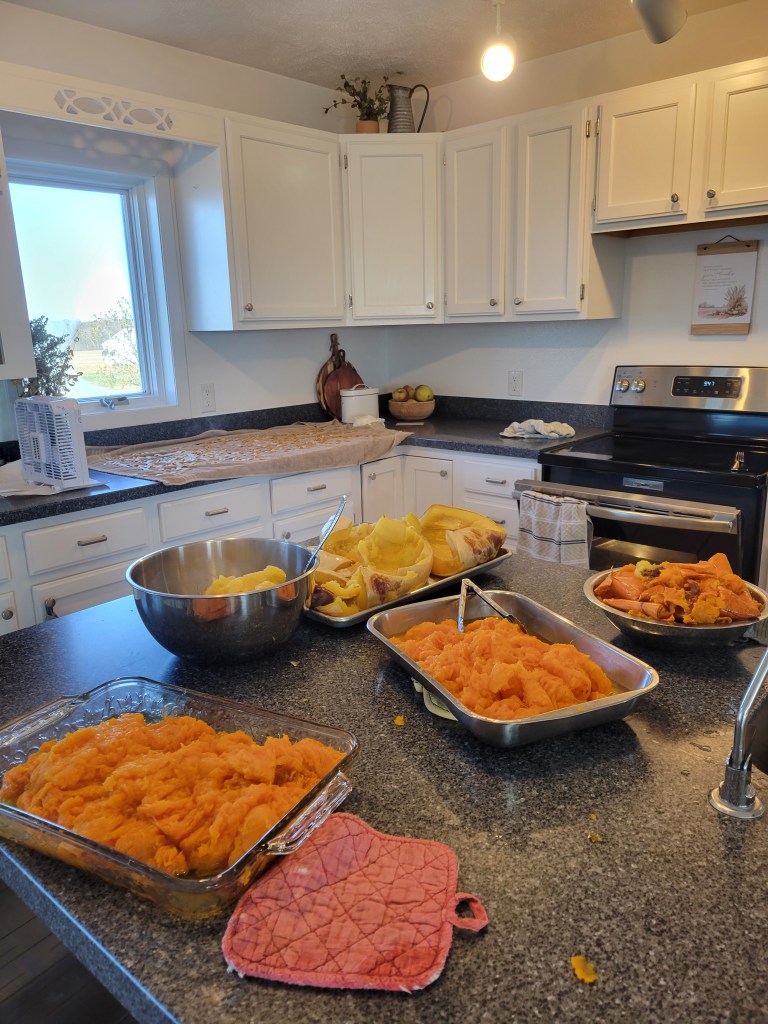
With the recent freezing temperatures, I brought in our butternut squash and pumpkins that we had for fall displays. I bit off more work than I expected when I started this project. The squash was minimal effort- the pumpkins a different story. I baked the squash and scooped out the meat. Reece and I have been eating it for lunch topped with butter, salt, and nutritional yeast. We deem it tasty and nutritious!

Butternut squash
Our fall display

I wanted to be this frugal, virtuous, homesteading sort of wife. So I thought I ought to save those pumpkins to can. After all, we had paid good money for them at the Pumpkin stand. (Honestly, if I was truly homesteadish and frugal, the pumpkins would have been homegrown.) But if I could can them, it would help combat the cost.  I had two hefty ones that I cut in halves and baked. Three of the pumpkins were the kind without much flesh; I was awfully grateful I didn’t need to process all 5!

I rose up early, while it was yet night (dark) and prepared meat for my household.

I placed pumpkin halves on cookie sheets and added water, not realizing how much liquid they make as they bake.  And did I have a mess! Two of the cookie sheets were just at the brim of overflowing when I caught it. So imagine trying to dip out or dump water off a cookie sheet with hot temperatures all around, without creating a flood in the bottom of the oven or scalding my hands in the process! I had both ovens going and had the privilege of cleaning them both too! Scooping out the flesh was easy. But then I had to put it all through the blender and fill jars.  Out of those two pumpkins, I got only 14 pints.

But the labor was not over. The dishes kept cropping up as if thrilled to be adding to the workload. The pumpkin skins had to be taken out to the pigs and chickens to keep up with this homesteading life. My son and I traipsed down together laden with slop. Ah, but the animals were so grateful! And I was glad to contribute to their joy, for it could not be anything but dismal to be an animal out in an old cold barn. At least we got fresh air and a bit of exercise to benefit us.  But now on to the next step.

Homesteading?! Those seeds ought to be drying out in the sun and fresh air!

I rinsed the seeds to save for roasting. I read how they must be thoroughly dry or they won’t crisp up well.  So I spread them on a towel and ran a fan over them for an hour or two. Finally, I divided them in bowls and made 3 different flavors. They crisped up pretty well and they look great stored in glass jars on the counter. But. I’m sorry to say, they have more to their looks than their taste. Actually, two of the flavors are pretty good. Perhaps it’s more the way they gum up in your mouth. We find ourselves chewing them, and depending who the chewer is, we have the need to spit them back out, which is not frugal at all!

I really ought to sell these seeds to help pay for my efforts. Anybody interested? 

And would you like to know how beat out I was, when my husband comes along and asks me what the price is of a can of store bought pumpkin?!! He quickly did the math and obviously, my ambitions completely missed it when it came to being frugal! A dollar and twenty-two cents for a 15 oz. generic brand of pumpkin is not unreasonable. My precious, home canned pints of pumpkin came to about 3 or 4 dollars a jar! And to think of all the time and energy I put into my attempts at being frugal! There may be more reasons I don’t can all kinds of food. But I’m hoping my hard, honest toil would allow me to be ranked among the virtuous.

As I took the jars out of the oven, I said to myself, “this would be the last straw if they wouldn’t seal!” But thank God, they innocently sealed, knowing nothing about the hard work they cost me.

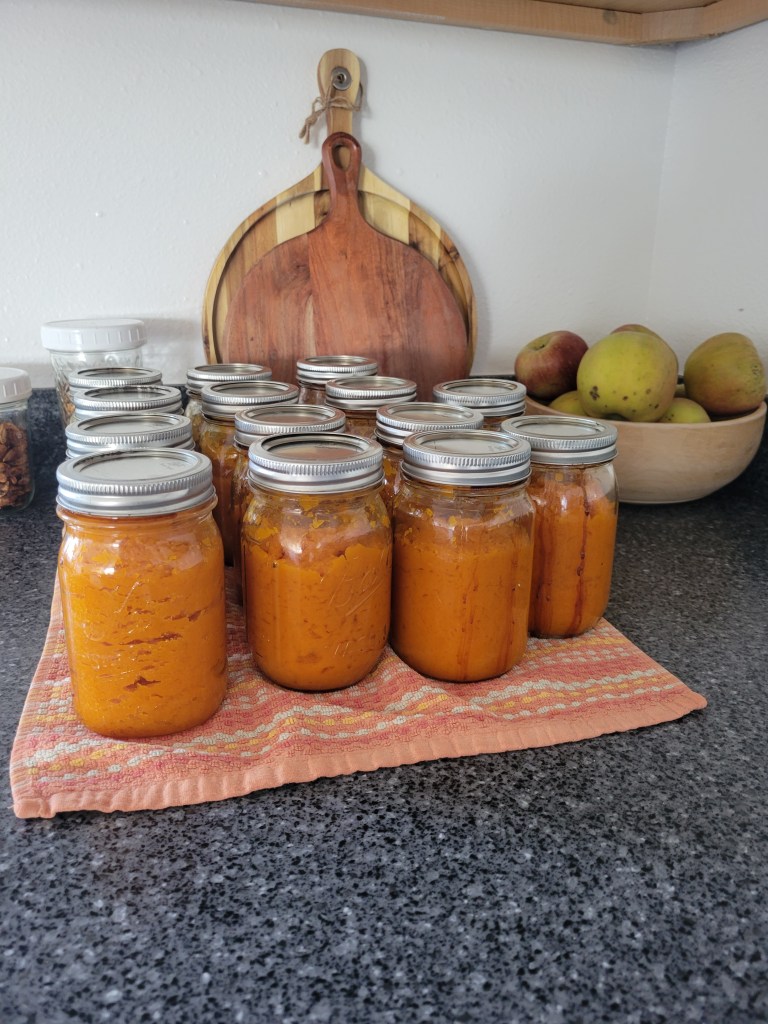
If you’re interested in the canning process, here it is:  Simply fill your pints, wipe the rim, and add lids and rings. Place jars on bread/cookie racks on top of your oven rack. (This adds stability to the jars) Turn oven to 250*. Bake for 4 hours.  Turn oven off and let set until cooled- at least 10-11 hours. I got mine started around 4:30 pm and turned it off at 8:30. The next morning, I got them out around 7.

My pressure canner sits neglected on the shelf since I’ve learned the ease of oven canning.

Pack It Healthy

Here we are, already well into the month of September! With it comes the arrival of school and lunch boxes. What you pack, impacts your child’s brain and health. And what a job it is to pack nutrition instead of prepackaged foods! It definitely takes intentionality and a good deal of preparation.

I want to share some ideas and recipes to inspire those lunch boxes. Some of these ideas will not likely be new, but maybe it can be a twist of inspiration one way or another.

Be Organized

Here is how I feel most prepared for the daily packing:  I keep my freezer compartment of the fridge well stocked with healthy baked goods/protein bars/leftovers/homemade pizza or pizza cups etc. I like keeping a variety of cookies and bars pre-bagged and ready to grab. I then slide all these into a gallon ziploc bag. Some days I’m also packing for Jerald and am always grateful for my supply stash.

I keep a clear organizer on a low shelf in my fridge, stocked with fresh fruit. Often things like apples, grapes, small oranges and the like. Another clear organizer holds cheese and cheese sticks. This makes for easy access for snacks or lunch packing, plus, the children can help themselves.  I’d much rather they see fruit, cheese sticks or yogurt cups when they need snacks than going to the pantry looking for snacky things! Not that I keep many snacky things around, but even healthy cookies don’t need to be the first option when they’re hungry!

A couple years ago, I took out 2 of my fridge drawers and use the lower shelves for my Tupperware Fridge Smart containers and the fruit/cheese organizer bins. I like this so much better than drawers! I like the easy access for already washed veggies options. Pepper or cucumber slices, cherry tomatoes or carrot sticks are the most frequent vegetables I pack. Sometimes I’ll do celery with peanut butter. Or for a different twist, fill celery with cream cheese and sprinkle with Nutritional yeast. I happen to like the last option better than my daughter. 😉

Most times I pack leftovers for Josie’s main dish, which they heat in the oven at school. (I don’t advocate microwave use) I also do this for the days I pack Jerald’s lunch. I find this much more simple and healthy than constantly packing sandwiches. I rarely have boughten deli meats on hand, simply because they are not good for you! They are filled with nitrates, flavorings, or other carcinogens.

6 Lunchbox Recipes

Ham or Egg Salad

We are blessed to raise our own organic hogs. A local friend from church butchers them for us and we get lunch meat ham from that.  Totally cured but without those harmful additives! What I most often make with that ham instead of a plain sandwich, is ham salad. I dice the ham very small, add homemade mayonnaise and presto- delicious ham salad!  Josie loves this with crackers. Sometimes I also make egg or chicken salad. Same idea- shred the cooked chicken or boiled eggs, add mayonnaise and salt. Super simple! Occasionally she eats these ‘salads’ on sourdough bread instead of crackers. When I have no leftovers or nothing else around, I resort to a peanut butter and jelly sandwich which she enjoys, but I don’t like to do it often. 

Ham salad

Homemade Mayonnaise

This takes so little time and is so much better for you than the store bought stuff!

In a wide mouth quart jar, break 2 room temperature eggs (I often set the eggs in a bowl of hot water for a few minutes.  This helps them dissolve into the oil better)

Add: 2 teaspoons white vinegar, 1 teaspoon lemon juice,  1 teaspoon salt,  ¹/² teaspoon mustard and 2 cups oil. Avocado oil makes the best but since it’s s so pricey, I sometimes use a mix of avocado and olive oil. Using only olive oil makes for a really strong tasting flavor, which I don’t care for. I use an immersion blender until it’s well combined and emulsified. Throw on a lid, add the date and refrigerate. Remember, this has no preservatives. But that’s OK! This is real, unprocessed food! Using fresh eggs will help it to last longer. 

You can also make this in a regular blender. Just blend everything else while drizzling in the oil.  I hate the greasy mess to clean up though. Absolutely recommend the immersion blender!

Pizza Cups

Use your choice of biscuits, bisquick mix or homemade dough. Press into well greased muffin tins. (I make a gluten free version for my crust.)

Fry 1 lb. Sausage. Drain and cool, then stir in 1 pint pizza sauce and 1 cup shredded cheese.  Fill dough lined muffins.  Bake at 350* for about 20 minutes or until crust is baked.  This amount of meat mixture makes 2 dozen pizza cups. These are delicious and freeze well! My family loves them.

In this picture I had forgotten to stir in the cheese. But I hate how the cheese sticks to the pan when I sprinkle it on top! So I’ve discovered it works much better to stir it into the meat mixture.

Oatmeal Chocolate Chip Cookies

Beat together: 1 C. peanut butter, 1/2 C maple syrup or honey,  1 Tablespoon vanilla. Then add: 1 C. oatmeal, 2 eggs, 1/2 teaspoon baking powder. Beat well.  Very last stir in 3/4 c. chocolate chips.  Drop on greased or lined baking sheet. Bake at 350* for 10 minutes.  Super delicious and easy!

Chocolate Protein bars

Melt together:  1 C. Peanut butter, 1/2 C. Coconut oil, 1 C. maple syrup, 2 Tablespoons vanilla. Whisk to combine.

Remove from heat and stir in 1 ¹/² C. collagen powder and ¹/² C. Cocoa powder. Whisk to dissolve. Pour over 8 C. Rice Krispies. Stir well. Press into a large cookie sheet lined with parchment paper. Set in freezer to chill. Cut into bars and keep refrigerated or frozen.

  My family loves these bars! Credit to my friend Valerie for giving me the idea to swap out protein powder in the original recipe, for collagen. I have learned some things about protein powder that make me skeptical about using it.

Protein Finger Jello

In a saucepan, pour in 2 C. 100% Juice. (We love grape sweetened with stevia) Sprinkle 4 Tablespoons beef gelatin (grass-fed pasture raised) over the juice and let bloom for about 5 minutes.  Whisk, and heat on medium until completely dissolved. Stir in 1/4 teaspoon salt and 1/2 C. Heavy whipping creme. Remove from heat and Whisk well.  Pour into lightly greased medium sized glass dish.  Set in fridge to chill until set, then cut into squares.

Healthy finger jello without loads of sugar and food coloring. Plus, it’s got a protein punch! It’s a win-win!

Additional Lunch Ideas

If you buy bushels of peaches to freeze, reserve some to fill small disposable cups with lids, for a handy lunch option. I like the ones from Walmart. You can find them in the aisle of disposable tableware. 

Or make a large batch fruit slush and do the same thing.  I’ve done both of these, plus last year I froze applesauce in these cups for another option. But so often, the slush or peaches came home again simply because Josie was tired of it. So this year I decided I’m not going to bother with doing that.

A side note on a delicious way to freeze peaches with out sugar is this. Use straight orange juice concentrate to stir over the peaches. I use 1 12 oz. concentrate to about 10-11 quarts peaches. The orange juice keeps the peaches from turning brown.  When I pull a pint out of the freezer, I sprinkle with stevia to taste. 

Yogurt is often a lunch option, but don’t be fooled thinking all yogurt is healthy. It can be, but you must be careful when purchasing yogurt or you will easily be consuming way too much sugar and/or food colorings, carrageenan, aspartame or sucralose. I usually buy a plain yogurt with a very low sugar content, then I sweeten it with stevia. Oikos and Chobani are good brands of Greek yogurt with a better ingredient list. But I still recommend checking the label, because it will vary depending on flavors or some contain a topping of sorts that may not be of the best ingredients. There’s been many times I have stood at the yogurt cooler studying ingredients, puffing with disgust! Of course, making your own homemade yogurt would be a great option too!

Another delicious recipe are these peanut butter banana muffins! I often make a double batch and fill a large cookie sheet instead of muffins. I like efficiency!

I’m sure there are more good ideas out there! Tell me what your healthy favorites are.

Pack to impact your family’s health!🍎

Seven Summer Recipes

It’s Summertime, folks! Regardless if the calendar hasn’t said so officially, it’s Summertime in our corner of the fields. I think June is one of the most beautiful months of the year! Trees are fully leafed and all nature has that lush, green look. Temperatures are moderate without the oppresive heat of late summer. Flower and vegetable rows stand stately- amidst freshly weeded or mulched pathways. Gardeners’ ambitions have not yet waned. All is fresh with new life and courage.

I want to show you a picture of our garden while it looks virtuous, because it will not look like this in August. As of now, I find it pleasant to gaze in it’s direction. The only exception is the unfinished mulching spots. I dislike those uneven surroundings.

You must remember though, it’s the man around here who loves to garden. Which undoubtedly makes me a stale, pallid housewife. Hey, I helped with part of the mulching when I mowed last week, can I get a mite of credit for that?!

Excuse me, I really got off on a bunny trail there. Bunnies like to hop around the garden if they get a chance and I obviously got sucked into their tracks. What I’m really here to talk about is recipes. Here are a few of our favorites for you to try this Summer. ⬇️

1. Chocolate Pecan Ice Cream Topping

2 sticks butter, 2 cups chopped pecans, 2 cups chocolate chips.

Melt butter, then stir in pecans. After they’ve browned a bit, remove pan from heat and stir in chocolate chips. Stir well until fully melted.

It works well to serve this topping in a small crockpot, because it must be kept warm to serve. It hardens over ice cream in a most delectable manner.

Back when I was a girl, we served this Chocolate Pecan topping at the Old Cookstove restaurant over homemade ice cream.  It was and continues to be a favorite there.  If you ever happen through northern Alabama on I-65, you really ought to swing into Danville, to try their good old southern, home cookin’! My Ma and Pa started this restaurant. It’s changed hands by now but it’s still the best eatin’ in town!

2. Peanut Butter Ice Cream Topping

Melt together 1 cup peanut butter and 1/2 cup butter. It’s as simple as that! Serve over a bowl of Schwan’s vanilla ice cream and don’t think about calories!

This too should be kept warm for serving. Or then reheated before serving.

3. Oven Fried Potatoes

I often make these with a grilled meat supper. A quick, easy but delicious way to fix potatoes.

6 large potatoes, diced into bite size. Drizzle with 1/2 cup melted butter.

In a small bowl mix together:

  1/4 cup Parmesan cheese,  1/2 cup flour,  1 ¹/² tsp. Salt,  1 tsp. Seasoning salt,  1/2 tsp. Garlic powder,  1 tsp. Paprika.

Pour this over the buttered potatoes and stir to coat. Spread on a baking sheet. Bake at 400* for 30-40 minutes. Stir once during that time to help them crisp evenly.

Typically I use sorghum flour in this recipe to avoid the gluten. I think most GF flours could be used successfully, except I wouldn’t recommend coconut flour.

4. Mandarin Orange Pie

This would be a taste of Summer in one bite- We absolutely love this pie! You can find this luscious recipe in a previous post On Eating Out And Pie

5. Healthy Fruit Popsicles

I cannot approve of my children sucking on those plastic, store bought tubes of popsicles with ingredients that are 100% horrible. I shudder when I think of the consumption of sugar and food coloring!

But I don’t mind my children eating these homemade popsicles frequently. They are free of food coloring and have only natural sugar. (this will vary depending on the yogurt you use. I use an unsweetened, plain yogurt.) These could even be  approved for breakfast because they’re really only yogurt and fruit. A popsicle for breakfast? What kind of Mom am I?!

2 to 2 ¹/² cups fruit- fresh or frozen, 3/4 cup yogurt/ liquid, 1/2 tsp. lemon juice, stevia or honey/maple syrup to taste

Blend fruit until pureed.  Add remaining ingredients and blend again. Pour into molds and freeze. 

  I used pints of my frozen strawberries/ peaches for the fruit and it worked great. I thawed them partially first, so they would blend better. 

6. Blueberry Lemonade

Bring to boil 1 cup blueberries and 1 cup of water. Boil for 810 minutes. Strain, and add to 1 gallon of your favorite fresh lemonade.

I love the beautiful summery look of this lemonade. It’s extra delicious when I muse on the fact that it’s naturally colored!

7. And here’s my last one- a recipe for happy summer days. Barefoot little boy + puppy + wagon+ sunshine + green grass. 🌳🐶

Avocado Happy

I’m sorry if you don’t like avocados because avocados are little bundles of healthy happiness! If you’ve not aquired a taste for them, it may be that your taste buds simply need adjustment. Give it a fair try. Get over their texture and color and keep trying until your taste buds say “more please!”

Avocados are nutritious gems! Full of healthy fats, vitamin C, vitamin E, magnesium, potassium, B6, folate and more. A single avocado has 975 milligrams of potassium while a banana, which is well known for its potassium, only delivers 487 milligrams per large fruit.

I would love to taste avocados grown in their native country- I’ve heard they surpass anything we buy in the grocery store. Avocados are nutritious for the whole family including your 6+ month old who’s beginning to eat table foods. A much more nutritious choice than the typical applesauce and yogurt for sure!

So if your trying out avocados for the first time, make sure they’re in the perfect stage of ripening. Press on the shell. If they feel soft enough to press into the flesh, they’re ripe. If they feel like mush, they’re past prime and will be brown and yucky looking inside. If they’re hard with no budging to your squeeze, they need more time to ripen. You’ll need patience because they’re ain’t no good way to speed up the process. I’ve laid them in the sun or on a heat register with some sucess, but nothing instant. I store my avocados in a basket along with bananas to help ripen them. Thanks to Google, I once tried baking avocados wrapped in foil, to ripen them. The result was a total fiasco! They got softer but tasted horrible! Please learn from my mistake. Actually, you should probably blame Google instead of me.

If your hesitant to try avocodos, I recommend sprinkling a few slices with plenty of salt, and eat alongside soft eggs for a trial test.

🥑 Here’s how you eat this delightful green fruit. (Yes, they are a fruit! Not a vegetable. Although I wouldn’t recommend adding them to your fruit salad!)

Toss them on top of salads. Sprinkle on top of Mexican foods or soup. Eat with rice and beans. Make guacamole. Slice and eat them plain sprinkled with salt and a squeeze of lemon juice. Put a few slices on a sandwich. Make Avocado toast. Basically, eat avocados anyway you choose. It will fill the day and your belly with happiness. 🥑

Here’s how you make Avocado Toast:

Toast a piece of sourdough bread. It doesn’t have to be sourdough but I’m awfully partial to it. It’s super crunchy, chewy and drool worthy. In a small bowl, smash the avocado and sprinkle liberally with salt and Nutritional Yeast. (I prefer Redmond Real salt for health benefits.) Spread on toast and sprinkle with more Nutritional yeast and Parmesan cheese. Bow your head and thank God for a delightful breakfast, then chow in. I can hardly eat this without moaning around! 🤤

You could scoop them out and slice them in an artful arrangement on the toast but I choose to simply squeeze them out and smash for efficiency.

This is my favorite breakfast on the market. I started eating this a year ago and haven’t got tired of it. Ok, so I don’t eat it every single morning because it takes skill to keep avocados in my pantry at just the perfect stage of ripening- not too hard and not too ripe. Either way is disgusting. But the perfect blend of ripening is superb! I often buy one bag avocodos with a couple soft ones and a second bag on the hard side, to further ripen. And oh how we miss those green gems when we’re out of stock!

My children did not like avocodo toast at first. They saw me eating it faithfully and eventually asked for bites. And more bites. Until I was making whole pieces for each of them. And now it’s everyone’s favorite around here. They also now love avocados served in any form. Taste buds really can change, so don’t give up after the initial trial!

Sometimes we top our avocodo toast with a soft egg, which is super tasty as well. But even without an egg, the combination of avocodo, sourdough, and the vitamins in the Nutritional yeast, makes a super filling and healthy breakfast. I’m not pining to eat a snack at 10 AM because this keeps me full a long time.

In case you’re not familiar with Nutritional yeast: These golden flakes have a cheesy, nutty type of flavor. Rich in nutrients they’re a good source of some trace minerals, B vitamins including B 12, fiber and antioxidants. It contains all nine essentials amino acids, making it a complete protein. I buy mine at our local bulk food store but most health food stores would carry it as well. We also sprinkle this on eggs or popcorn along with salt.

Nutritional yeast flakes

Guest Post- The Magic Of Sourdough

This post is written by my friend Valerie Miller. We’ve been besties for years and both find healthy living intriguing and necessary. Though miles apart, we still often chat a couple times a week.  A year ago she graciously sent me sourdough starter by mail. Since then my family and I happily devour sourdough bread on a regular basis. If you’ve not yet given it a try, there’s no better time than now to delight your taste buds and digestive system!

Sourdough: the rage in many a kitchen across the world. Although sourdough is a hot topic, and a popular trend these days, it’s a trend I’m very happy to subscribe to, so much so that my sourdough starter has taken the status of a pet, and making yummy, nourishing sourdough goodies has become a hobby.

Bread is Biblical!

Its interesting to take note of the way bread was a staple, and necessary for physical survival in Bible times. Of course, most special of all is the fact that Jesus proclaims himself as the Bread of Life, in a spiritual sense.  Sourdough is believed to originate in ancient Egypt and remained the main method of leavening bread until bakers yeast replaced it a couple hundred years ago. In recent years, bread has become a villain because so many people have difficulty digesting it. And rightfully so. The bread you find on the grocery store shelf has been made with less than stellar grains, added preservatives, artificial flavors, and synthetic vitamins!

3 Simple Ingredients!

Sourdough bread can be made with 3 simple ingredients: flour, salt, and water. How incredible! I’d love to meet the person who discovered the magic of sourdough! 
Sourdough starter contains a mixture of lactic acid and wild yeast. During the fermentation process, these beneficial bacteria partially break down and “predigest” the starch and gluten proteins found in grains. Sourdough is not gluten free, but because of this process that has taken place, many people with a gluten sensitivity can enjoy sourdough bread. This process also puts sourdough bread lower on the glycemic index. In other words, it doesn’t spike your blood sugar like yeast bread does.

Baking with sourdough isn’t hard!

I’ll admit, I was intimidated by it at first. I thought it was a finicky thing that would produce only nice bread for the professionals. And I’m not a professional, so I anticipated ugly, flat bread! It’s true that I’ve had my share of flops, but those aren’t the norm. And flops are the perfect opportunity for the yummiest French toast!

Get a starter from a friend.

You can also make your own starter, but its much easier to start out with an established starter. To feed your starter, you will want to feed with equal amounts of starter to flour and a little less water. It’s important to use unbleached flour, and non chlorinated water to feed your starter. My favorite flour to use  is King Arthur bread flour. It yields a robust, bubbly starter. Starter stored on the counter at room temperature needs to be fed once a day to keep it alive. Here’s the good part (and what I do): you can store your starter in the fridge if you’d like, and feed it only once a week. When you’re ready to use your starter for baking, take it out of the fridge, feed it, and after several hours, it’ll be ready to use. 
Before attempting to make bread, you’ll want to take note of how active and mature your starter is. A good rule of thumb is that it must double in 5 hours to be strong enough for a good rise in bread. The day before making your bread, feed it 3 times, morning, noon, and evening. It will be ready to go the next morning. For the recipe below, I start out with ¼ cup starter, feed it ¼ cup flour, and a little water. By noon, I have a ½ cup of starter to feed with ½ cup flour, and water. Before bedtime, its grown to 1 C, which I feed 1 cup flour, and water. The next morning you’ll have 2 cups starter, the perfect amount for your bread! (Be sure to save out a tablespoon or 2 of starter to set back and feed for the next time!)

Sourdough Sandwich Bread


2 C fed sourdough starter
1 ½ C water
2 T honey
2 T melted butter, or oil
Mix all together in your mixer bowl. 
Add: 
5 Cups bread flour
Mix for 3-4 minutes
Turn the mixer off and let the dough rest for 20 minutes.
Add 2 ½ tsp salt, and mix/kneed for 10 minutes
Remove the dough from the mixer, put it into a dish, and cover with a lid or plastic wrap. Let it rise till double, approximately 3 hours. Punch the dough down, divide and shape into 2 loaves. Put the dough into well-greased bread pans, prick with a fork, cover with plastic wrap, and let it rise till double. (Approximately 3 hours)
Bake at 375 for 35 minutes. Butter the tops and let the loaves rest in the pans till partially cool. This will help keep the loaves soft and prevent the bottom from getting crusty.

Sourdough pancakes


2 C fed sourdough starter
2 eggs
1/4 C melted butter
1 tsp baking powder
1/2 tsp baking soda
1/2 tsp salt
Mix the starter, eggs,butter and salt. Add the baking powder and soda and mix just until incorporated. Fry pancakes in lots of butter!


If you’re interested in making artisan sourdough bread, this is my favorite recipe. I do prefer a different baking time, 30 minutes covered and 5 minutes uncovered.
https://littlespoonfarm.com/sourdough-country-loaf-recipe/

I enjoy selling sourdough goodies at a local Farmer’s Market

I’m Valerie Miller, wife of David and mama to Austin, Felicity, and Eric. We reside in Athens, TN. As a busy mom, with a side of homeschooling, I don’t find much time for hobbies these days. Healthy living/eating, of which sourdough is a large part, has become my “hobby”, and it’s so satisfying to know I’m fueling my family with nourishing food! You can contact me at fivesouthernmillers@gmail.com

Gardens And Greenbeans

Mary Mary quite contrary, how does your garden grow?

Well, the picture  shows the answer for ours. There’s little produce found amidst the weeds. Jerald is the gardener around here and I help him sometimes with mulching or such. But this year something went koo koo to a greater extent than normal.  It’s an overall flop of about 90%. I wouldn’t be suprised at all if this was the norm if the garden was my responsibility. (Actually, there wouldn’t be a garden if I had to do it- I’d patronize Farmers Markets.) Because of bad experiences like this year, gardens depress me. And some people say gardens are therapy?! Life. Growth. They feel so close to nature.  I see weeds, bugs, probable death of plants and imaginative snakes. I feel close to dirt.  Occasionally there’s actual food to eat.

The poor green beans produced a couple pans of beans instead of buckets like usual. We ate corn once and decided we can buy corn on the cob that’s much better, so we never tried it again.  The cucumbers gave a measly crop of 3 or 4 tiny ones that were actually eatable. The melons look promising but the coons have been feasting on them well before their time, so we have yet to see if we’ll get to enjoy any.  The tomatoes finally started ripening last week.  (Way behind times I know, but I’m just grateful to even be getting any!) But that could change too.  It’s either feast or famine on zucchini and this year we hit famine. Not only did the zucchini perish but the summer squash died right along with it. I’m holding my breath for this volunteer summer squash at the edge of the garden. Don’t ask me how it got there.  Just maybe I’ll get a few to eat fresh?! That off colored leaf there worries me.

As far as I know we have a good crop of potatoes because we haven’t dug them yet.  The sweet potatoes look green and viney so I have my hopes up about them too.

If you have a good crop of green beans and want a slick way to can them, try out oven canning! Here’s how I did mine last summer.

Fill quart jars with your clean and snapped beans. Add: 1 teaspoon salt and 1 Tablespoon lemon juice. Bottled is fine.  Fill about half full with water, wipe rims and screw on lids and rings.

Place cookie or bread racks in the oven on top of your oven racks. This gives stability to the jars. Do not place jars on a baking sheet! The jars will need even heat circulating  throughout. 

Fill your oven with jars. Turn to 270*. Begin timing after oven has preheated. Bake for 3 hours. Turn oven off and let the jars inside until they’re mostly cooled. I like to do it in the evening then I can turn the oven off at bedtime and by morning the jars are cool enough to remove. (They may still be warm but will be sealed)

This method can be used for pints but reduce the baking time to 2 ¹/² hours.

I love the simplicity of oven canning!  No need to run that pressure cooker all day long,  getting only 7 quarts canned at a time. You can chuck your oven full of jars and have them all done in one whack! And no pressure to keep you on edge either!

For more oven canning recipes read here.

May you feel blessed that your garden is hardly as bad as mine and if it is, know your not alone! 

I’m not a gardener, so my  flowers should be admired. Only one germanium has died so far! 😜 And we love our front porch at day’s end.

On a different note, I will be taking a break from writing for some time.  Because of my mental health the last two months, we are trying to cut out any possible stress factors. I enjoy writing and don’t like to count it as a stressor, but my hubby thinks otherwise.

I do have a guest post coming in the next month, so will still be posting that. 

Thank you for reading and understanding!

It’s Snack Season

It’s getting that time of year when those yummy snacks and accessories of sweets begin to magically appear. Well, not quite magically but they do appear! Much as I love those party snacks, cookies, and candies, my body does not agree with me on the subject. So I’ve become a minimalist when it comes to Holiday goodies. Plus, I don’t get led into temptation when I don’t make the unhealthy goodies in the first place! But I do know how fun it is to spend time making treats that are holiday exclusives, and I’m not scolding anyone for doing that! 😁

I have fond memories of growing up, making Christmas candy on winter evenings. My older sister cooked up a batch of caramel candy while Mom made a grande size batch of buckeyes. Then we’d melt chocolate and everyone could help dip them. To this day, buckeyes are the one Christmas candy I always melt over. The peanut butter and chocolate sweetness speaks Christmastime to me!! And oh the days before I needed to concern myself on the complex health subject!

I still enjoy making special treats if they are “healthified” in some way. Some goodies might not be totally healthy but healthier would be the key!

One dreary evening this Fall, I enjoyed making a batch of this tasty popcorn and seeing my children’s delight. It’s still sweet but does not have that notorious corn syrup! I host a substantial grudge against it and all things containing it or high fructose corn syrup! There have been many times I check an ingredient list in the store to find that sneaky item hidden there…..and I huff and I puff about that stuff! Its plopped back on the shelf and I depart the aisle muttering. I wish the company that made it could see the scenario. And if you are like me and do the same thing, perhaps we could get the point across; We hate high fructose corn syrup and refuse to buy your products if it’s in there! Ok. Honest confession. I have bought things with it in or even corn syrup itself- horrors! but it’s far from being welcome and used much in my house! End of sticky subject. Now on to the popcorn!

Homemade Caramel Popcorn

Melt together 1 cup butter, 1 cup coconut sugar, and 1/2 cup honey. Bring to boil and boil for about 4 minutes, stirring now and then.

Remove from heat and add in:

1/2 teaspoon baking soda, 1 teaspoon vanilla, 1/4 teaspoon cream of tarter. Mix well and pour over 6-7 quarts of popped corn. (I used ladyfinger popcorn because it was the only I had on hand but I’d recommend using large kernels) Once well coated, spread on cookie sheets and bake at 225* for approximately 30 minutes. Stir once in between. As it cools on the counter it will become even more crunchy. Store in airtight container.

Party mixes always flock the holiday gatherings but I feel so bloated and trashy after eating it. There’s the high gluten content besides all the preservatives/additives. So here’s a suggestion for a healthier alternative.

Holiday Trail Mix

Mix together your choice of a variety of nuts. I would go light on the peanuts or omit completely. They can quickly flavor everything else. Add in craisins and a bag of sugar free or dark chocolate chips. This looks festive with the nuts and craisins. Chocolate chips, craisins and nuts are a perfect blend of sweet and salty. (You really do not need M&Ms in trail mix for it to be yummy- who wants all that food coloring and extra sugar anyway?!)

Store your “holiday mix” in a big glass jar on the counter and enjoy! I would still recommend not over indulging because nuts are a heavy food and harder to digest. But they still have health benefits that outweigh the usual mix of crackers, pretzels, cheesies and cereals.

Here’s one more recipe that is in fact, quite healthy! It’s a delicious way to get that good-for-you coconut oil in your body! They are rich.

Healthy Peppermints

3/4 cup virgin (unrefined) coconut oil, room temperature. Whisk until its fluffy. Add in: 1/2 teaspoon stevia- I used E.N.D stevia) and approximately 20 drops Peppermint essential oil or more to suit your taste- I used DoTERRA) Whisk everything till creamy. Use a teaspoon and drop into paper lined mini muffin pan. Chill until hardened.

Melt 1 cup sugar free or dark chocolate chips. Drop spoonfuls of chocolate on top of coconut oil mixture. Chill again until chocolate is firm. Makes 1 dozen. These should be stored in the refrigerator or in a very cool place.

I’d love to know- what are your healthier holiday snacks?

3 Summer Refreshers

The hot, hazy, lazy Summer days have come. Well, the hot and hazy but not the lazy! You have to pretty much set aside time to be lazy if you want any part of laziness. We all need times to slow down and watch the world go by…..we certainly don’t want Summer to slip by unnoticed! How bout some slushies or lemonade to drink for that moment of laziness we all need now and then?

1. Watermelon Slushie

Put in blender:

3 c. chilled watermelon, 1/2 of a fresh lemon (juiced), a handful ice cubes, and a sprinkle stevia. Blend well. Pour in a glass jar, sit outside and revel in Summer! Your taste buds will be thrilled. Your children too. They will come running at the noise of the blender and clinking of ice, clamoring for some before they even know what your making. You hand out cups and soon there’ll be sticky, red splotches across the floor, before they ever make it outside. But that’s life in Summer! And oh the blessings of barefoot days!

2. Watermelon Popsicles

You can also pour this into popsicle molds, although the water in it separates a little. Your children may think these are twice as nice as the slushie!

3. Fresh Lemonade

3 – 4 fresh lemons, juiced. Water and ice to make a gallon, 1 teaspoon stevia glycerite, 1/2 teaspoon E.N.D. stevia. Stir well and slice up one more lemon to drop into the glass pitcher of lemonade. This adds dimensions of beauty! I think this is really nice and sweet. You can always adjust to your likeness. I love that my children can drink up, yet aren’t guzzling down the sugar!

If you don’t care about sugar consumption and want a very easy peasy lemon squeezy of a drink, try this: 1 c. bottled lemon juice, 2 c. sugar, ice and water to make one gallon. This is very tasty and a real quicky if you need an instant drink!

🍋 🍉 If life hands you lemons, make lemonade. If life hands you melons, you may be dyslexic. 😜

It’s Strawberry Season!

Depending where you live, you may or may not be eating fresh strawberries. There are so many ways to enjoy those plump red berries! We all have our favorites and I’m here to tempt you with another one to add to your list! For sure if you’ve got fresh lettuce or spinach growing in your garden and fresh strawberries!! Besides being delicious, this salad is lovely to behold!

Strawberry Spinach Tossed Salad

1 10 oz. bag fresh spinach, chopped. Or, you can do a mix of lettuce and spinach or other greens.

1 1/2 c. fresh strawberries, sliced

3/4 c. pecans

1 1/2 T. butter

1 t. sugar and a sprinkle of salt

3 oz. feta cheese

Toast the pecans in skillet with butter. Remove from heat, add sugar and salt; cool.

Dressing:

3/4 c. sugar

6 T. white vinegar

2 T. minced onion

1/2 t. poppy seeds

1/4 t. salt

1/2 t. soy sauce and 1/2 t. Worcestershire sauce

1/2 c. vegetable oil

Combine all ingredients, adding oil last. Mix well.

In a large bowl, mix the spinach, strawberries and pecans. Pour dressing over mixture and toss gently to coat. Sprinkle feta cheese over top. Used with permission from Stutzman’s Culinary Secrets.

We absolutely love this salad! It’s Jerald’s favorite for sure! Here’s a few notes on changes I make, for a healthier version:

I sprinkle my pecans with stevia instead of sugar. In the dressing, I’ll often substitute sweet mix or stevia for the sugar. I usually omit both soy and Worcestershire sauces, because they’re not the healthiest stuff around and I think it’s perfectly fine without! I like to use MCT oil instead of vegetable oil. I’ll often add extra strawberries or pecans to my likening.

How do you like to eat fresh strawberries?

Lemon Lover’s Luxury

Are you, like me, ready and waiting for warmth and sunshine?! It’s been a cool Spring in Nebraska and I’m anxiously awaiting Summer days to stay!

So here’s a recipe to bring sunshine to your face while you wait for sunshine outdoors! It’s a perfect addition to a Mother’s Day brunch or lunch! They look Springy or Summery; They fit the occasion no matter what. At least, that is, if you love lemon! And, oh yes! Do you like healthy?! Me too! And that’s what these are made of so get your oven on!

Luscious Lemon Bars

Crust:

1/4 c. butter, melted

1/4 c. honey

1/4 c. coconut flour

1 c. almond flour

Whisk this together and press into an 8×8 pan, lined with parchment or wax paper. Bake at 350* for 12-13 minutes. Just until very lightly browned.

Filling:

4 eggs

1/2 c. honey

1/2 teaspoon stevia powder

1/2 c. lemon juice- approximately 3 lemons, juiced.

3 Tablespoons tapioca flour

Whisk together eggs, honey, stevia and lemon juice. Last add the tapioca flour. Pour over the prebaked crust. Bake for 22 minutes. The center should not be jiggly when you shake the pan. Cool for about an hour and then move to the fridge to finish cooling for another hour or two.

When your ready to cut the bars, slice around the outside edges first, to loosen. Gently lift them from the pan with the wax paper. Then you can better peel the paper off and slice. If you can resist tasting immediately, they are beautiful dusted with powdered sugar! (Which isn’t so healthy but for looks it’s ok!) But they’re certainly delicious even without! If you have any left after tasting or serving, store the remaining bars in the fridge. These are so chill! I love how you can pick these up without them crumbling to bits!

I made this recipe several times critiquing it. Using fresh lemon juice is definitely most delicious! But I also tried bottled lemon juice with good success. I used the E.N.D. Stevia but I think another brand would work too, although you may need to experiment with the amount.

Jerald is not a lemon fan like me. Lemon bars aren’t his thing. But these! He admitted these “aren’t too bad”. Which actually means “they’re pretty good”. My man is not showy with words, so I’ve learned to interpret his, “not too bad” to mean delicious!